
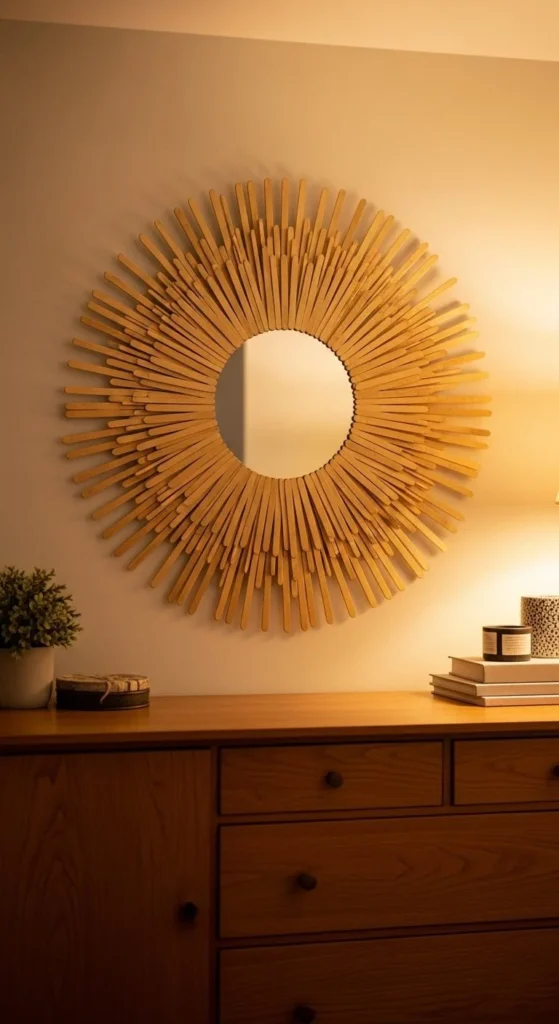
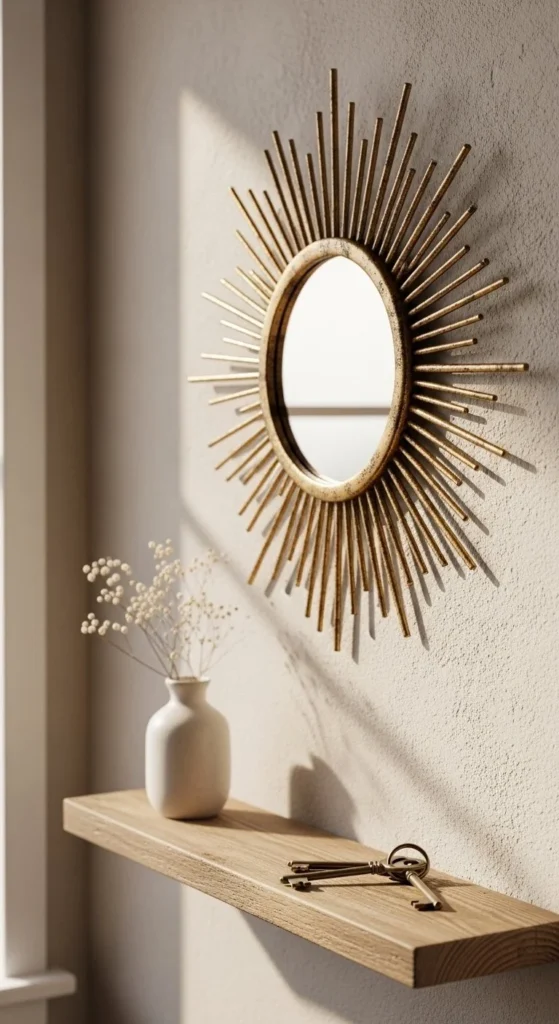
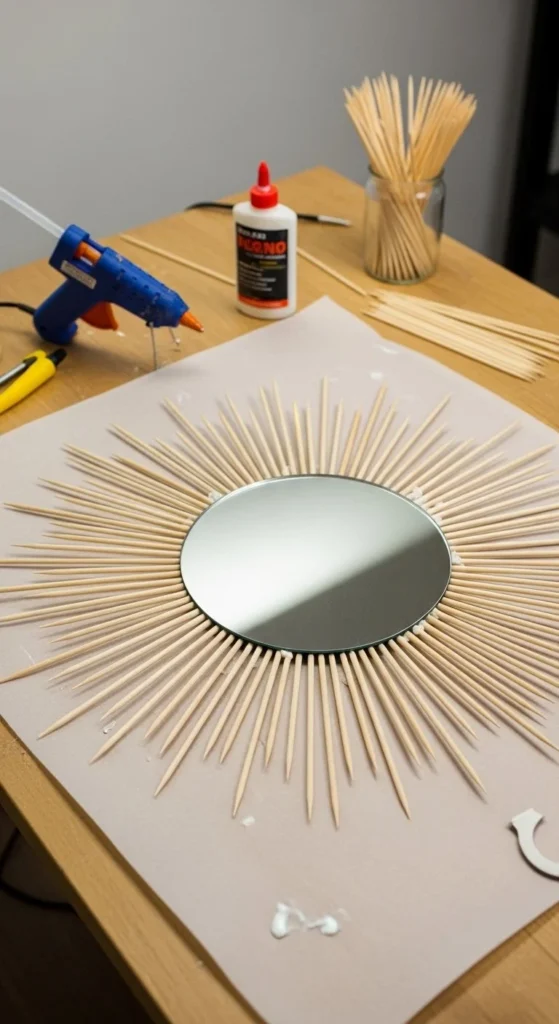
1. Classic Gold Skewer Sunburst
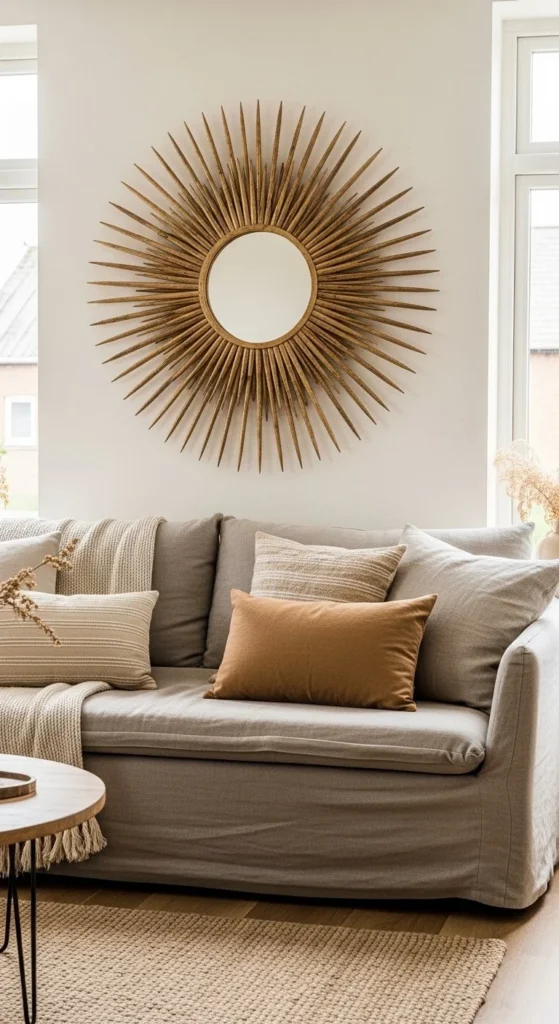
This is the most copied DIY sunburst style online. Wooden skewers keep the rays slim and graphic. Start with a small round mirror to avoid wall crowding. Measure the wall before committing. Many builds fail at that stage. Lay out twelve main spokes like a clock face. Fill gaps with shorter skewers for balance. Hot glue sets quickly, so test placement before pressing down. Wax paper underneath saves surfaces from glue drips. Once everything dries, sand the tips lightly. This removes sharp edges and helps paint look smoother. Spray paint in thin layers. Two coats give even coverage without clogging detail. Antique gold works well with neutral rooms, but champagne tones feel softer. This mirror works above sofas, dressers, or entry tables. Keep surrounding decor simple so the rays stay dominant.
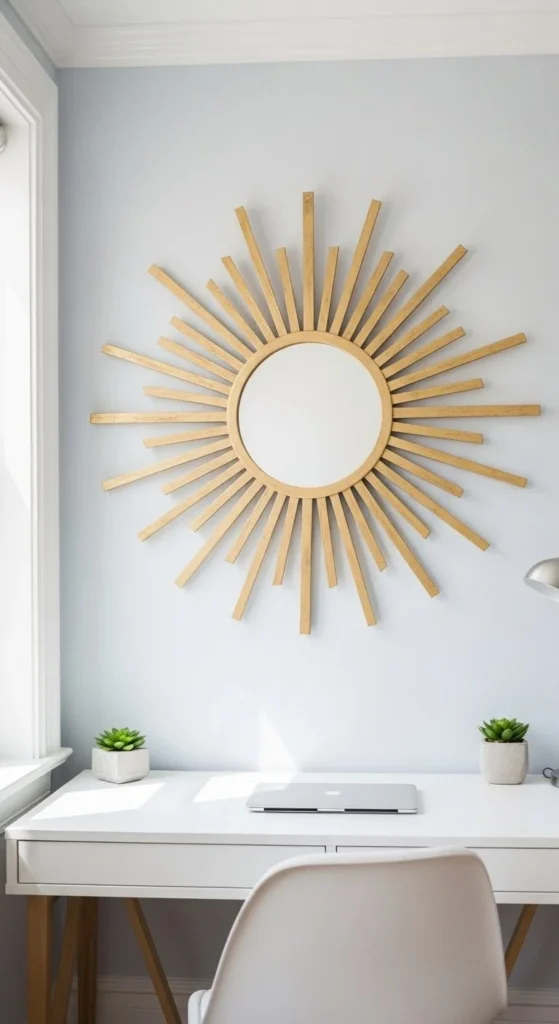
2. Beginner 5-Step Sunburst Mirror
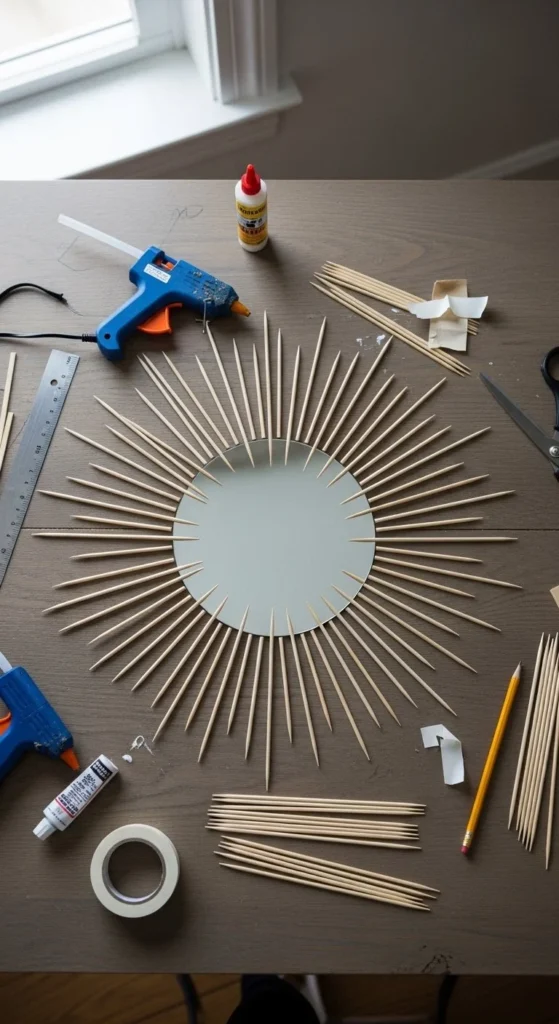
This version focuses on clarity rather than speed. Step one is measuring wall space. Step two is marking twelve positions around the mirror. Step three is gluing long spokes first. Step four adds filler rays. Step five finishes with sanding and paint. Clock-style layouts prevent uneven spacing, which frustrates beginners. Use a pencil to mark positions before gluing. Popsicle sticks or skewers both work here. Don’t rush the glue stage. Let sections dry before rotating the piece. Satin metallic paint hides flaws better than high gloss. This mirror fits offices, bedrooms, and hallways. Keeping the process structured makes the result look intentional, even if your cuts aren’t perfect.
3. Budget Under-$10 Dollar Store Sunburst
This project keeps costs low without sacrificing impact. Dollar mirrors, skewers, glue, and spray paint are enough. Many supplies are already at home. Keep the mirror center small to reduce weight. Use cardboard or foam board as backing. Lightweight builds hang more securely, especially in rentals. Lay out rays before gluing to check spacing. Spray paint outdoors or in ventilation. Thin coats prevent drips. This mirror works well in gallery walls or narrow entryways. Soft metallic shades feel calmer than bright gold. Even unfinished wood sealed with clear spray can work. This is a strong first project for anyone testing DIY decor for the first time.
4. Embroidery Hoop Framed Sunburst
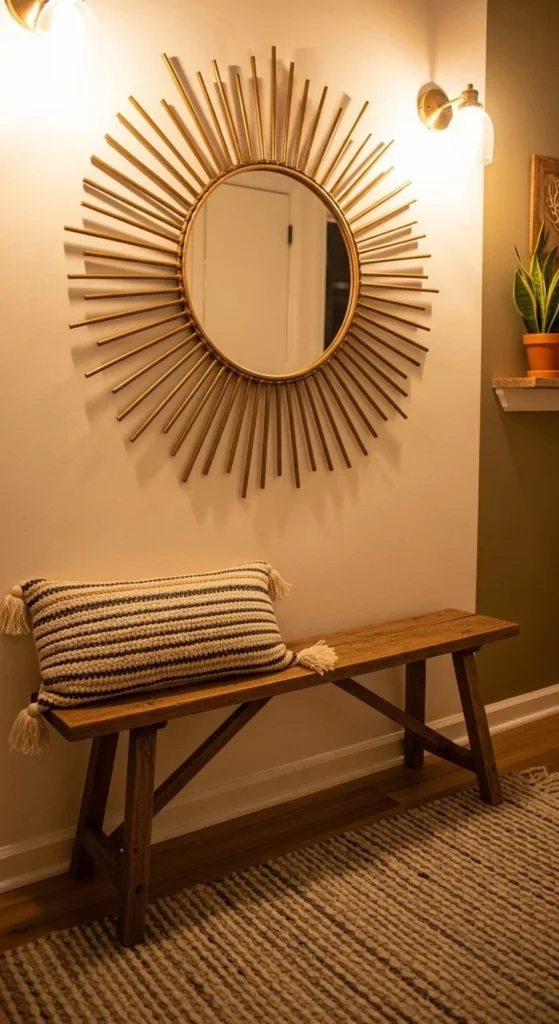
Embroidery hoops simplify the entire build. They act as frame and structure at once. Glue rays directly to the outer ring. Rotate lengths to create movement. Hoops keep alignment consistent without rulers or templates. This makes them popular for first-time builders. Once assembled, sand lightly and paint everything together. Painting after assembly ties the whole piece together visually. This mirror suits entryways, bathrooms, and small wall sections. Pair it with a narrow bench or hook rail underneath. For texture, wrap the hoop in twine before painting. The detail stays subtle but adds depth.
5. Popsicle Stick Reinforced Sunburst
Popsicle sticks create stronger structure than skewers alone. Layer them in stages. Start with long rays. Add shorter ones on top. Overlapping adds stability and visual depth. Layering hides glue seams, which helps the finish look cleaner. Use wood glue for a slower set and stronger bond. Let each layer dry fully before adding more. Sand edges before painting so paint doesn’t pool. This mirror leans slightly graphic and works well in bedrooms or craft rooms. Antique gold or bronze tones keep the look grounded.
6. Dollar Store Spoon Sunburst
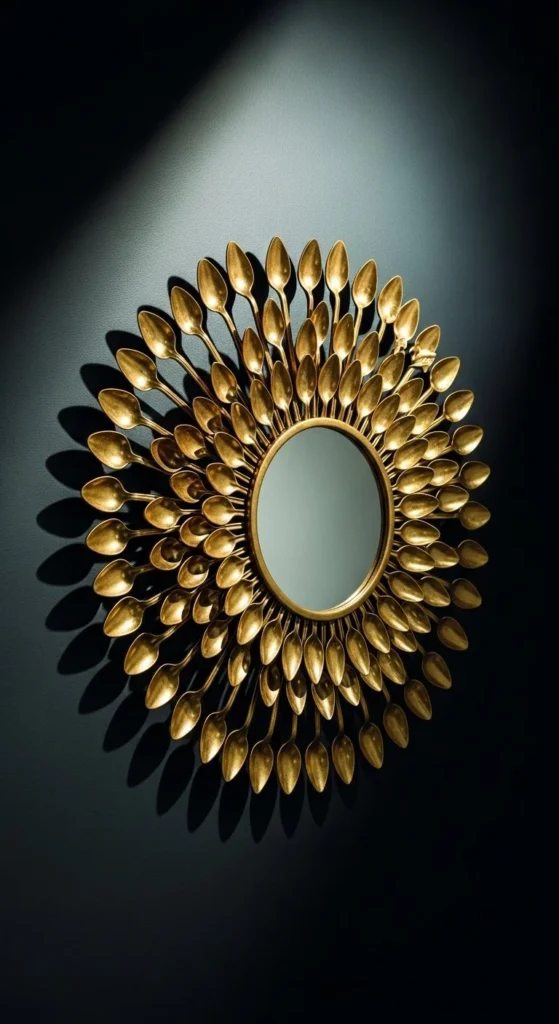
Plastic spoons create texture wood can’t match. Cut the handles cleanly so the spoon bowls sit flat. Arrange them like petals radiating outward. Slight overlap adds strength and depth. Glue everything first before painting. Painting after assembly keeps the finish consistent across layers. Use light spray coats to avoid drips between curves. Gloss finishes look bold, while satin softens the shine. This mirror works well in dining spaces, powder rooms, or dramatic wall moments. Keep the mirror center small so the rays remain the focus. Because spoons add bulk, use strong adhesive strips or wall anchors if hanging permanently. This style reads sculptural even from a distance, making it ideal for rooms where decor should feel expressive rather than subtle.
7. Whitewashed Farmhouse Sunburst
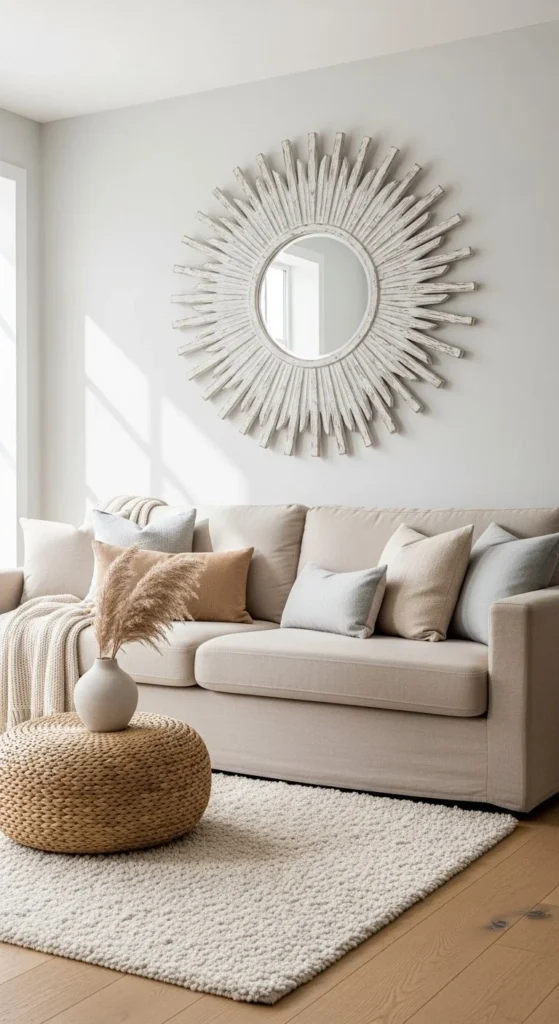
Whitewash tones everything down while keeping texture visible. Thin white paint with water and brush lightly so wood grain shows through. Let some areas stay uneven. That variation adds charm. Lighter finishes disguise small mistakes, which helps newer DIYers feel more confident. Use skewers or thin dowels for a softer profile. Seal lightly once dry to protect the surface. This mirror pairs well with shiplap walls, linen curtains, and woven accents. It works best in living rooms or bedrooms where calm styling matters. Keep the surrounding decor neutral so the mirror doesn’t disappear into the wall.
8. Matte Black Modern Sunburst
Matte black relies on clean execution. Cut rays evenly. Sand thoroughly. Space them with intention. High contrast shows every detail. Patience matters more than speed with this finish. Use flat or ultra-matte spray paint for a smooth look. This mirror fits modern, industrial, or minimalist interiors. Pair it with black light fixtures or hardware nearby to tie the room together. Hang it level. Even slight tilts stand out with bold contrast. This style feels graphic and architectural rather than decorative.
9. Natural Bamboo Boho Sunburst
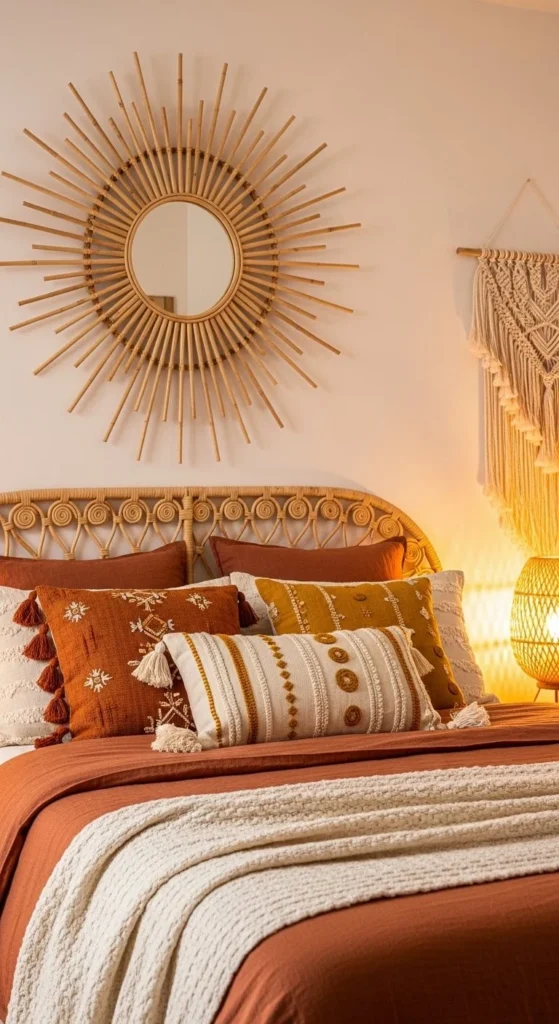
Bamboo skewers bring warmth without paint. Sort them by length before gluing. Start with longer rays, then fill gaps with shorter ones. Leave spacing slightly uneven for an organic feel. Natural materials soften rigid layouts. Sand lightly to remove splinters. Seal with clear spray if desired. This mirror works beautifully with plants, woven textiles, and neutral bedding. It suits bedrooms, reading nooks, and relaxed living spaces. Keep the mirror size modest so the rays don’t overwhelm the wall.
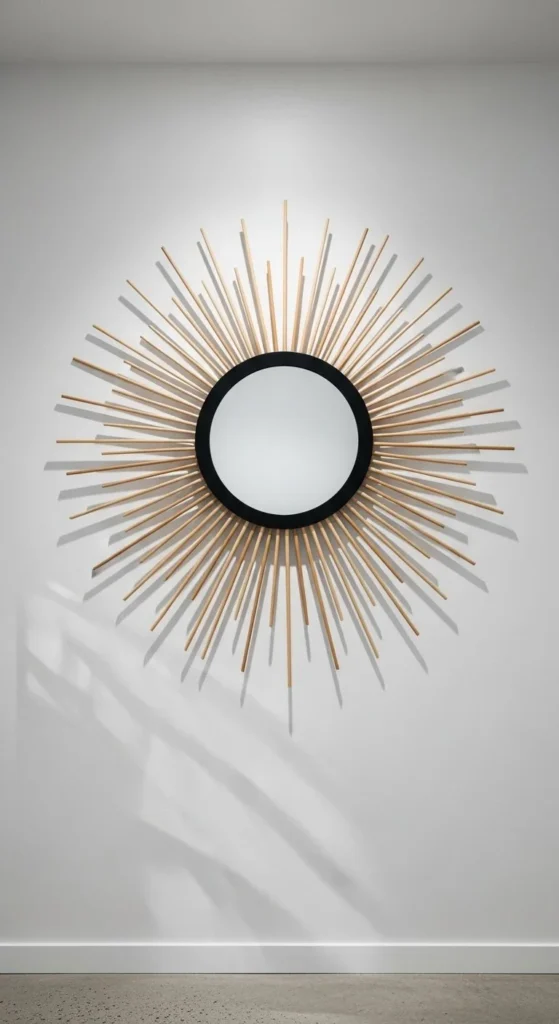
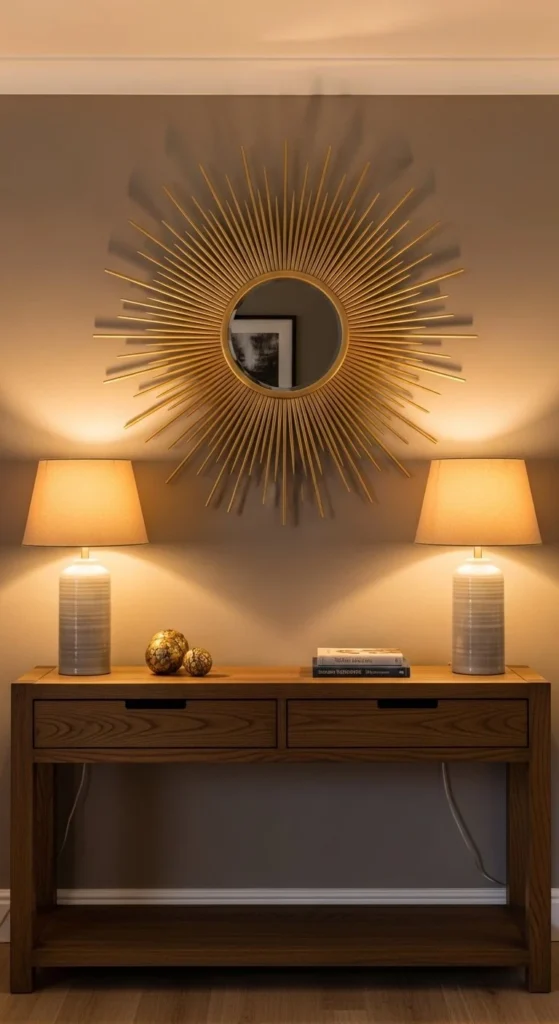
10. Clock-Face Precision Sunburst
This method removes guesswork entirely. Mark twelve points like a clock before gluing anything down. Attach long rays first. Add filler rays between them for fullness. Measured layouts save time later and reduce frustration. This style feels structured and polished. It works well in offices, studios, and spaces where balance matters. Choose soft metallic tones to avoid harsh reflections. Keep nearby decor minimal so the symmetry stands out. This build rewards patience and planning more than creativity.
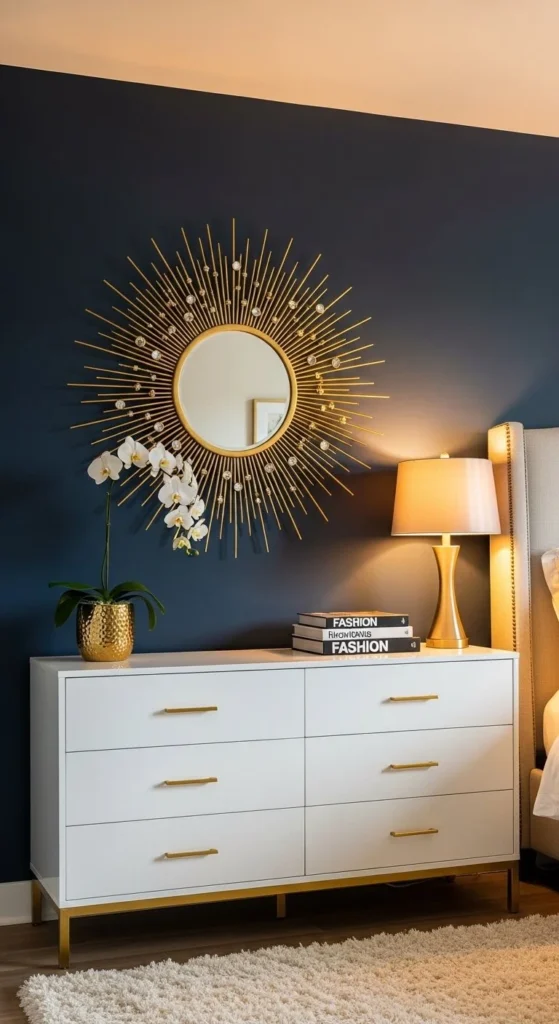
11. Gold Leaf Finish Sunburst
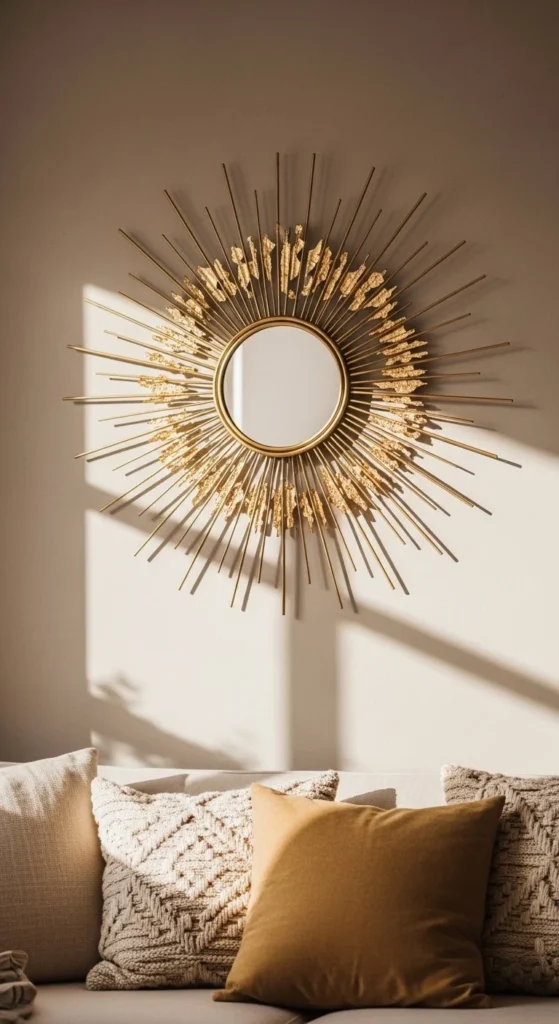
Gold leaf adds depth that spray paint can’t replicate. Apply after a base coat of paint for adhesion. Press gently and allow edges to vary slightly. Irregular gold edges create dimension and reflect light beautifully. Seal lightly once dry to prevent flaking. This mirror suits bedrooms, living rooms, or formal sitting areas. It’s slightly fussy, so small mirrors are easier for beginners. Pair with soft textures like velvet or linen for contrast. Even a simple wall becomes a statement with gold leaf detailing.
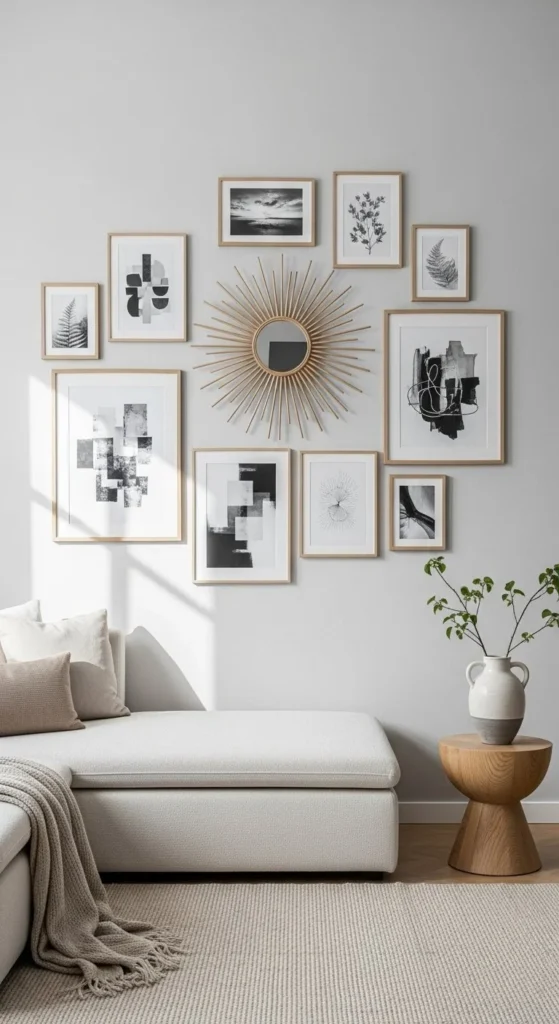
12. Gallery Wall Centerpiece Sunburst
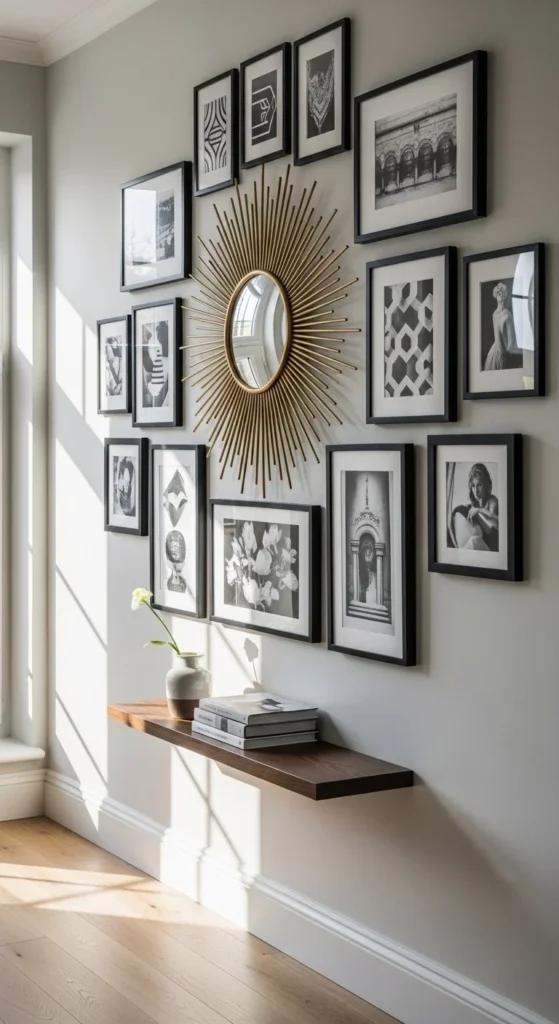
Use the sunburst as the anchor for surrounding artwork. Keep nearby frames simple in shape or color. Mirrors break up flat walls and reflect light, adding visual interest. Position the rays so they don’t compete with other frames. This approach works in hallways, staircases, and entryways. For balance, keep the mirror slightly smaller than the largest frame around it. Lightweight materials ensure the wall isn’t overloaded. It’s a clever way to integrate a statement piece without dominating the space.
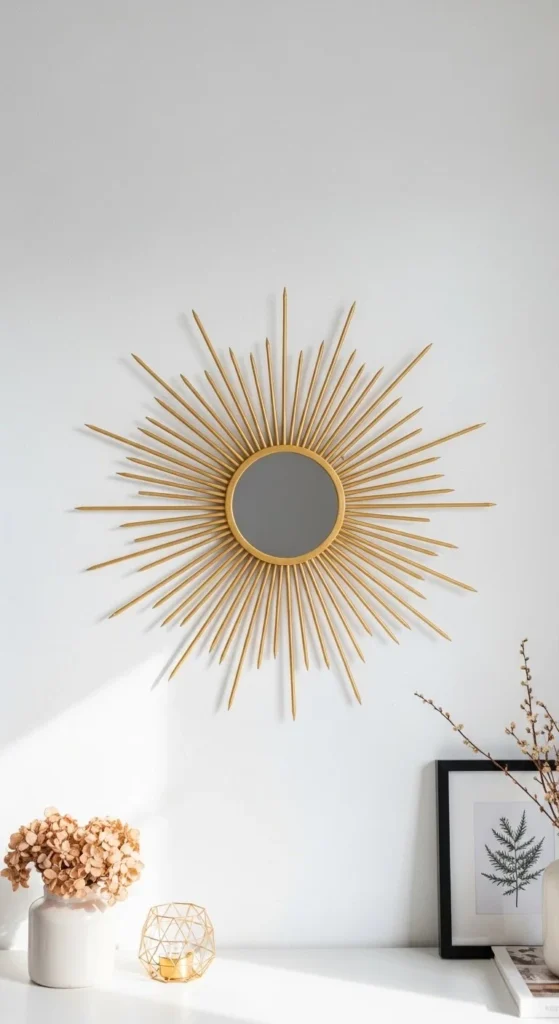
13. Mini Entryway Sunburst
Even tiny mirrors can make an impact. Use thin rays and lightweight backing to avoid excess weight. Scale matters more than length here—shorter spokes prevent visual clutter. Hang above small shelves, hooks, or key racks in entryways. Spray paint in warm metallic tones for a polished finish. Keep the surrounding wall calm so the mirror reads as intentional. Perfect for apartments or small walls where space is limited.
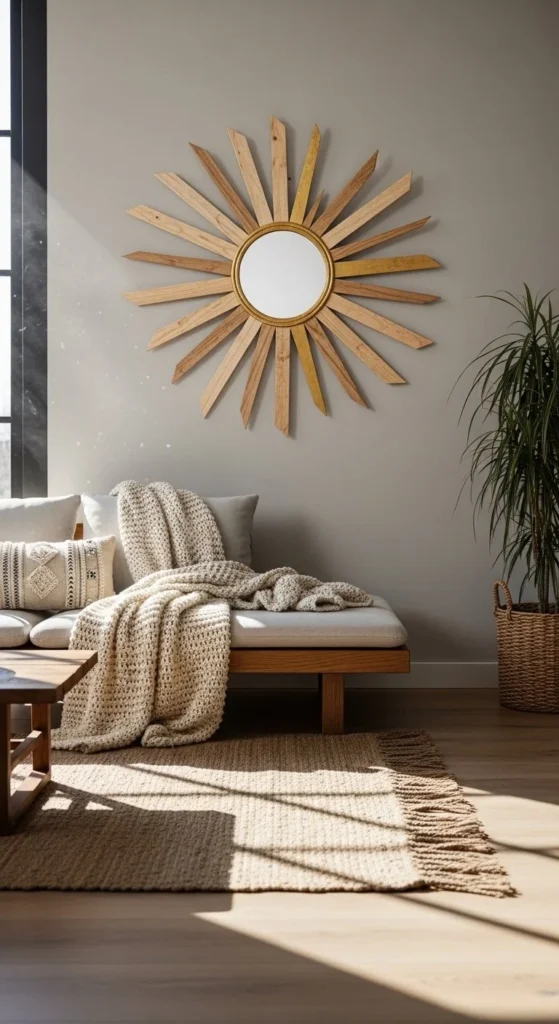
14. Oversized Shim Sunburst
Wood shims let you create bigger, more dramatic mirrors. Paint or stain the shims before assembly. Use a strong backing like MDF or plywood. Even spacing prevents sagging in oversized builds. Keep furniture minimal nearby so the mirror is the focal point. Two layers of rays increase depth, but don’t overcomplicate assembly. This approach works best in living rooms, dining areas, or spaces with high walls. Seal lightly to protect wood.
15. Two-Tone Natural and Gold Burst
Alternating finishes add rhythm without extra materials. Seal raw wood to prevent warping. Contrast highlights texture and depth, making the mirror feel more dynamic. This style pairs well with plants, woven furniture, and neutral bedding or seating. Keep the metallic tone muted so it complements rather than dominates. Two-tone designs make the mirror visually interesting from multiple angles.
16. No-Drill Hanging Sunburst
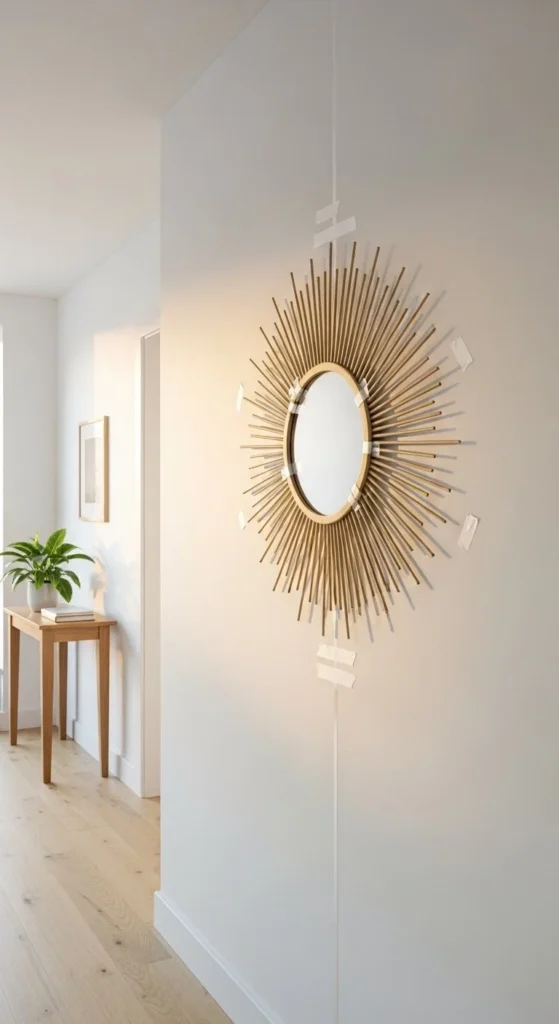
For renters, no-drill hanging is a game-changer. Use heavy-duty double-stick tape or removable mounting strips. Lightweight mirrors perform best with this method. Avoid oversized builds or thick wooden rays—they may slip. Lay out the mirror on the floor first to ensure spacing. This technique works in apartments, dorms, or any wall where holes aren’t allowed. Keep surrounding decor minimal to make the mirror the focus. A simple metallic finish looks clean and intentional without hardware.
17. Multi-Layer Spoke Sunburst
Layering spokes adds drama and depth. Start with longer base rays, then add shorter secondary layers on top. Layered designs create a sense of movement and catch light differently throughout the day. Allow each layer to dry before adding the next to prevent shifting. Sand edges lightly for smoothness. Works well in living rooms, dining rooms, or over mantels. Finish in metallic or matte tones depending on your preferred style. The extra layers make the mirror feel custom and luxurious without a large budget.
18. Wax Paper Mess-Free Assembly
Wax paper prevents glue from sticking to your work surface. Lay out all rays and backing on top. Simple prep reduces cleanup and saves sanity. Hot glue or Gorilla Glue works well, but be cautious with placement. Once dried, peel off the wax paper. Use this tip on all glue-heavy DIY projects, not just mirrors. Even messy projects feel cleaner and more manageable. This works especially well when building multiple layers or using uneven materials like spoons or skewers.
19. Embellished Metallic Burst
Add small beads, studs, or sequins to your rays for texture. Attach after painting for consistency. Accents add dimension and shimmer, making the mirror feel custom. Works well in bedrooms, dressing areas, or feature walls. Keep the embellishments minimal so they enhance without overwhelming. Paint all rays first to unify the surface, then add accents strategically. This technique makes even inexpensive builds feel high-end and designer-inspired.
20. Video Tutorial Inspired Sunburst
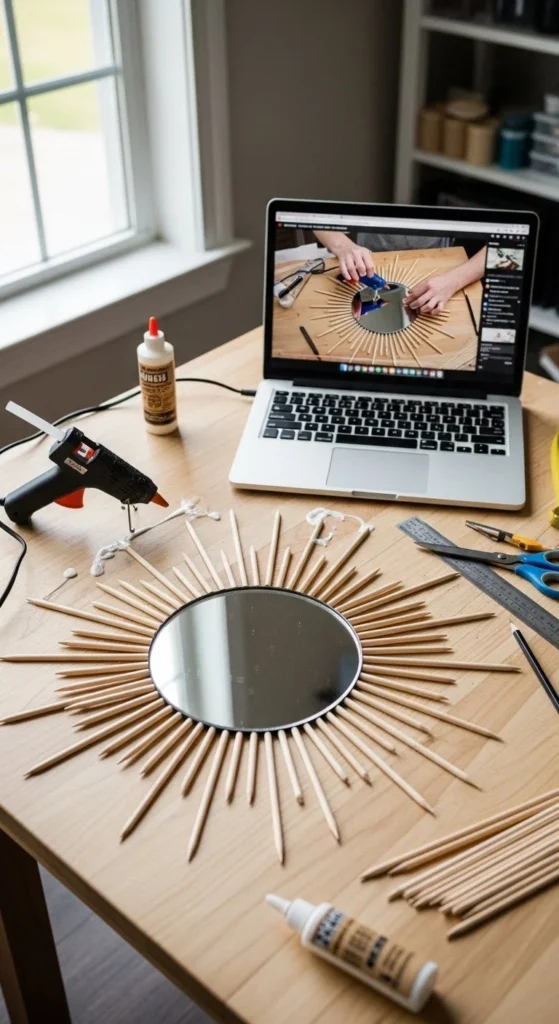
Follow video guides for extra clarity. You can see spacing, layering, and gluing techniques in real time. Visual guidance prevents common mistakes, like uneven rays or sloppy glue. Combine skewers, popsicle sticks, or spoons depending on your chosen style. Pause frequently to match your speed. This approach works well for beginners who prefer step-by-step instruction. Use the video as a reference, but adapt colors and materials to suit your space. It’s a great way to build confidence and ensure your mirror turns out as planned.
21. Textured Plastic Fork Sunburst
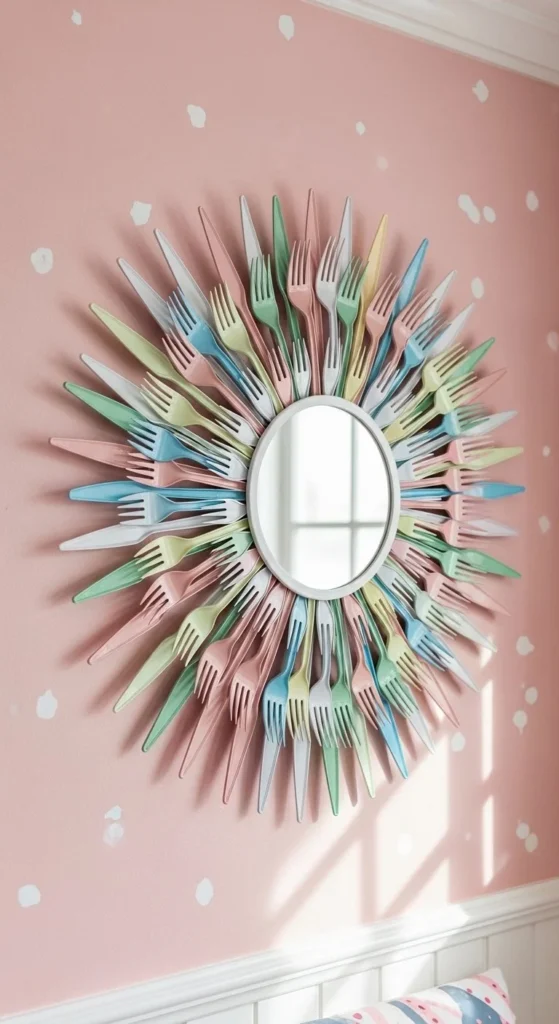
Plastic forks create a unique texture that spoons or skewers can’t achieve. Trim handles and glue the fork heads outward like petals. Layering adds depth and dimension, making the rays feel sculptural. Paint afterward for a unified finish. This technique works in bedrooms, craft rooms, or kid-friendly spaces. Lightweight plastic keeps hanging simple, even for medium-sized mirrors. Pair with neutral walls or soft pastel accents to keep the focus on the mirror itself.
22. Wall Collage Integration Sunburst
Place the mirror as the centerpiece among framed art. Sunburst mirrors break up flat galleries and add reflective contrast. Keep other wall pieces minimal so the rays don’t clash. Use symmetry or slight offset for visual interest. Lightweight builds allow you to combine multiple frames safely. Works in hallways, living rooms, and bedrooms. Metallic or natural tones blend seamlessly with black, white, or wood frames. This approach turns a simple wall into a curated focal point without additional furniture.
23. Stunning Boho-Chic Sunburst
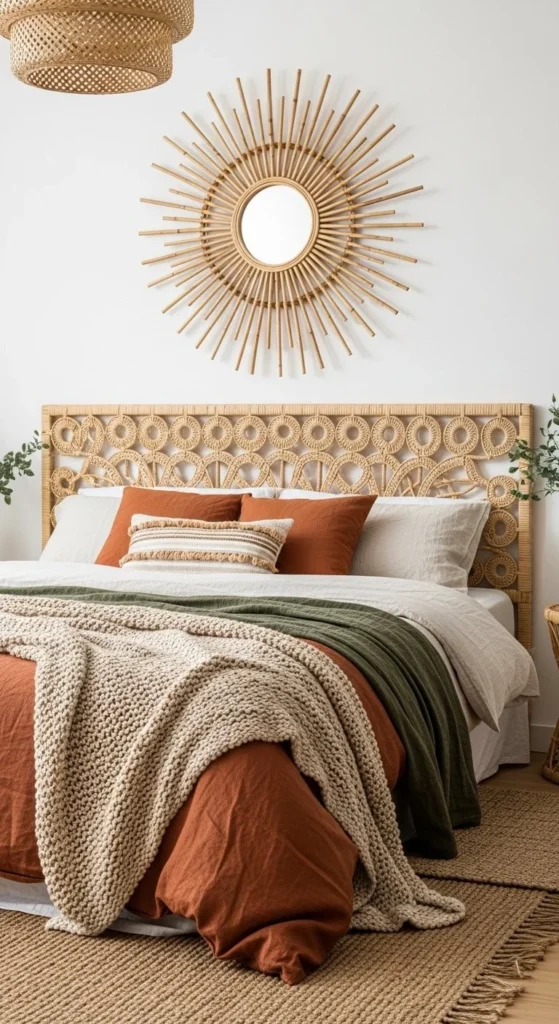
Combine natural bamboo with gold-painted rays for boho-chic flair. Mixing materials creates visual richness without adding weight. Start with a small mirror, expand with rays of different lengths, and layer carefully. Sand edges lightly to prevent splinters and finish with metallic spray for shine. Pair with woven textiles, plants, and neutral bedding for cohesive styling. Works best in bedrooms or living areas where casual elegance is desired. Even simple materials can feel luxurious when arranged thoughtfully.

Leave a Reply