
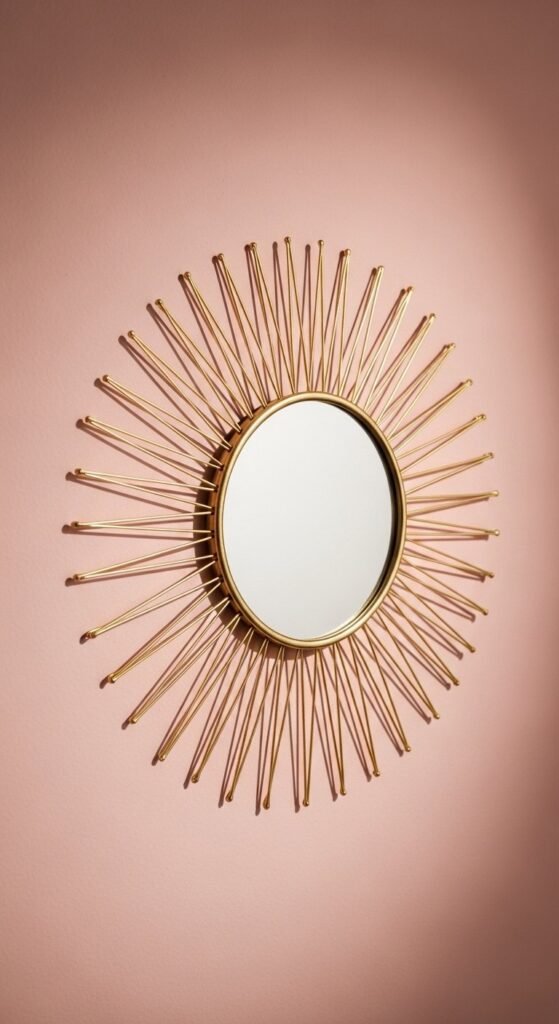
1. Sunburst Stick Mirror
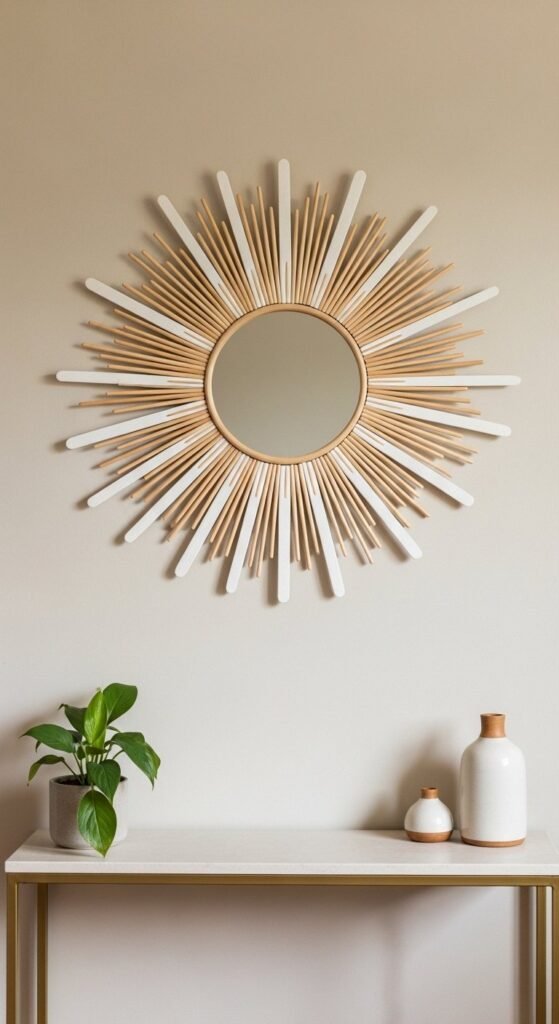
Sunburst mirrors stay popular because they feel bold without being expensive. Paint stir sticks, bamboo skewers, or coffee stirrers all work well. Cut them to varying lengths for a layered look. Hot glue makes assembly quick. Spray paint in warm white, matte black, or metallic gold depending on your space.
Dollar store mirrors keep this project budget-friendly. For stronger hold, glue sticks onto a cardboard ring first, then attaches to the mirror. Add hanging hardware before sealing the back.
Style this mirror above a dresser, entry table, or reading nook. Pair with neutral walls so the shape stands out. For extra texture, lightly sand the stick edges after painting. Want subtle shine? Dry-brush metallic paint only on the tips.
This craft works well for beginners. Mistakes disappear once everything is layered. If you like rustic, leave wood natural and seal with clear matte spray. If you prefer glam, use gold or champagne spray. Either way, the sunburst shape adds strong visual interest with simple materials.
2. Broken CD Mosaic Mirror
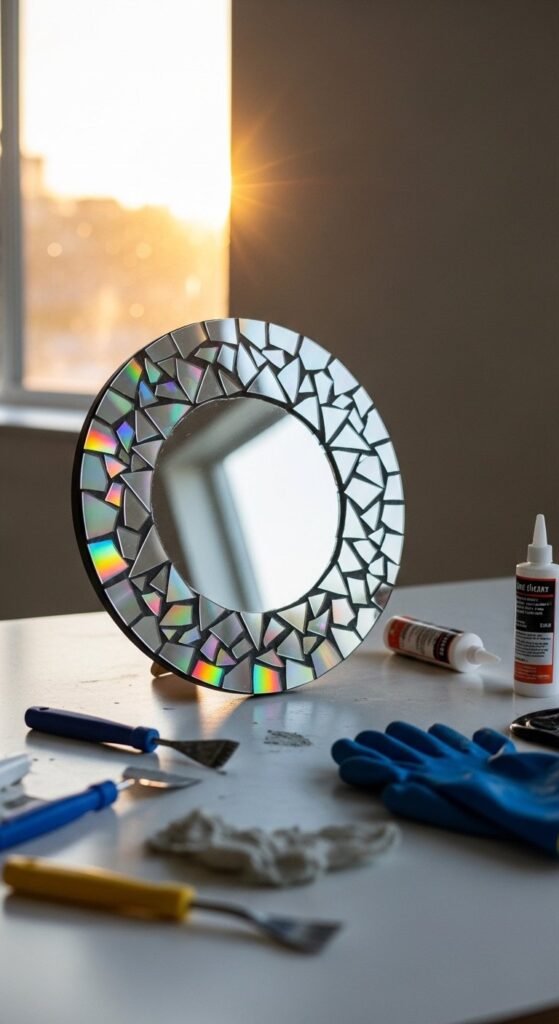
Old CDs turn into reflective mosaic magic. Snip discs into small shards using heavy scissors. Wear gloves and eye protection. Spread strong craft adhesive or tile glue around the mirror edge. Press pieces in random patterns. Let dry fully before grouting.
White or charcoal grout creates contrast. Push grout into gaps using a rubber spatula or old credit card. Wipe excess with a damp sponge. Seal once cured for durability.
Great upcycling option for scratched discs that would otherwise get tossed. Try mixing CD shards with small mirror tiles or glass gems for variety.
This style works well in teen rooms, craft rooms, or gallery walls. Light hitting the surface produces subtle rainbow reflections. Keep the frame thin so the mirror remains the star.
If you want softer shine, lightly sand CD surfaces before placing. For bold color, paint the base black before adding shards. This project looks complex but follows simple steps.
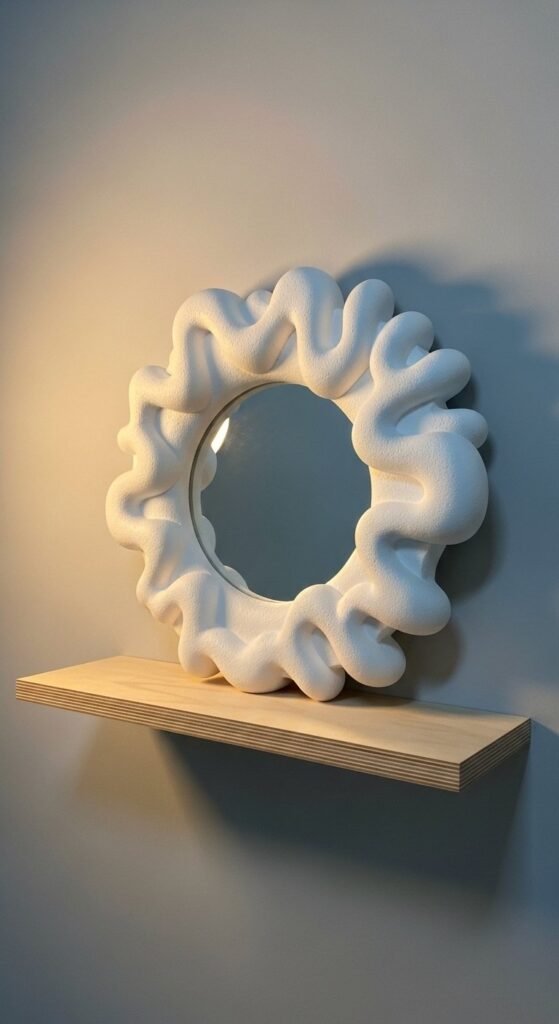
3. Air-Dry Clay Sculpted Frame
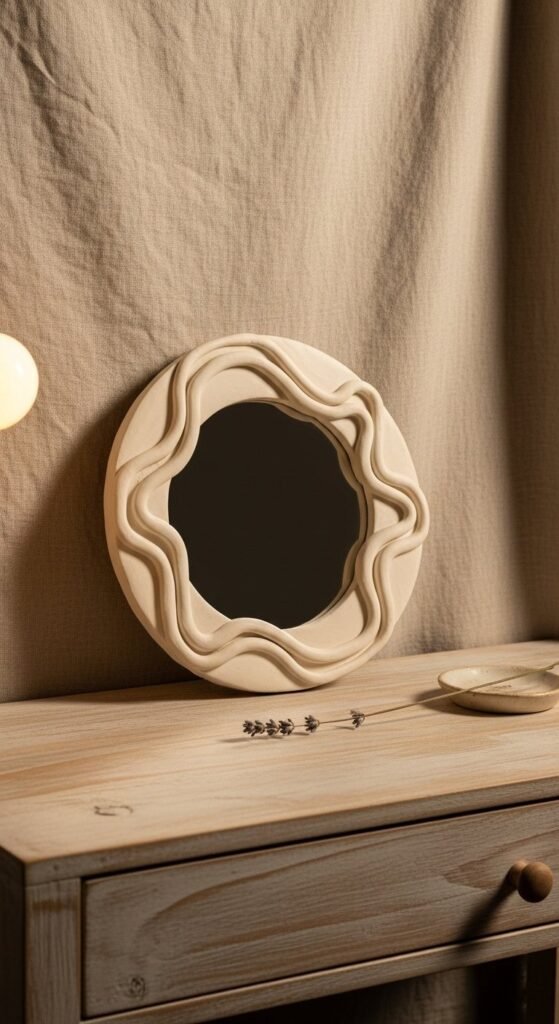
Air-dry clay allows custom shapes without special tools. Roll clay into coils and press around mirror edges. Smooth with damp fingers. Add gentle ridges, scallops, or petal forms. Let dry completely before painting.
Acrylic paint works well. Neutral tones feel calm. Pastels suit nurseries. Metallic highlights add subtle shine. Seal with clear varnish for protection.
Kid-friendly and forgiving. Cracks can be filled with lightweight spackles. Uneven spots become part of the look.
Mount using strong adhesive strips or add a sawtooth hanger to the back. These mirrors look great on bedside walls, bathroom shelves, or gallery clusters.
Try stamping textures using lace, leaves, or fabric. You can also embed small beads or shells into damp clay for detail. Each mirror ends up slightly different, which adds charm.
4. Cardboard Hot Glue Embellished Mirror
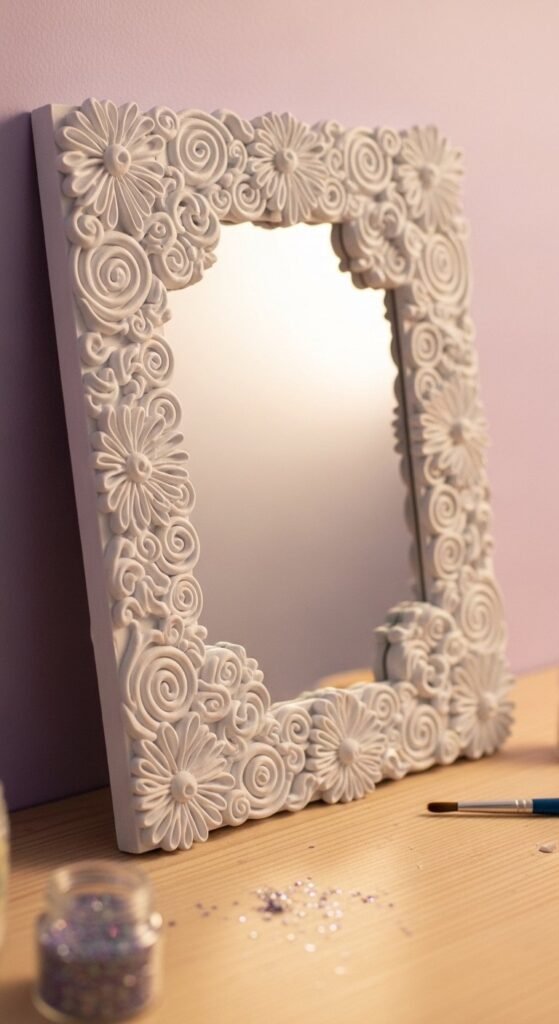
Hot glue becomes sculptural when layered. Draw frame shapes directly with glue. Create loops, vines, or geometric lines. Let cool fully. Paint once hardened.
Cardboard or foam board works as the base. Cut a frame slightly larger than your mirror. Glue mirror in center. Build designs around it.
Fast project with big texture payoff. Spray paint gives smooth coverage. Acrylic paint works too.
This style fits shabby chic, cottage, or whimsical spaces. Hang in bathrooms, hallways, or craft rooms.
For durability, seal with clear spray. Want shine? Dry-brush gold on raised areas. You can also mix glitter into paint.
Mistakes hide easily because texture disguises uneven lines. Try practicing patterns on scrap cardboard first.
5. Rope-Wrapped Boho Mini Mirror
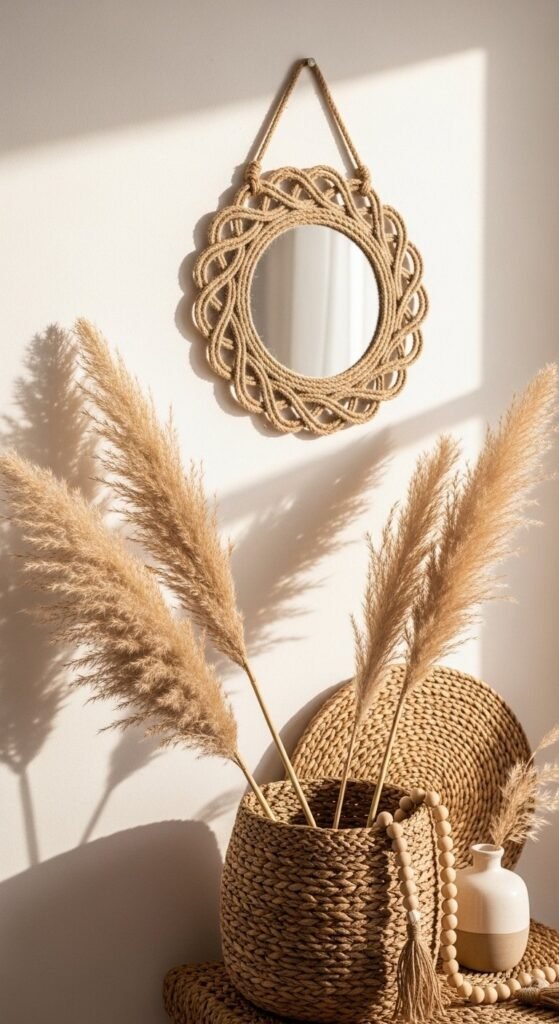
Rope wrapping adds instant boho character. Apply glue along the mirror edge. Press rope tightly in a spiral. Continue until fully covered. Create a small loop at top for hanging.
Jute rope works well. Cotton rope gives a softer look. Thicker rope makes bolder frames.
No cutting tools required. Great for beginners.
Use these in bedrooms, hallways, or bathrooms. Group several together for a casual wall display.
For variation, paint rope after wrapping. Whitewash for coastal feel. Add wooden beads between rope rows for detail.
If glue seeps out, let dry and peel away. Clear-drying glue looks best.
This project pairs nicely with plants and woven textures. It also works on square mirrors with careful corner shaping.
6. Rustic Twig Frame Mirror
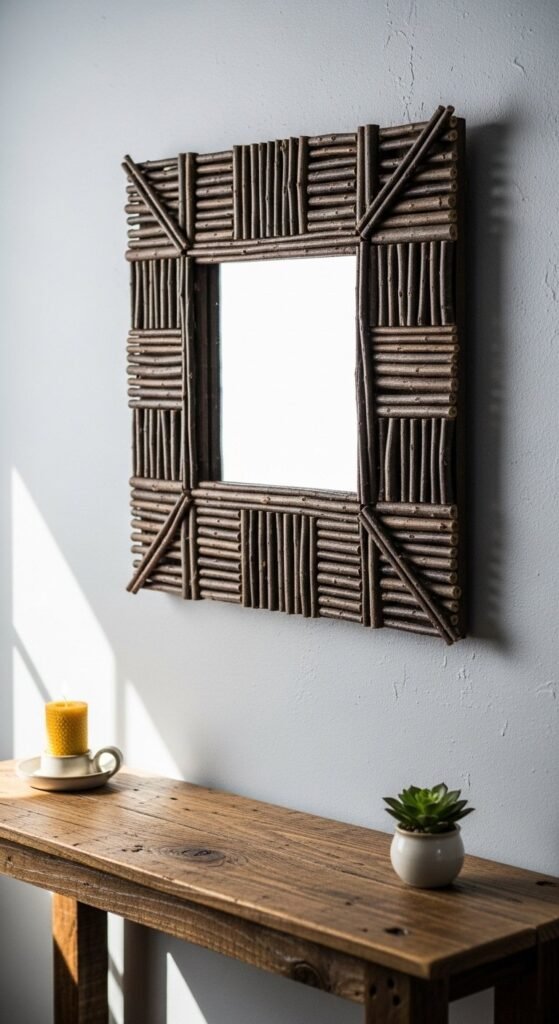
Twigs bring an organic texture that feels warm and casual. Collect straight sticks from outdoors or buy craft twigs. Trim to length with garden shears. Glue horizontally or vertically around the mirror edge.
Leave bark intact for rustic character. Or lightly sand for a smoother look. Seal with matte clear spray to prevent shedding.
Perfect for nature-inspired rooms. Works well in cabins, mudrooms, or boho spaces.
For stronger construction, glue twigs onto a cardboard frame first. Then attach a mirror. This helps everything stay aligned.
You can stain twigs darker or dry-brush white for farmhouse style. Mix twig thicknesses for visual interest.
Hang solo or pair with woven wall art. Add a small leather loop hanger for extra charm.
7. Beaded Wood Accent Mirror

Wood beads add gentle texture without heavy weight. Slide beads onto floral wire or glue directly around the mirror edge. Alternate sizes for rhythm.
Natural beads suit neutral rooms. Painted beads add playful color.
Great stash-buster project. Use leftover beads from jewelry making.
Secure with strong craft glue. Let it cure fully before hanging.
These mirrors fit nurseries, vanities, or gallery walls.
For extra detail, brush metallic paint lightly over raised areas. Or dip only half the bead in paint for two-tone effect.
If beads roll while drying, work in short sections. Tape can hold them in place temporarily.
8. Mod Podge Decoupage Frame
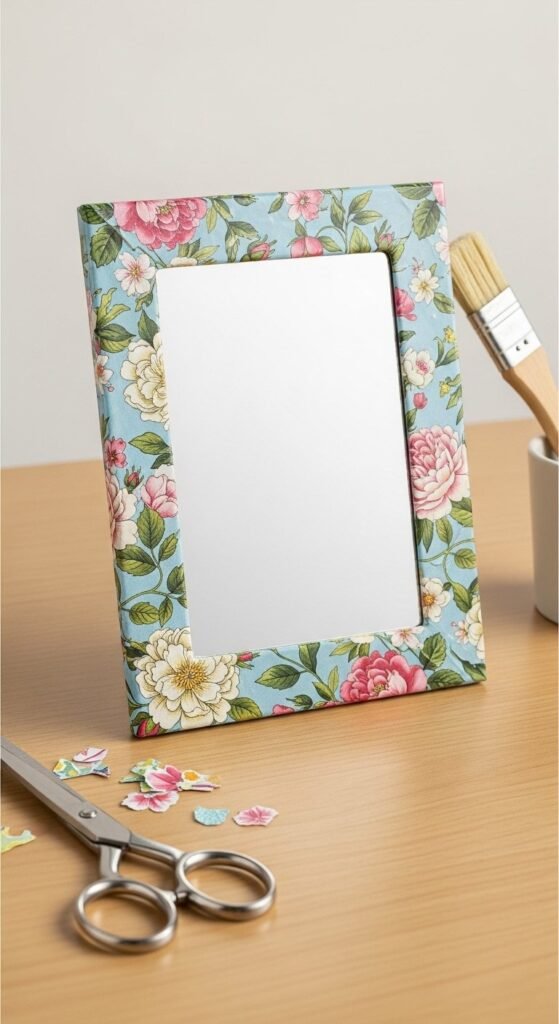
Decoupage allows endless patterns. Cut paper strips or shapes. Brush Mod Podge onto frame. Lay paper down. Smooth gently. Add the top coat once dry.
Use book pages, maps, fabric, or magazine images.
Low-cost customization. Change look anytime with new paper.
Seal with extra coats for durability. Lightly sand between coats for smooth finish.
These mirrors suit desks, bathrooms, or dorm rooms.
For a softer look, use matte sealer. For shine, use gloss.
Trim excess paper with a craft knife once dry. Corners look cleaner if folded neatly.
9. Egg Carton Flower Mirror
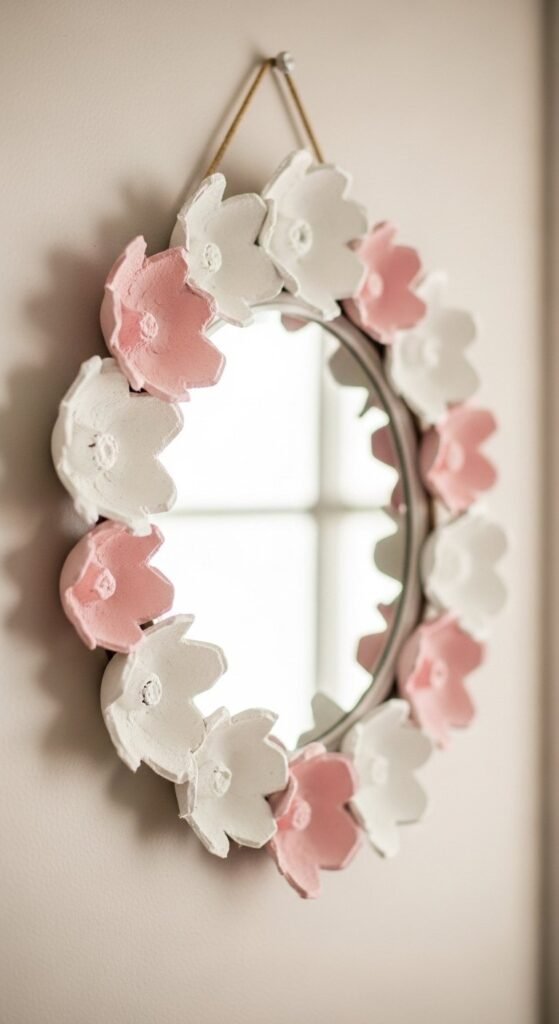
Egg cartons become charming petals. Cut cups apart. Trim into flower shapes. Paint before or after assembly.
Glue flowers around the mirror edge. Layer for fullness.
Zero-waste craft idea.
Great for kids with supervision.
Use pastel tones for a gentle look. Bright colors for playful spaces.
Seal with clear spray for strength.
Hang in bedrooms, playrooms, or craft corners.
You can add small buttons or beads in flower centers.
Work from bottom upward so layers overlap naturally.
10. Coastal Seashell Mini Mirror
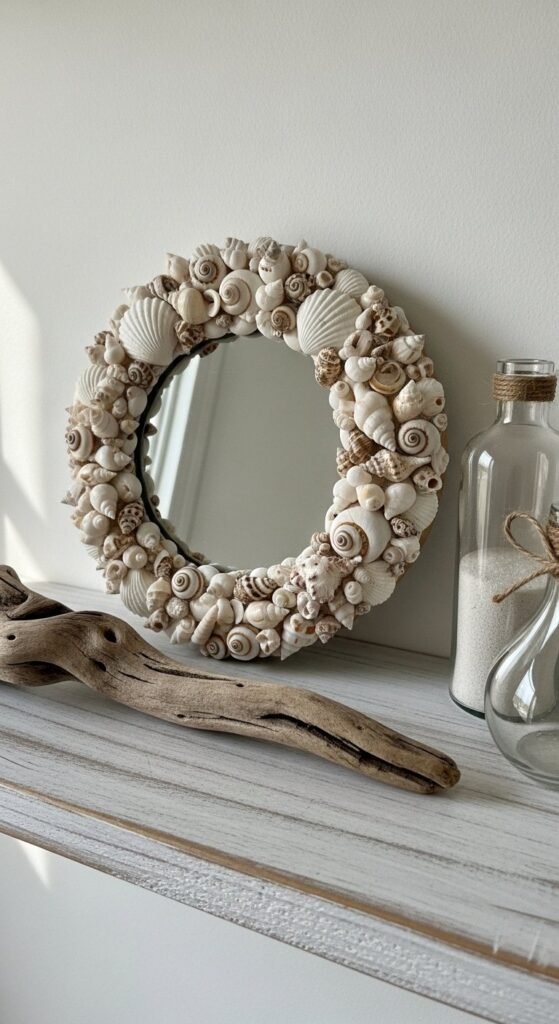
Shell frames feel relaxed and beachy. Use flat shells for easier gluing. Arrange dry first. Then glue in place.
Stick to one color family for a calm look.
Perfect summer decor piece.
Seal with clear spray to prevent dust buildup.
Works in bathrooms, beach houses, or coastal-themed rooms.
For variation, mix in tiny pebbles or sand dollars.
Use a lightweight mirror so hanging is easy.
Avoid heavy shells near the top to reduce strain.
11. Mini Gallery Mirror Set

Grouping small mirrors creates instant wall interest. Mix frame styles while keeping a shared color tone. Lay arrangement on floor first. Then transfer to the wall.
Use lightweight mirrors with adhesive hooks.
Great for renters.
Keep spacing consistent. About two inches between mirrors works well.
This setup fits entryways, hallways, or above dressers.
Add small art prints between mirrors if desired.
Stick to odd numbers for a casual feel.
Simple frames let reflections become the feature.
12. Painted Stencil Frame Mirror
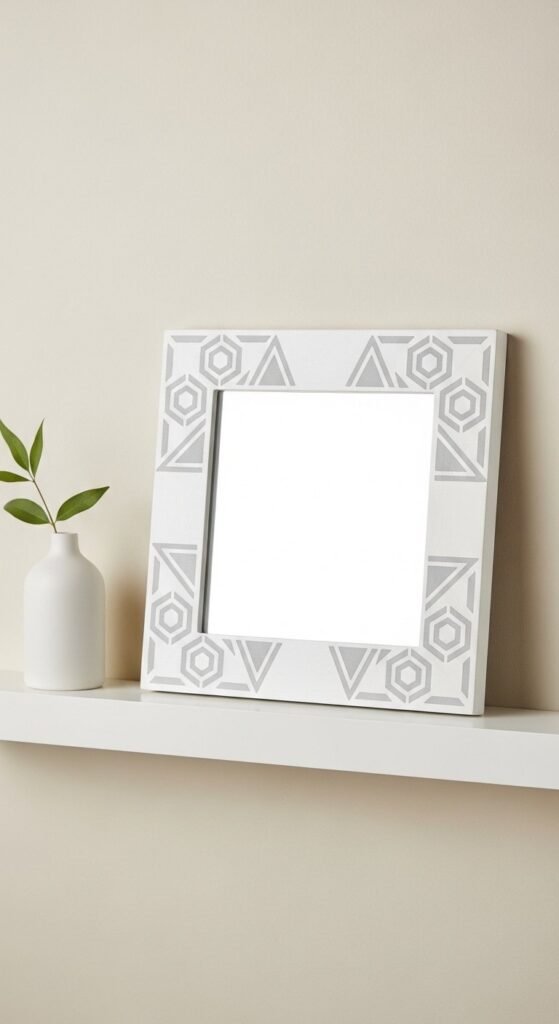
Stencils give patterns without heavy embellishment. Tape stencil to frame. Dab paint with sponge. Lift carefully.
Use two-tone colors for subtle contrast.
Quick refresh for old mirrors.
Seal with a clear coat.
Great for bathrooms or desks.
Metallic paint adds shine.
Practice on scrap wood first.
Keep stencil clean between uses.
13. Ribbon Hanging Nursery Mirror
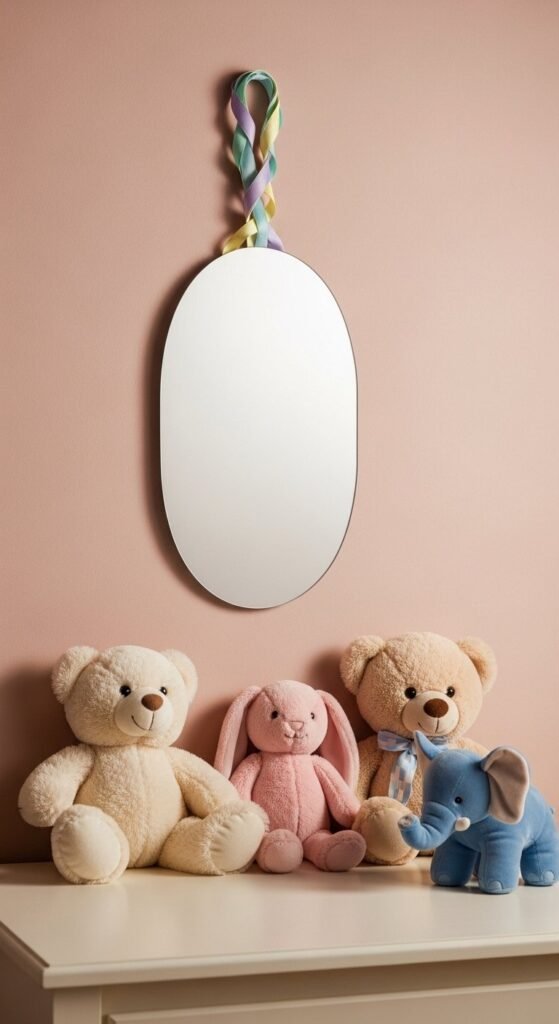
Ribbon hangers soften mirror look. Glue or staple ribbon to the back. Hide attachment with felt circle.
Choose satin for shine. Grosgrain for texture.
Sweet nursery accent.
Match ribbon color to bedding or wall art.
Lightweight mirrors work best.
Double ribbon for strength.
Add a small bow or charm if desired.
14. Macrame Wrapped Mirror
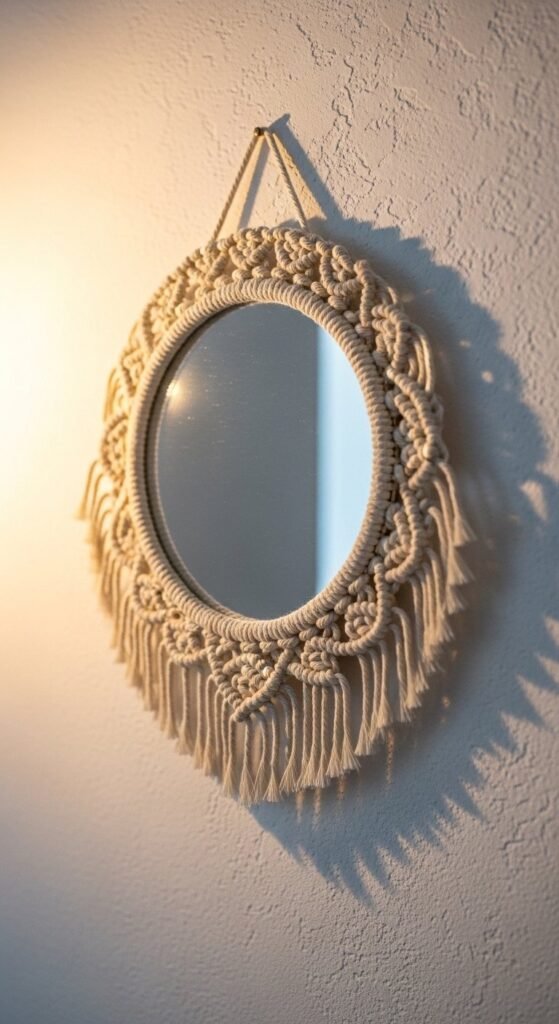
Macrame adds handmade texture. Start with basic square knots. Wrap cord around mirror edge.
Plenty of beginner knot tutorials online.
Relaxed boho style.
Trim fringe evenly.
Looks great near plants or woven baskets.
Use cotton cord for softness.
Keep knots tight for a clean finish.
15. Hairpin Glam Ring Mirror
Hairpins become instant sparkles. Glue pins evenly around the mirror edge.
Use gold, rose gold, or black.
30-minute craft.
Works well in bedrooms or vanities.
Keep spacing consistent.
Seal lightly if desired.
Add a second row for a fuller look.
16. Celestial Moon Texture Mirror

This design feels artistic and calm. Cut a crescent base from cardboard. Spread lightweight spackle or joint compound on top. Create gentle ridges with a palette knife. Let dry fully.
Paint in matte cream, warm gray, or pale clay. Dry-brush gold on high points for glow.
Great statement piece for small walls.
Seal with clear spray.
Works well in bedrooms or meditation corners.
You can add tiny star details using toothpick impressions.
Uneven texture adds charm. No perfection required.
17. Flexible Craft Mirror Cut Shapes
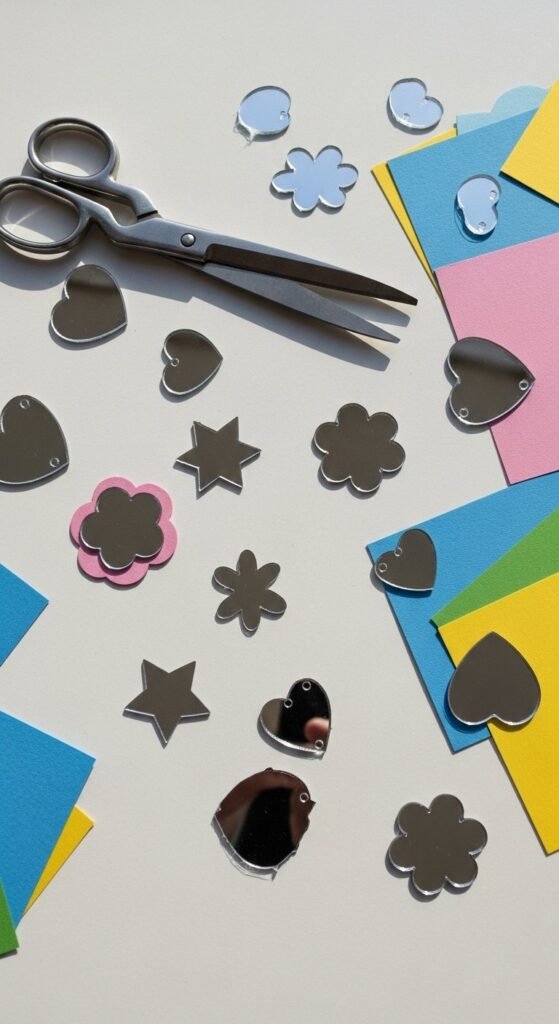
Flexible craft mirrors cut easily with scissors. Trace shapes onto backing. Cut slowly.
Glue onto cardboard or foam board. Decorate edges with paint, washi tape, or beads.
Beginner-friendly option.
Great for kids’ rooms, parties, or seasonal decor.
Lightweight and safe.
Use double-sided tape for quick projects.
Group shapes into wall clusters.
18. Spray Foam 3D Frame Mirror
Spray foam expands into bold shapes. Apply around the mirror edge in short bursts. Let’s cure. Trim excess with a craft knife.
Paint once hardened.
Creates dramatic texture.
Wear gloves. Work in a ventilated area.
Great for modern or art-inspired rooms.
Seal with paint and clear coat.
Irregular shapes look intentional.
19. PVC Pipe Slice Mirror Frame
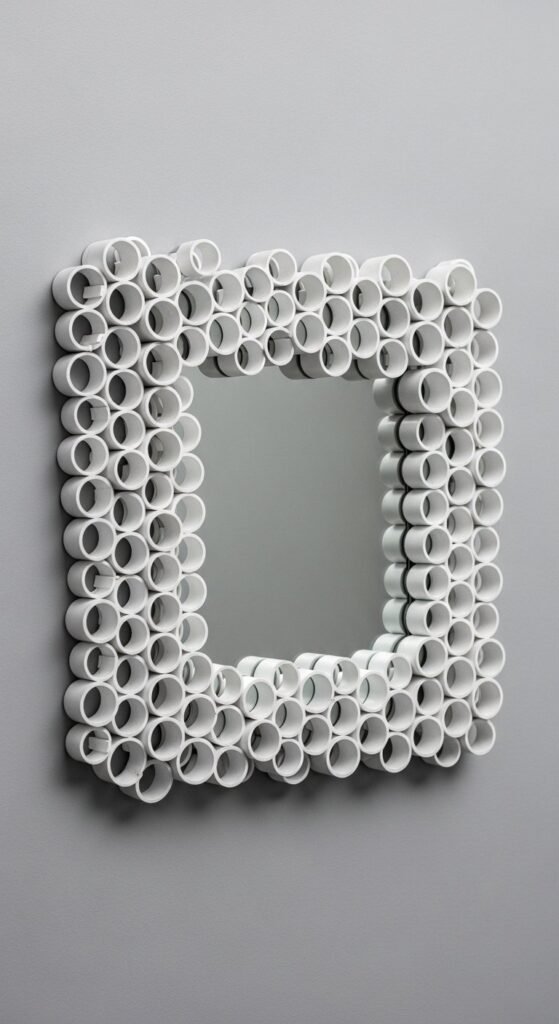
Cut PVC pipe into thin rings. Sand edges. Paint before assembly.
Arrange in pattern around the mirror. Glue securely.
Industrial-meets-modern look.
Black, white, or metallic finishes work well.
Hang in the office or hallway.
Seal after painting.
Keep ring thickness consistent.
20. UV Resin Pocket Compact Mirror
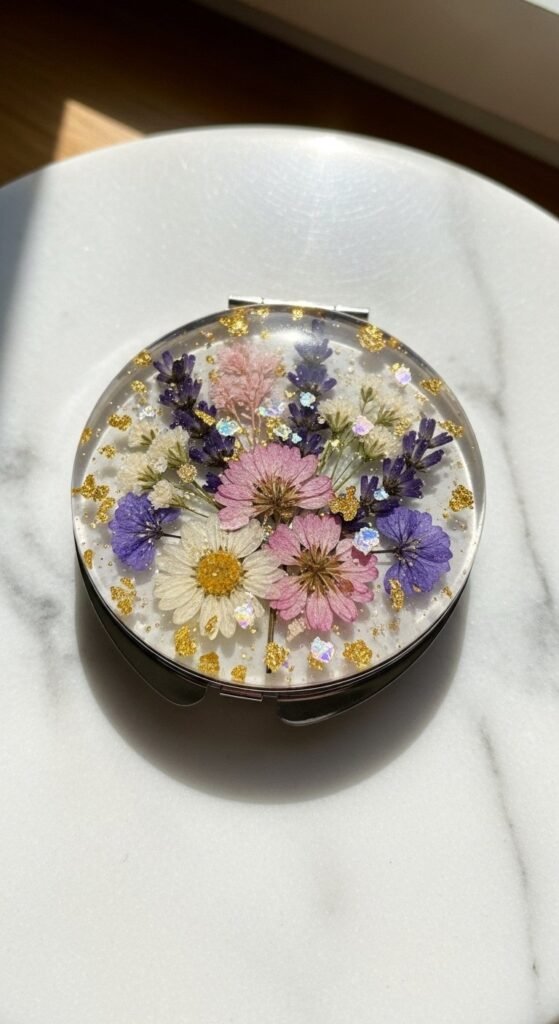
Use blank compact mirrors. Pour a thin layer of UV resin. Add small dried flowers, glitter, or decals. Cure under UV light.
Seal edges if needed.
Perfect handmade gift.
Choose minimal fillers for clarity.
Great for purses or travel bags.
Work in a dust-free area.
Let it cure fully before closing.
21. Driftwood Sun Frame Mirror
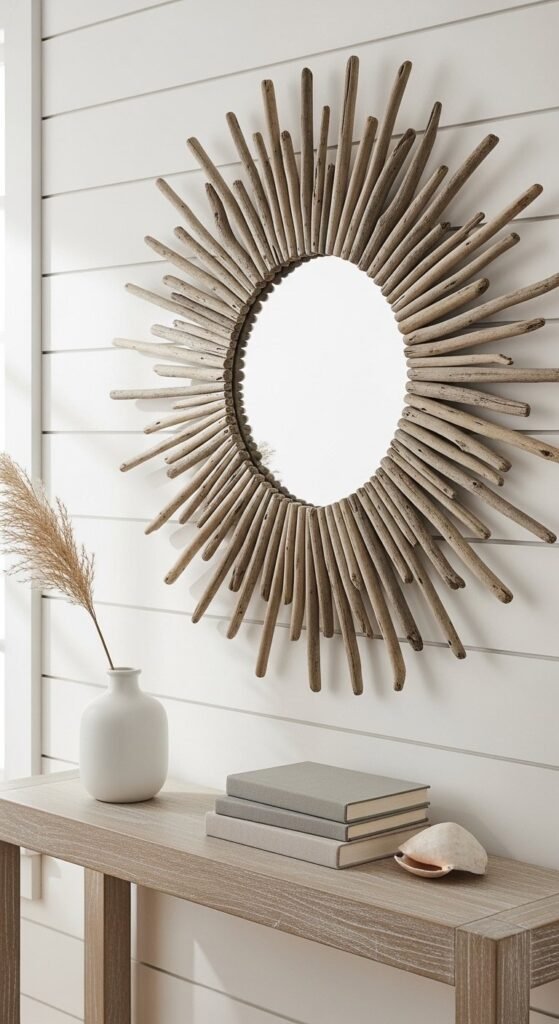
Driftwood brings character without added paint. Collect small pieces or purchase craft driftwood bundles. Cut ends flat for easier gluing. Arrange in a loose radial layout. Glue from the back outward so spacing stays even.
Leave wood natural for coastal style. Or whitewash lightly for a softer tone.
Perfect for relaxed spaces.
Seal with matte clear spray to reduce dust.
Looks great in bathrooms, entryways, or beach-themed rooms.
Mix thicker and thinner pieces for variation.
If driftwood curves, face the curve outward for organic feel.
22. Coffee Stirrer Chevron Frame
Coffee stirrers create clean geometry. Cut ends at angles. Glue into V-shapes around the mirror edge.
Stain or paint before assembly for faster finishing.
Budget-friendly and graphic.
Seal with a clear coat.
Great for offices, hallways, or gallery walls.
Use painter’s tape as guides for straight lines.
Mix two stain tones for subtle contrast.
23. Fabric-Wrapped Frame Mirror
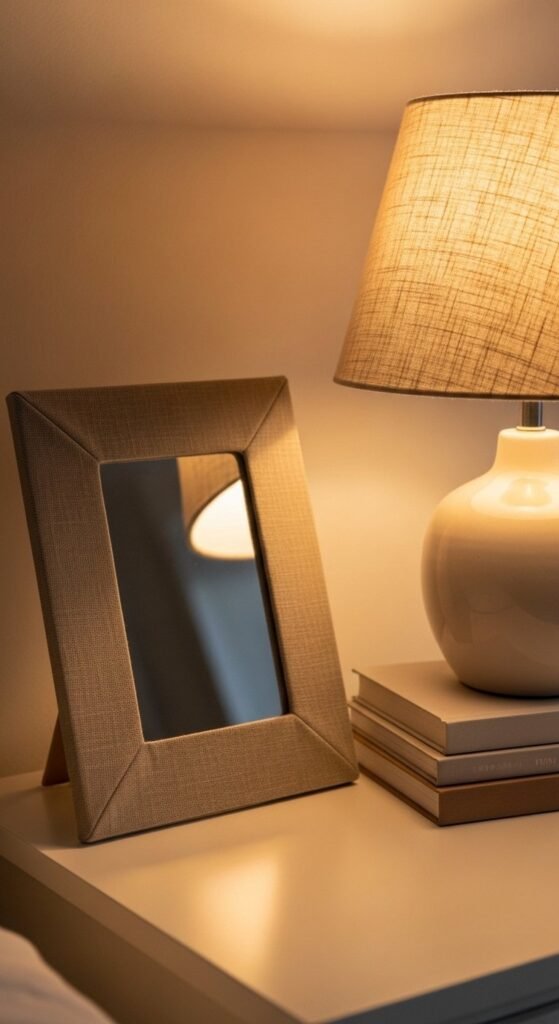
Fabric softens hard edges. Cut fabric slightly larger than frame. Wrap tightly. Glue on back side. Fold corners neatly.
Use linen, cotton, or velvet.
Quick texture change.
Great for bedrooms or dressing areas.
Seal edges with a thin glue line.
Choose patterns for a playful look. Solids for a calm feel.
You can switch fabric seasonally

Leave a Reply