
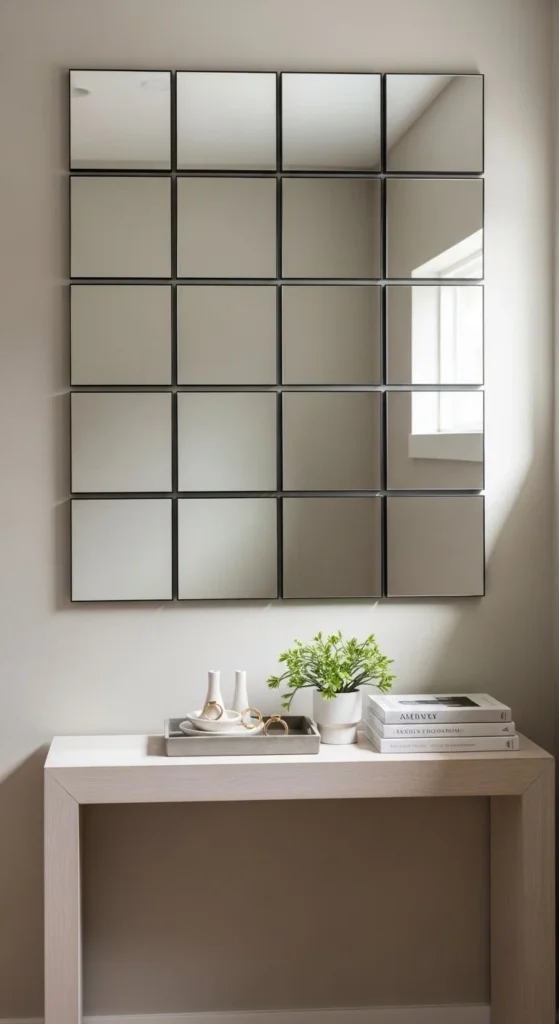
1. IKEA LOTS Classic Grid Wall

This is the look that started it all. Small square mirrors laid out in a tight grid change how a room feels within hours. Light bounces everywhere. Corners soften. The wall suddenly feels wider. Start by mapping the grid with painter’s tape. A laser level helps keep lines straight. Use double-sided tape first, then add Liquid Nails behind each mirror for long-term hold. Work from the top row downward so spacing stays consistent. IKEA LOTS mirrors keep costs low, especially if you wait for restocks. Stick to ½-inch gaps for a balanced look. Too tight looks busy. Too wide feels unfinished. This style works best in bedrooms, dining rooms, or narrow living areas. Frameless edges keep things clean. If walls are textured, add extra adhesive dots. Let everything cure for a full day before touching. Wipe fingerprints with microfiber only. No harsh sprays. Simple grid. Big visual payoff.
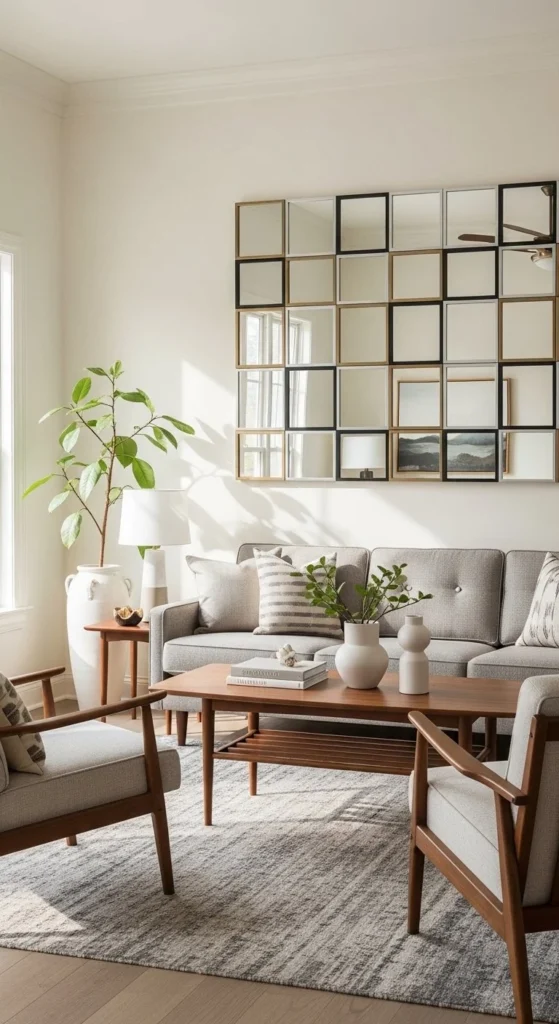
2. Black Industrial Frame Mirror Wall

This version adds structure without heavy cost. Thin wood strips create a windowpane effect that feels graphic and bold. Paint trim pieces matte black before mounting. Let them dry fully. Install mirrors first. Frames come last. This avoids alignment stress. Wooden spacers keep gaps even while glue sets. The black lines help hide small spacing flaws. That’s a bonus for beginners. Pair this wall with simple furniture. Too much pattern nearby can clash. Living rooms and home offices suit this look well. Want a softer tone? Try charcoal instead of pure black. Rental-friendly trick: mount mirrors to plywood, then hang the full panel with Z-clips. That limits wall damage later. Industrial style loves contrast, so add warm lamps nearby. The reflection keeps the room from feeling dark.
3. Dollar Tree Ultra-Budget Mirror Wall
This one is all about cost control. Dollar Tree mirrors vary slightly, so sort them before installing. Lay everything on the floor first. Adjust spacing until it feels right. Expect small imperfections. That’s part of the charm. Use extra tape to stop sliding while adhesive dries. Lightweight mirrors work best for renters or quick updates. Stick to smaller sections instead of full walls. Entryways and hallways shine here. Keep frames minimal or remove them entirely. Clean edges make the wall feel calmer. Avoid textured paint unless you add more adhesive. Give the glue at least 24 hours. Don’t rush. For under $20, the visual change feels dramatic. Add a narrow console table below for balance.
4. Boho Mirror Wall With Wood Spacers
This style feels relaxed and warm. Natural wood strips create breathing room between mirrors. Leave the wood raw or stain lightly. Measure once. Cut evenly. Uneven spacers show fast. Install mirrors first, then slot spacers between rows. ½-inch wood works well visually. Boho rooms benefit from softer reflections, so avoid harsh lighting. Use table lamps or filtered daylight. This wall pairs nicely with linen bedding and woven rugs. Budget tip: use paint stir sticks from hardware stores. They’re cheap and consistent. Seal wood lightly to prevent warping. The mix of reflection and texture keeps the wall from feeling cold.
5. Frameless Quick-Install Mirror Wall
Speed matters here. Frameless installs skip extra steps and look sharp. Smooth walls are best. Clean the surface fully. Any dust weakens hold. Apply adhesive in small dots, not lines. This avoids squeeze-out. Start centered, then expand outward. Patience during drying saves heartbreak later. Don’t adjust once placed. That causes cracks. This look suits modern spaces and small rooms. Bedrooms and studios benefit most. Keep styling simple so reflections don’t feel chaotic. A single plant or lamp is enough. Maintenance is easy. Vinegar and microfiber keep glass clear. No frames. No fuss. Just light and space.
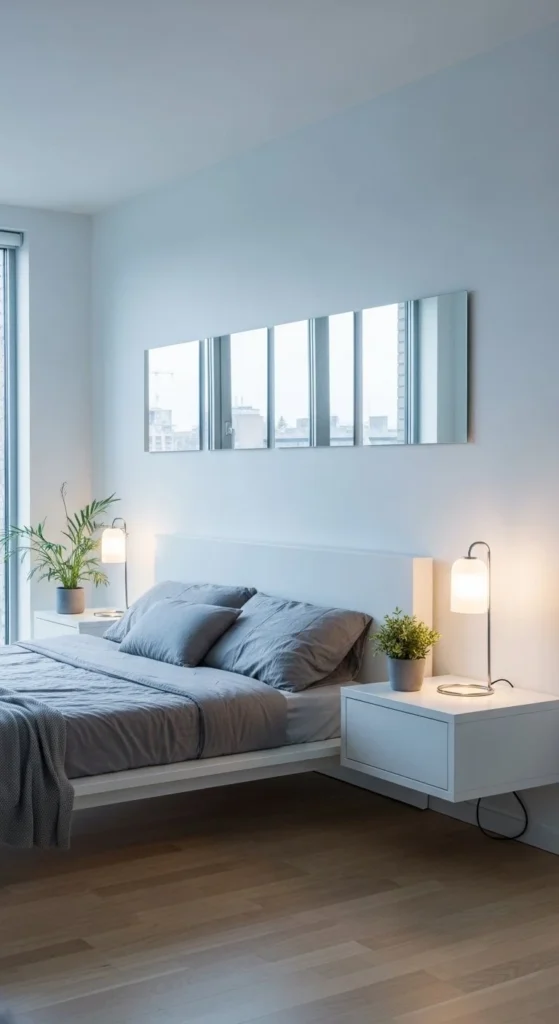
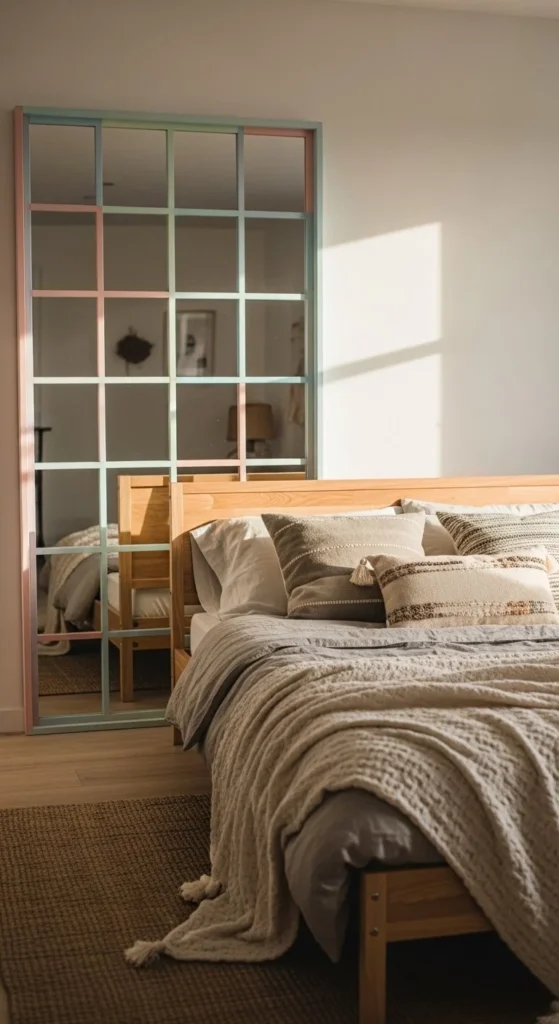
6. Bedroom Headboard Mirror Wall
A mirror wall behind the bed adds drama without crowding the room. It reflects light while keeping the focus centered. Use a shorter grid height so the wall doesn’t feel overpowering. Stop the mirrors just above the headboard. Soft lighting matters here. Warm bulbs reduce glare and harsh reflections at night. Frameless mirrors keep the look calm. If you want framing, go very thin. Budget tip: stick to a 3×4 or 4×4 grid instead of floor-to-ceiling. That still changes the room’s proportions. Install with tape plus adhesive so mirrors don’t shift. Let everything cure fully before placing pillows back. This style works best with simple bedding and muted colors. Too many patterns can feel busy once reflected. Clean lines win every time.
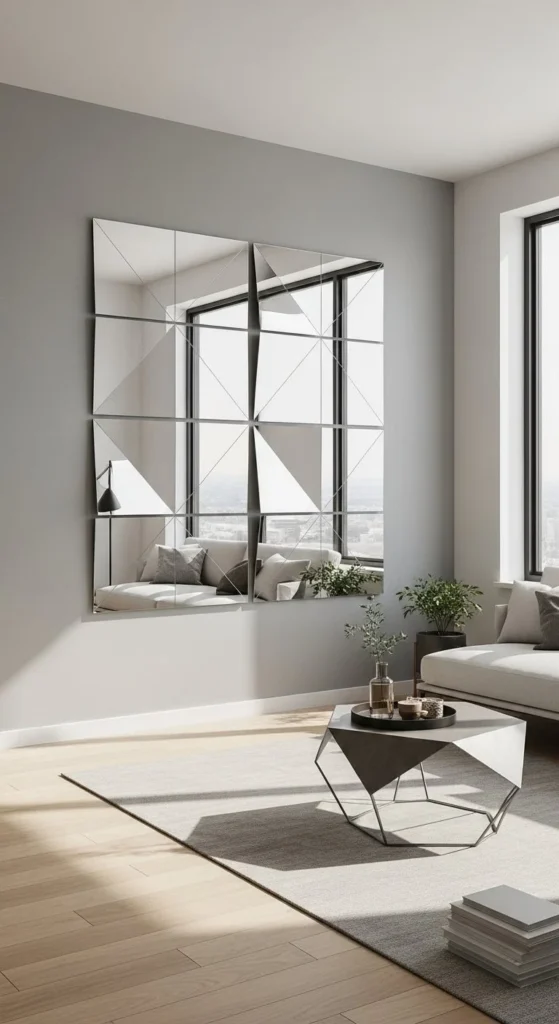
7. Living Room Statement Mirror Wall
This idea turns a plain wall into a focal point. Place the grid behind the sofa or across from windows. Reflections pull daylight deeper into the room. Measure carefully before starting. Living rooms show mistakes fast. Laser levels save time and stress. Use wooden spacers or tile spacers to keep gaps even. For large sections, consider mounting mirrors onto plywood first. Then hang the panel. It adds stability. Stick with neutral furniture so reflections don’t clash. A single bold plant looks great doubled in glass. Budget-friendly mirrors keep costs controlled even on bigger walls. Give adhesive a full day before leaning furniture back. Rushing here causes cracks.
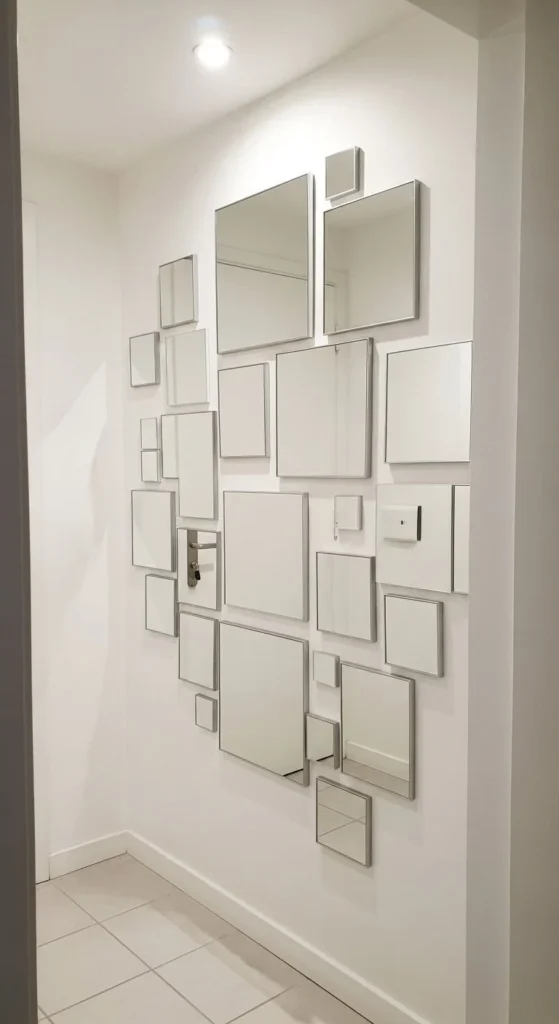
8. Narrow Hallway Mirror Grid
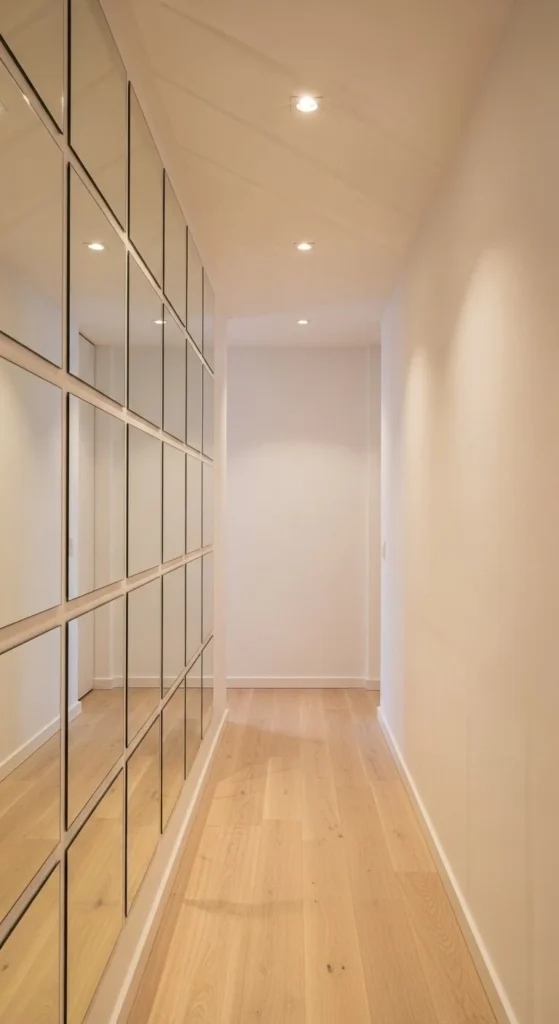
Hallways love mirrors. They stretch space visually and bounce light where windows can’t reach. Use a vertical grid to emphasize height. Keep gaps consistent so the wall doesn’t feel chaotic. Lightweight mirrors work best in tight spaces. They’re easier to handle solo. Start from the top corner and work down. That prevents creeping misalignment. Avoid heavy frames here. Simple edges keep the hallway feeling open. Budget trick: limit mirrors to one side only. That still changes how the space feels. Clean often. Hallways collect fingerprints quickly. Microfiber cloths handle daily upkeep without streaks.
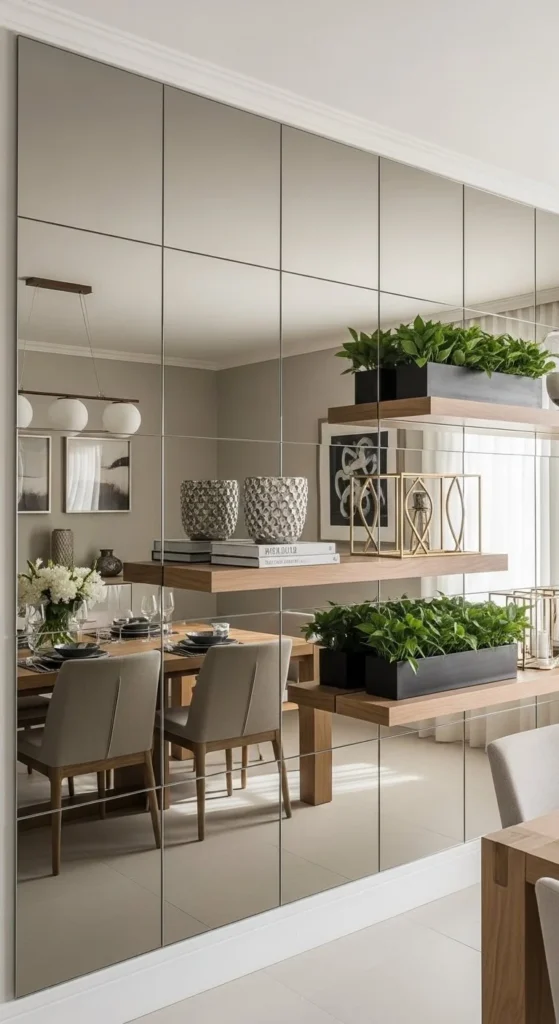
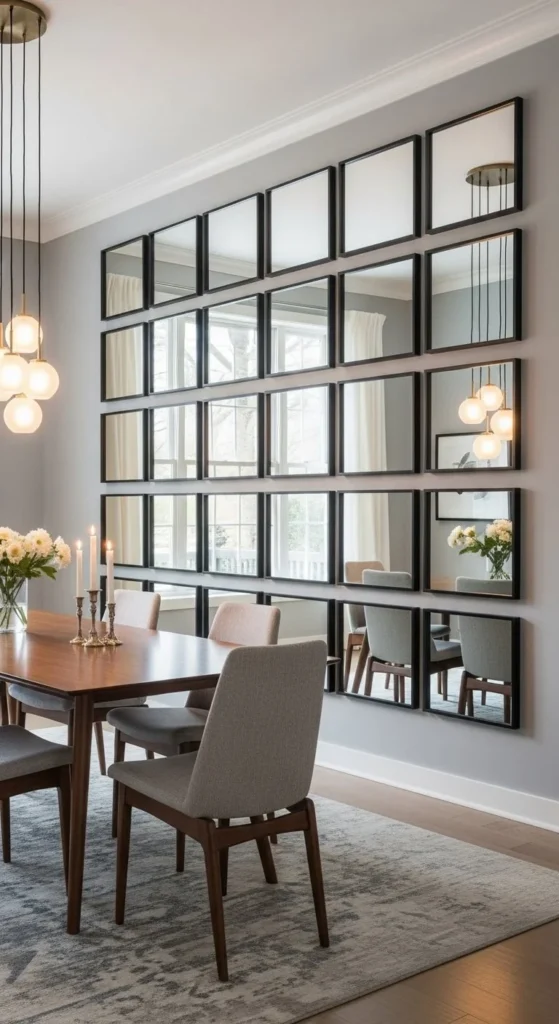
9. Dining Room Grid Mirror Wall
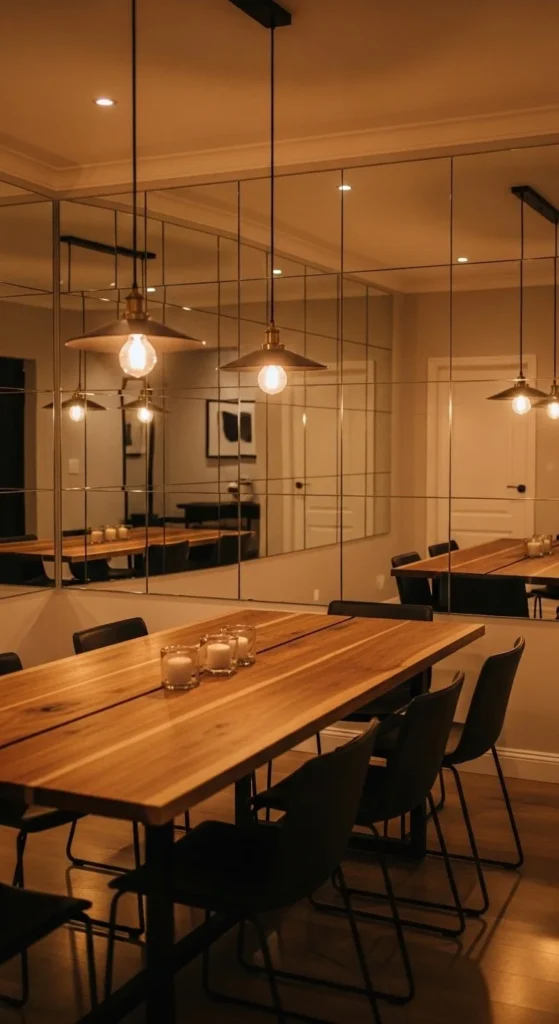
Mirror walls in dining rooms feel bold and social. They reflect candlelight and pendant lamps beautifully. Place the grid on the wall opposite the table for balance. Keep spacing tight for a polished look. Black or dark trim pairs well with dining furniture. Paint frames before installing to avoid mess. Budget option: use paint stir sticks as faux frames. Seal them lightly. Avoid placing mirrors too low where chairs might bump. Mount slightly above chair-back height. This keeps glass safe. Reflections make smaller dining rooms feel wider during gatherings. Stick with simple table settings so reflections don’t look cluttered.
10. Rental-Friendly Removable Mirror Wall
Renters can still play. Use removable mounting strips rated for glass. Test one mirror first. Wait overnight. If it holds, continue. Keep grids smaller to reduce risk. Lighter mirrors are safer for this method. Avoid textured walls unless strips are designed for them. This setup works well in bedrooms or home offices. When it’s time to move, remove slowly and evenly. No yanking. Clean residue gently. Budget mirrors keep replacement stress low if one breaks. The visual effect still delivers light and space without permanent damage. Smart, simple, temporary.
11. Plywood-Backed Large Mirror Panel
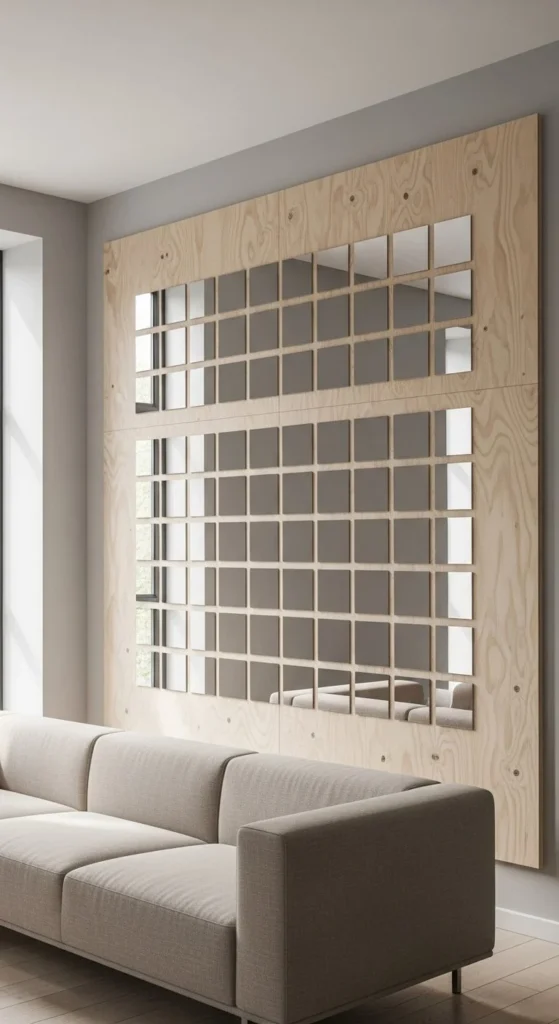
This method works well for bigger installs. Mount mirrors onto plywood first, then hang the full panel. It keeps everything aligned and stable. Use construction adhesive sparingly. Too much causes squeeze-out. Mark grid lines directly on plywood before attaching mirrors. That saves time. Once cured, hang the panel with Z-clips or heavy-duty anchors. This setup suits living rooms and dining areas. Budget tip: plywood offcuts often cost less. Sand edges smooth. Paint backing to match the wall so gaps disappear visually. This approach also makes removal easier later. One solid piece. Clean look. Less wall stress.
12. LED-Backlit Mirror Grid Wall
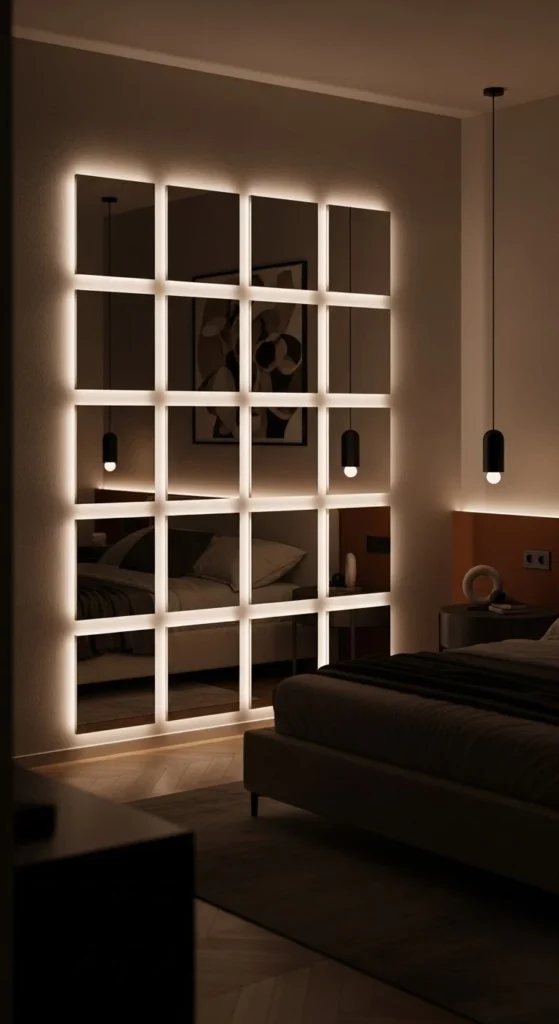
Lighting changes everything here. LED strips behind mirrors create glow without glare. Stick strips along the backing or spacer edges. Choose warm white for bedrooms. Cool tones feel harsh at night. Test lighting before final mount. Adjust brightness early. Keep wiring hidden behind mirrors or frames. This style suits modern and luxury-inspired rooms. Budget LEDs work fine if evenly spaced. Avoid hotspots. Dimmers add control without complexity. Reflections soften the glow and make walls feel deeper. Simple mirrors. Strong mood.
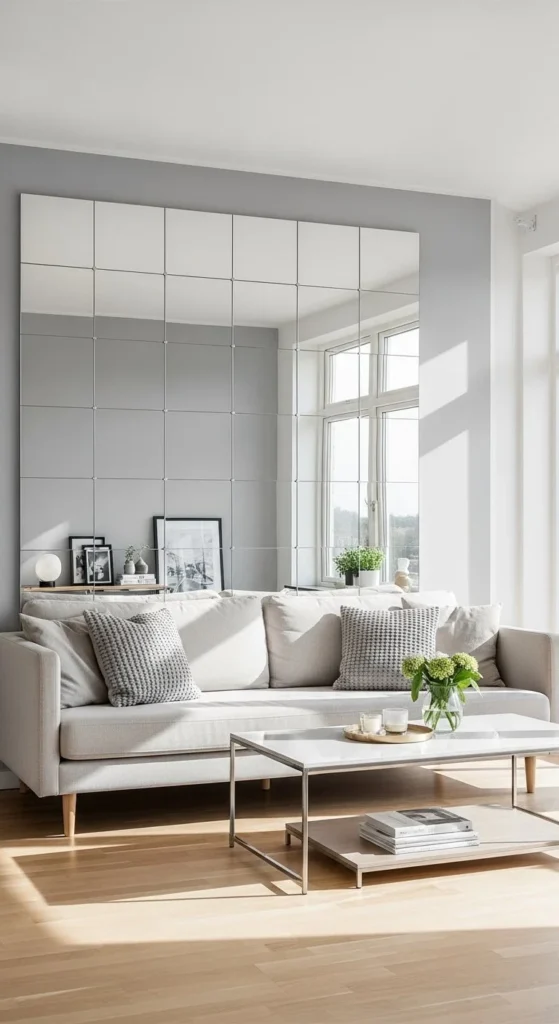
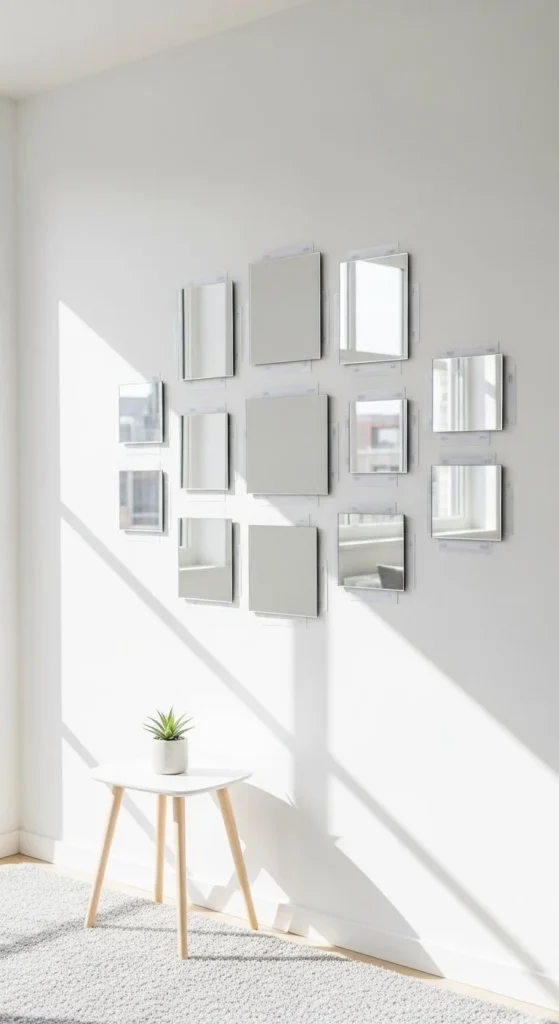
13. Minimal Scandinavian Mirror Wall
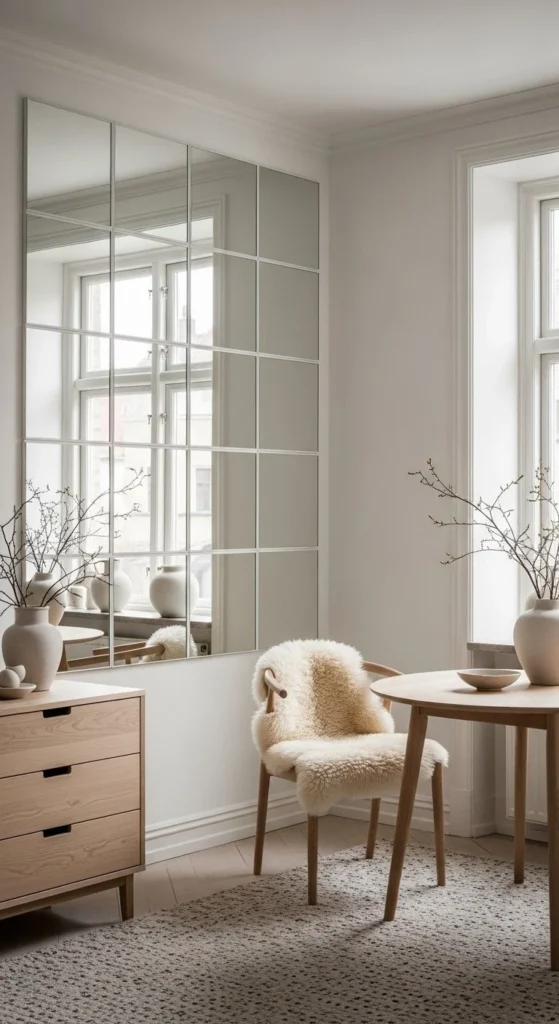
This look stays light and restrained. Frameless mirrors keep lines clean. Pale wood furniture reflects gently without contrast. Stick to even spacing and symmetry. Scandinavian rooms show imbalance quickly. Use a level on every row. Budget tip: smaller grids still change room proportions. Add mirrors only where light hits naturally. Avoid heavy decor nearby. A single plant or soft throw is enough. This wall works well in bedrooms or reading spaces. Calm reflections. Simple shapes. Nothing loud.
14. Boho-Lux Mirror Wall With Mixed Textures
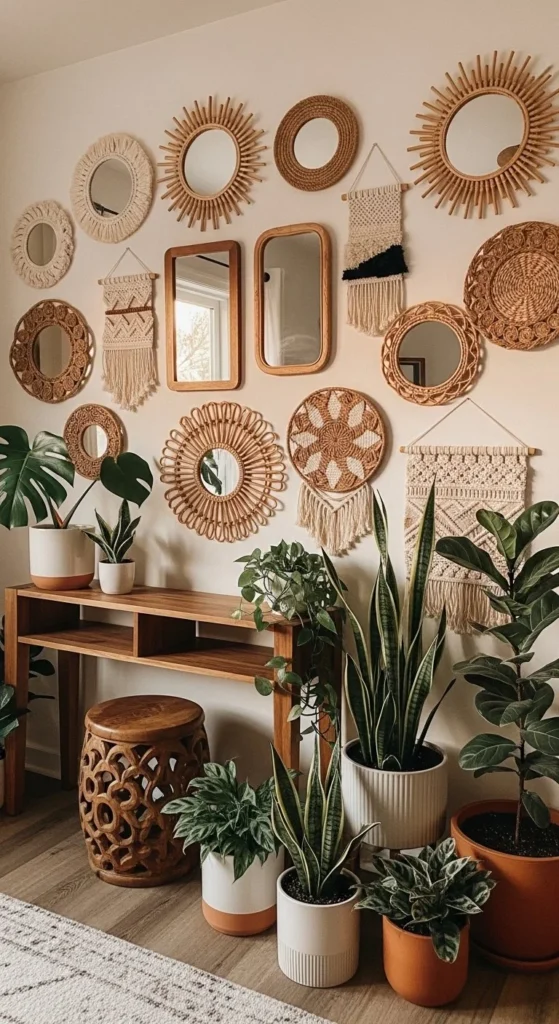
This style mixes reflection with texture. Place mirrors in a grid, then surround them with woven accents or wood details. Keep mirrors centered so textures don’t overwhelm. Balance matters more than symmetry here. Budget hack: thrifted wood frames repainted to match. Keep colors warm. Avoid shiny metals nearby. Reflections stay soft when lighting is diffused. Living rooms and bedrooms suit this blend. The wall feels layered without feeling busy.
15. Entryway Mirror Feature Wall
Entryways benefit fast from mirrors. Light reflects inward. The space feels wider on arrival. Keep the grid centered above a console table. Mount mirrors higher to avoid bags and keys hitting glass. Frameless designs keep it sleek. Budget mirrors work well here due to lighter use. Add a single lamp or bowl below for function. Clean often. Entryways show smudges quickly. The payoff comes every time you walk in. Small wall. Big shift.
16. Eclectic Shape Mirror Wall
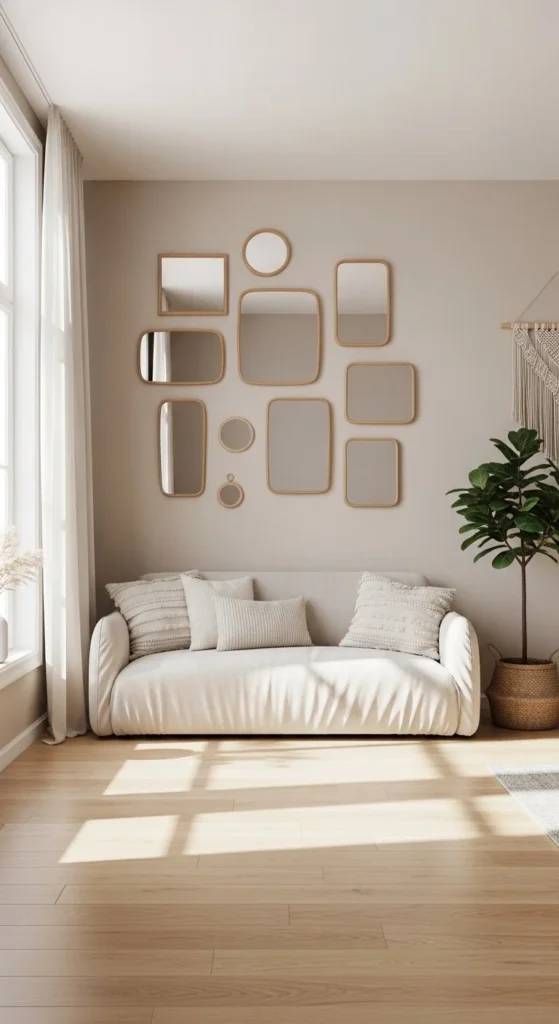
Mixing shapes adds personality. Combine squares with rectangles and small circles for a playful grid. Plan layout on the floor first to see balance. Use painter’s tape on the wall as a guide. Start from a central anchor mirror and expand outward. Budget tip: leftover mirrors from other projects work perfectly. Avoid overloading one area. Keep frames thin or frameless for cohesion. Living rooms and studies benefit most. Reflections vary with shape, adding depth. Clean regularly with microfiber. The eclectic vibe keeps walls interesting without cluttering space.
17. Outdoor Patio Mirror Wall
Mirrors outdoors bounce light and extend small patios visually. Use weather-resistant adhesives for safety. Mount mirrors on smooth stucco, wood panels, or metal frames. Spacing should be consistent — ½-inch works well. Lightweight mirrors reduce risk in wind. Add plants or climbing vines nearby; reflections double greenery impact. Budget option: mirror tiles from hardware stores. Avoid heavy panels unless you have support. Clean weekly to remove dust and water spots. The wall makes patios feel larger and more vibrant. Mix textures for charm: wood, metal, and glass play well together.
18. Bathroom Mirror Grid Wall
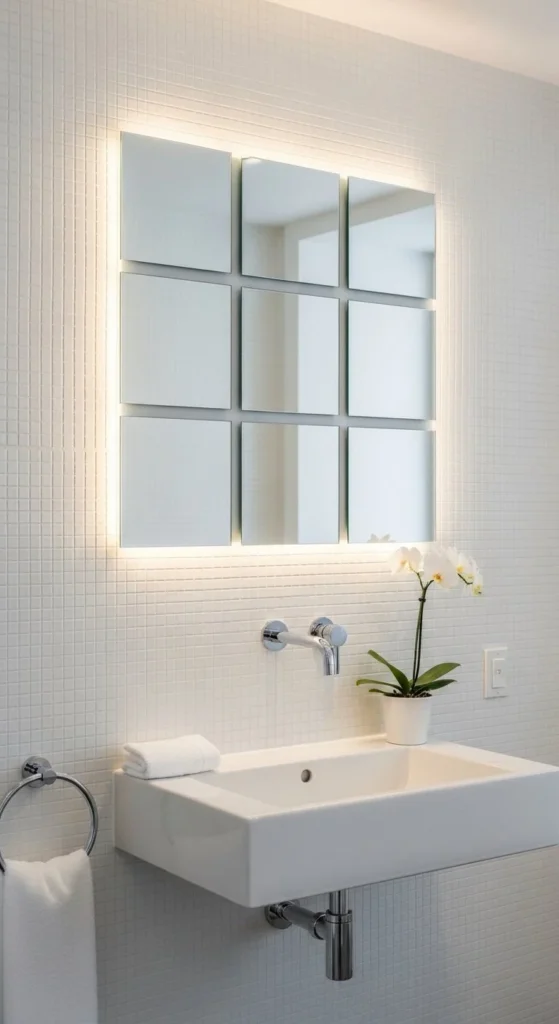
Bathrooms are tricky but rewarding. Stick to smaller, lightweight mirrors. Adhesive must be water-resistant. Let glue cure fully before using mirrors. Frameless edges minimize mold trap spots. Budget mirrors work well if mounted carefully. Keep spacing uniform for a clean look. Avoid textured or uneven walls. Vertical alignment above sinks helps reflect light and make small bathrooms appear wider. Soft lighting prevents glare on glass. Mirrors plus subtle accents like soap dishes or plants keep the space airy. Small changes, big visual impact.
19. Mixed Metal Frame Mirror Wall
Adding different frame metals brings subtle sophistication. Keep frames thin to avoid clutter. Lay mirrors on the floor first to mix metals evenly. Painter’s tape grid guides spacing before mounting. Budget tip: spray paint older frames for color consistency. Avoid shiny reflections next to lamps to prevent hotspots. Works well in living rooms and dining spaces. Reflections add depth while metal frames create contrast. Lightweight mirrors are easier to handle when mixing materials. Layered tones feel intentional and not chaotic. Clean edges maintain clarity. One wall transforms the room.
20. Mirror Wall With Spray-Painted Trim
Customize with spray-painted trim. Choose pastel or muted tones for subtle flair. Mask mirrors carefully before painting to avoid overspray. Dry fully before mounting. Thin wooden strips or leftover sticks work as frames. Budget hack: reuse IKEA LOTS mirrors and paint inexpensive stir sticks as trim. Maintain uniform spacing using spacers or tape. Bedrooms benefit most from this approach. Mirrors keep light soft while color adds warmth. Avoid glossy finishes unless you want reflections of the trim itself. One accent wall with pastel trim feels playful yet calm. Reflections stay balanced.
21. Geometric Diamond Mirror Wall
Rotate mirrors into diamonds for a geometric twist. Use a laser level to keep angles consistent. Spacers or cardboard templates help maintain even gaps. Budget tip: small IKEA LOTS mirrors work perfectly when rotated. Avoid overly large diamonds for first-time DIYers; start small. This wall suits living rooms, hallways, or bedrooms. Keep surrounding decor minimal so the pattern pops. Soft lighting prevents harsh reflections. Easy to wipe down with microfiber. Diamonds bring movement to an otherwise static grid. The visual depth makes rooms feel larger instantly.
22. Mirror Wall With Floating Shelves
Combine mirrors and shelves for dual functionality. Install mirrors first, then mount floating shelves over selected rows. Measure carefully to prevent overlaps. Use lightweight mirrors to reduce stress on brackets. Budget hack: IKEA LOTS plus inexpensive pine boards. Shelves reflect in mirrors, doubling visual depth. Works well in dining rooms or kitchens. Keep shelf items minimal to avoid chaos in reflections. Even spacing between mirrors and shelves is key. Clean mirrored areas often. The combo enhances both storage and openness.
23. Small Bathroom Vanity Mirror Wall
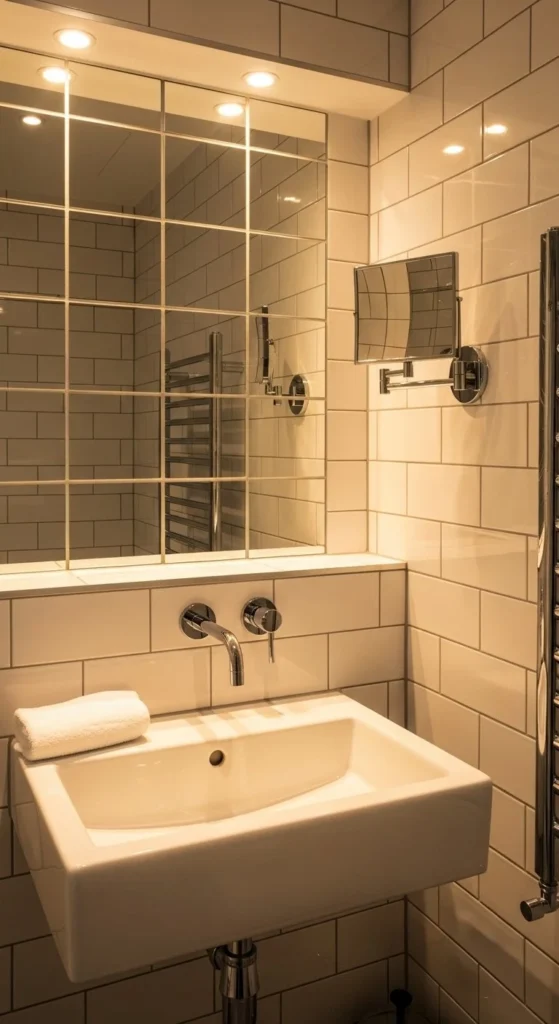
Small bathrooms gain depth with mirror walls. Use tiny, lightweight squares to avoid excess weight. Adhesive must be waterproof, especially near sinks. Stick to frameless mirrors for a clean aesthetic. Budget-friendly option: Dollar Tree mirrors arranged in a 2×4 or 3×3 grid. Install with double-sided tape first, then secure with Liquid Nails. Keep spacing consistent for a tidy look. Reflective walls amplify natural light from windows. Small touches like a plant or hand towel reflected subtly enhance space. Mirrors make tight areas feel airy and less claustrophobic.
24. Corner Mirror Wall Illusion

Mirrors in corners visually expand rooms dramatically. Cover both adjacent walls for a near 90-degree reflection. Start from the top corner, using spacers to maintain consistent gaps. Use lightweight mirrors to ease handling. Budget hack: small IKEA LOTS mirrors fit corners better than large panels. Avoid frames that interfere with tight angles. This setup works well in bedrooms, home offices, or small living areas. Soft, diffused lighting prevents reflections from becoming overwhelming. Clean regularly to keep corners bright. The corner illusion makes rooms feel twice as wide.
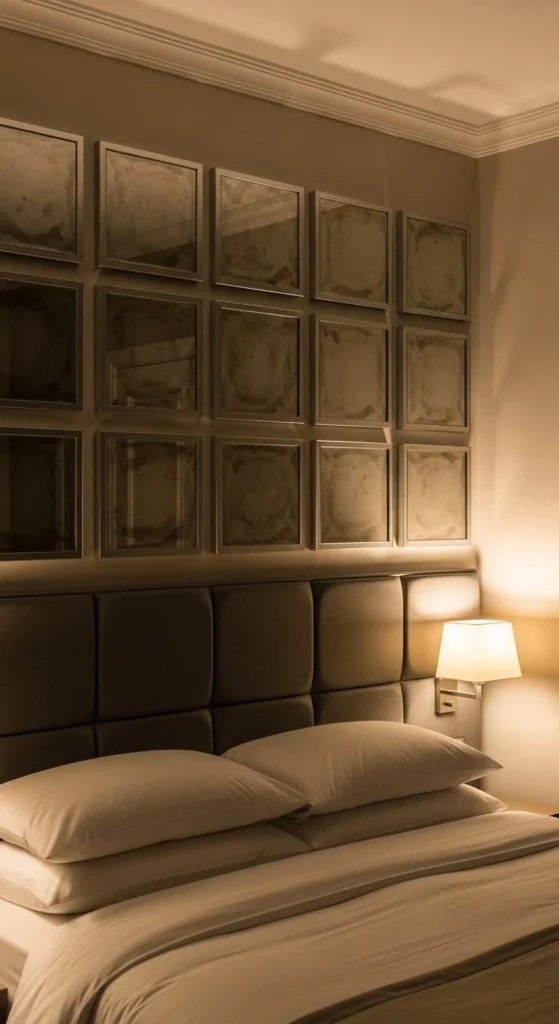
25. Vintage-Inspired Mirror Grid
A vintage twist adds warmth. Distressed or silvered mirrors create character. Mix in new and thrifted frames to control cost. Arrange in a tight 3×4 or 4×4 grid. Keep spacing even to maintain balance. Living rooms and bedrooms suit this style best. Use painter’s tape to map placement before gluing. Budget tip: spray paint thrifted frames for uniformity. Avoid overcrowding; let wall breathe. Soft lighting prevents reflections from appearing too harsh. The mirrored grid adds depth while maintaining a cozy, lived-in feel.
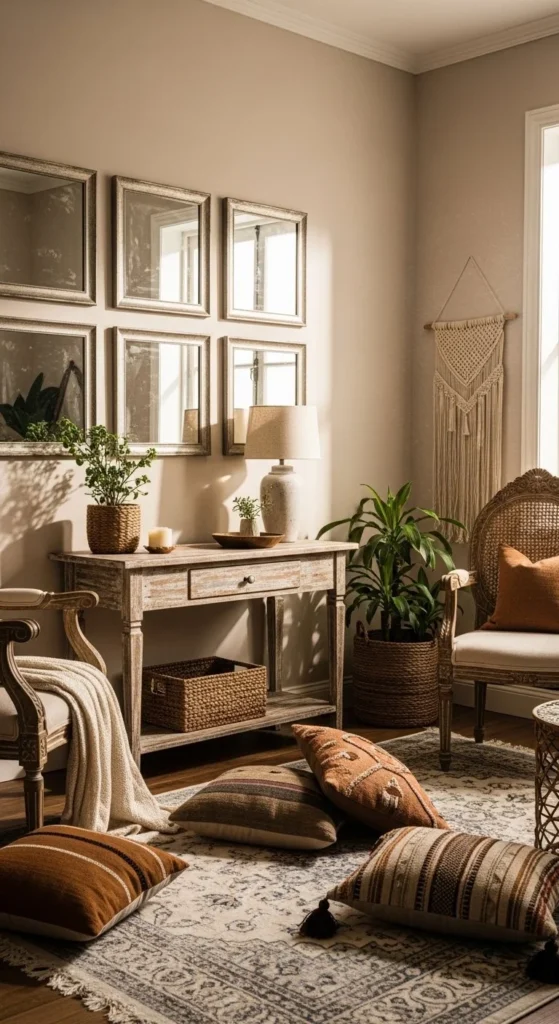
26. Mirror Wall With Integrated Art
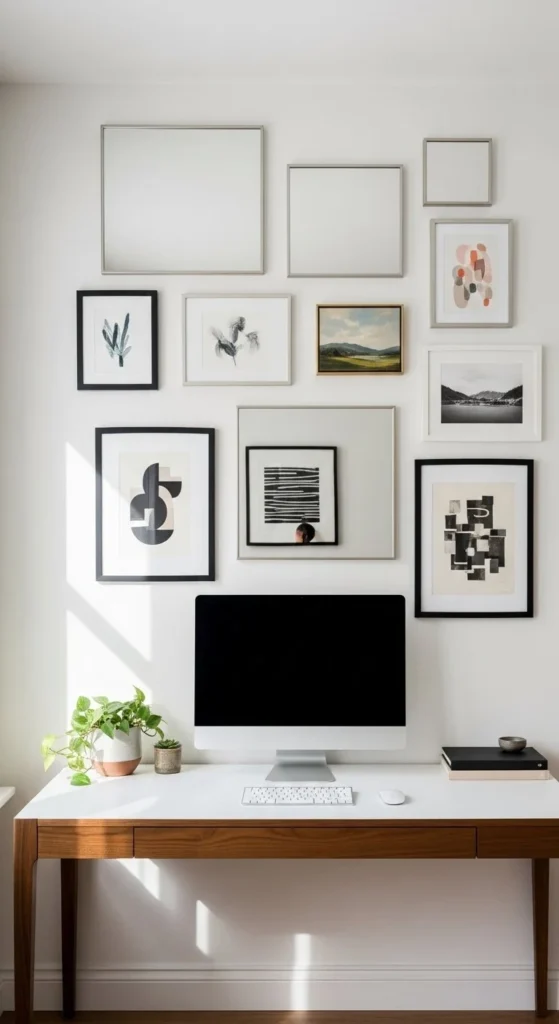
Mix mirrors and art for visual interest. Position mirrors around small framed pieces to extend their presence. Plan layout on the floor before mounting. Use painter’s tape as a guide for alignment. Budget tip: Dollar Tree mirrors can be paired with inexpensive frames. Works in home offices or creative spaces. Keep frames thin to avoid overpowering artwork. Mirrors double the artwork’s visual impact while reflecting light. Clean edges and even gaps maintain polished results. Simple decor prevents reflections from looking cluttered. This combo feels dynamic yet functional.
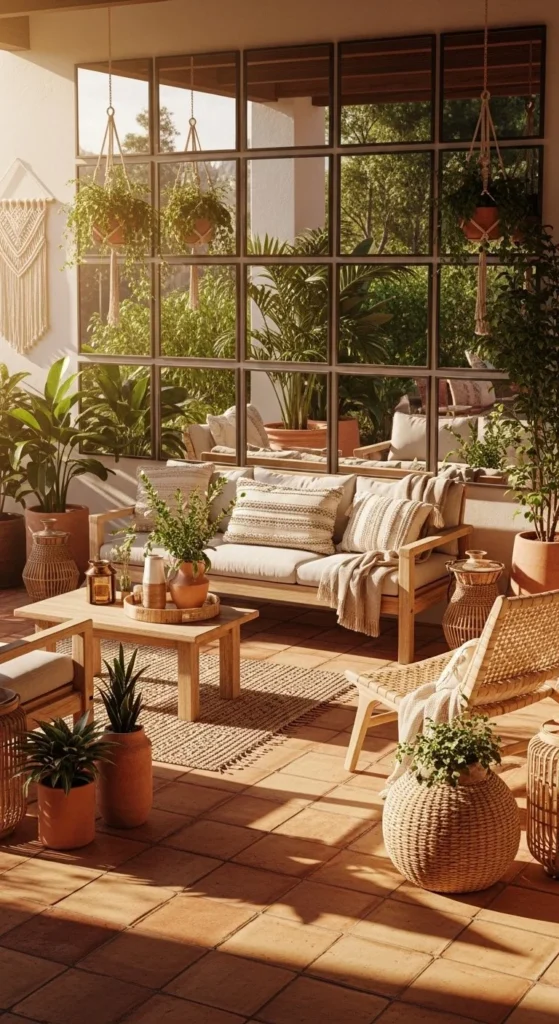
27. Boho Mirror Wall With Hanging Plants
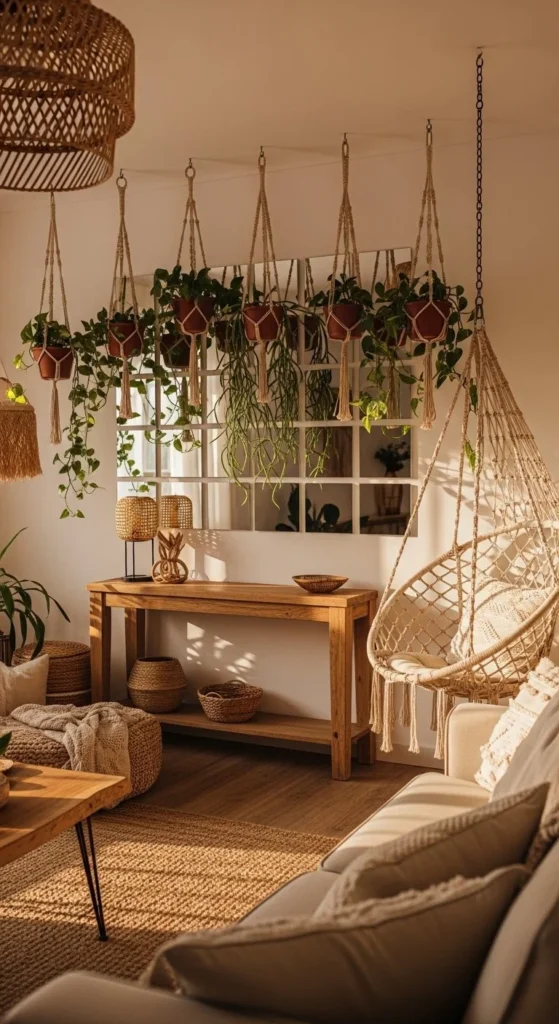
Add greenery for life. Mirrors reflect hanging plants, multiplying visual texture. Keep spacing consistent between mirrors and plants. Budget hack: small mirrors plus inexpensive jute hangers. Mount plants on hooks above the mirror grid. Soft, diffused lighting prevents glare and harsh shadows. This works in living rooms, bedrooms, or sunrooms. Mirrors expand space while plants soften reflections. Avoid overloading the wall. One or two plants per row maintain balance. Clean mirrors often; soil dust can accumulate. Reflections and greenery together create warmth and depth.
28. Black Grid Framed Statement Wall
Black frames add structure and drama. Use thin slats for a modern statement. Install mirrors first, then attach frames using glue or small brads. Budget tip: IKEA LOTS plus painted stir sticks are perfect. Keep ½-inch spacing consistent. Works best in dining rooms, living rooms, or entryways. Reflections create depth; black frames add contrast. Soft, warm lighting prevents the wall from feeling cold. This style pairs with neutral furniture and wooden accents. One accent wall transforms the entire space visually. Clean regularly to maintain shine and clarity.

Leave a Reply