
1. Dollar Store Grid Mirror Wall
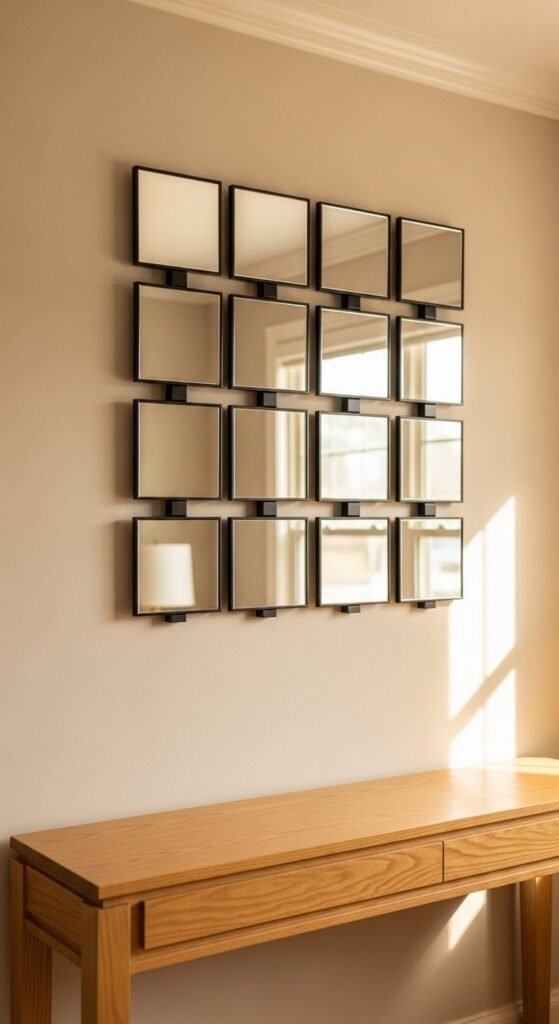
This mirror grid works well in small rooms where light feels limited. Dollar store mirrors keep costs low and make mistakes stress-free. Mount them on a foam board first so spacing stays even. Then hang the full panel instead of each mirror separately. Hot glue works fast, but double-sided mounting tape helps with clean removal later. Keep frames identical for a crisp look, or spray paint them matte black or champagne gold for contrast. This layout looks best above consoles, sofas, or entry tables. Stick to symmetry so reflections don’t feel chaotic. Mask edges before painting to avoid cloudy glass. If gaps feel harsh, thin trim strips can soften the grid without raising the budget.
2. Sunburst Stick Frame Mirror
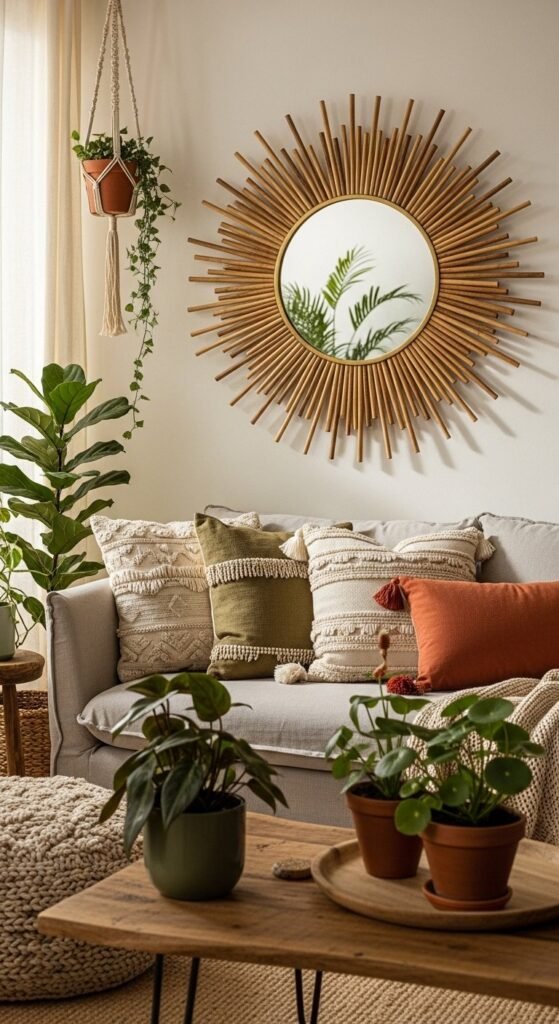
Sunburst mirrors lean retro but still feel current when paired with natural textures. Wooden skewers, craft sticks, or thin shims work well. Lay everything out before gluing so spacing stays balanced. Paint before assembly to avoid drips on glass. Gold spray paint adds instant drama, while raw wood keeps it casual. Foam board backing helps hold the radial shape steady. Hang this piece where light hits it directly so shadows show off the texture. Bedrooms, hallways, and above dressers work especially well. If symmetry feels intimidating, slightly uneven spacing gives it an artsy look instead of a stiff one.
3. Gold Splatter Art Mirror Frame
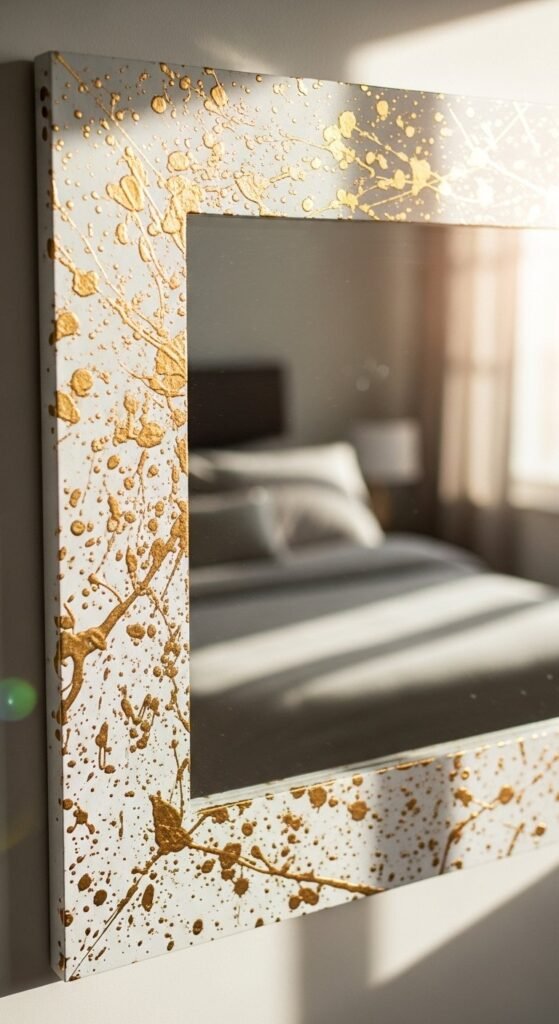
Splatter frames double as wall art and decor. Start with a plain frame or MDF trim glued around a frameless mirror. Protect the glass using painter’s tape and plastic wrap. Flick gold paint using a stiff brush or toothbrush for better control. Less paint gives cleaner results, so build layers slowly. This style pairs well with modern or eclectic rooms. Keep surrounding decor simple so the mirror stands out. If gold feels bold, try black on white or bronze on taupe. Let everything dry fully before removing tape to keep edges crisp.
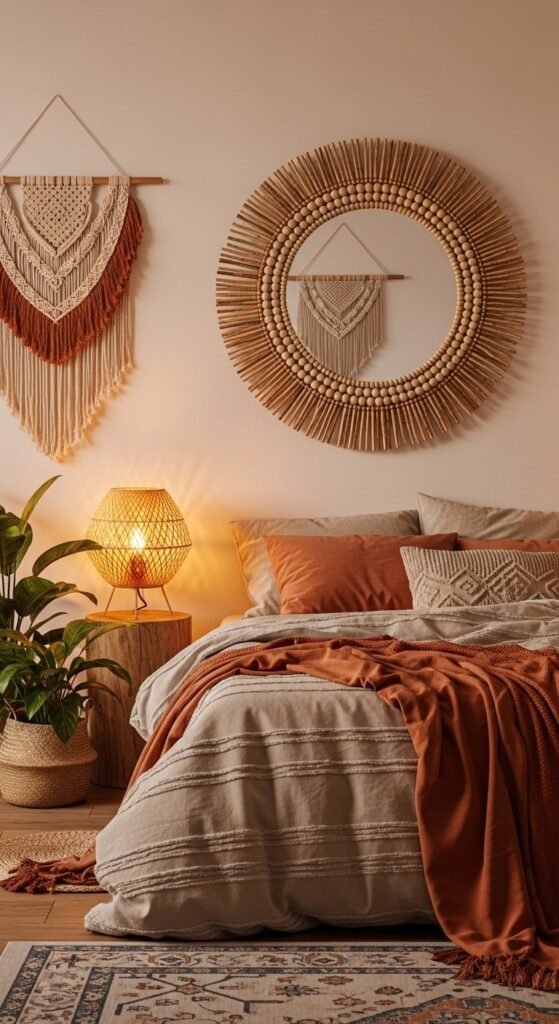
4. Boho Yarn-Wrapped Round Mirror
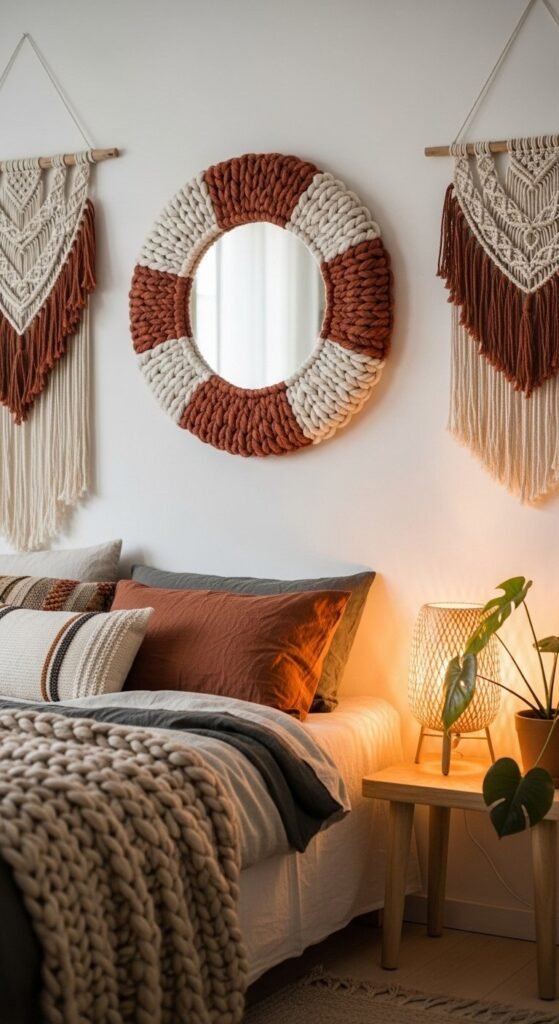
Yarn-wrapped mirrors feel soft and tactile. They work best with small to medium mirrors. Use hot glue in short sections so yarn stays tight. Neutral yarn keeps the look calm, while color blocking adds personality. Layering yarn thickness creates depth without tools. This style fits well in bedrooms, reading corners, or nurseries. Pair it with woven baskets or linen textiles. Avoid humid areas unless yarn is sealed. For extra detail, tuck beads or knots into the wrap pattern. Lightweight frames make hanging simple with basic hooks.
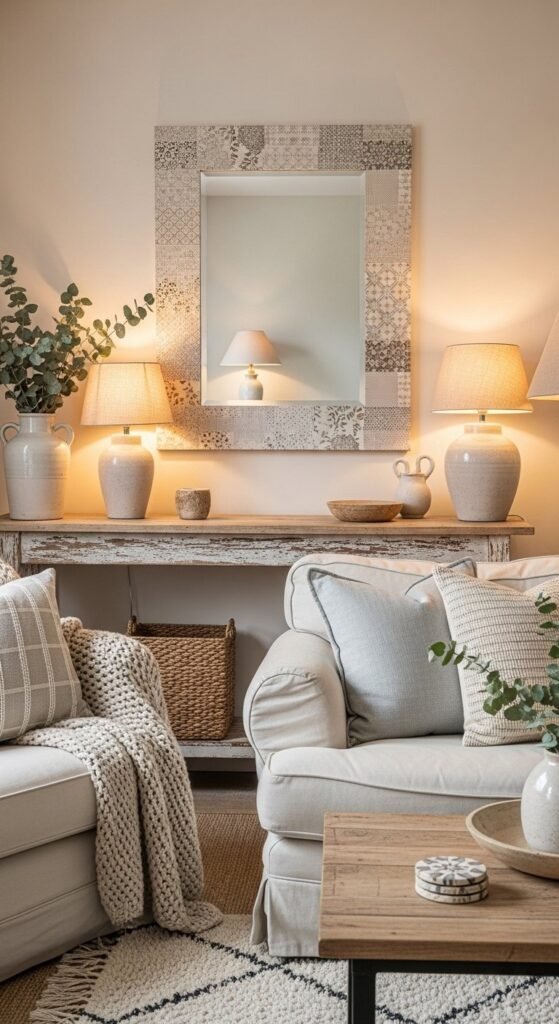
5. Mosaic Tile Statement Mirror
Mosaic mirrors bring sparkle without expensive materials. Craft mirrors or acrylic sheets are safer than real glass. Break pieces inside a cloth to control edges. Arrange patterns dry before gluing so spacing feels intentional. Epoxy or strong craft glue keeps tiles secure. Grout color changes the whole mood—white feels clean, charcoal feels bold. This mirror works as a focal piece, not background decor. Entryways and stair landings show it off best. Seal edges once finished so reflections stay sharp over time.
6. Spray-Painted Builder-Grade Mirror Frame
Builder-grade mirrors look plain but respond well to simple framing. Lightweight trim moulding keeps things manageable. Measure twice and dry-fit before gluing anything down. Liquid adhesive made for glass holds better than craft glue. Paint the trim separately so edges stay sharp. Satin or matte finishes hide flaws better than gloss. This upgrade works well in bathrooms, rentals, and hallways. Keep the frame width proportional to the mirror size. Narrow trim feels modern, thicker trim leans classic. Let adhesive cure fully before touching or hanging accessories nearby. This project reads polished without expensive materials.
7. Rope-Wrapped Coastal Mirror

Rope frames bring texture without paint or tools. Sisal or jute rope works well and stays flexible. Start wrapping from the bottom so seams stay hidden. Hot glue in short sections to keep alignment tight. Natural rope softens reflective surfaces, making rooms feel calmer. This style pairs nicely with light walls and woven accents. Entryways and bathrooms benefit most from the coastal look. Avoid placing near direct moisture unless sealed. If full rope feels heavy, try alternating rope and wood beads for variation.
8. Air-Dry Clay Sculpted Mirror Border
Clay borders allow total shape control. Roll clay evenly and press directly onto a backing board instead of glass. Sculpt waves, ridges, or floral patterns using simple tools. Let it dry fully before sanding rough spots. Paint with acrylic once hardened. Soft neutral colors highlight texture better than dark tones. This mirror reads like wall art, not an accessory. Works well in creative spaces or bedrooms. Keep designs slightly imperfect for character. Seal with clear coat for durability.
9. Recycled CD Mosaic Mirror
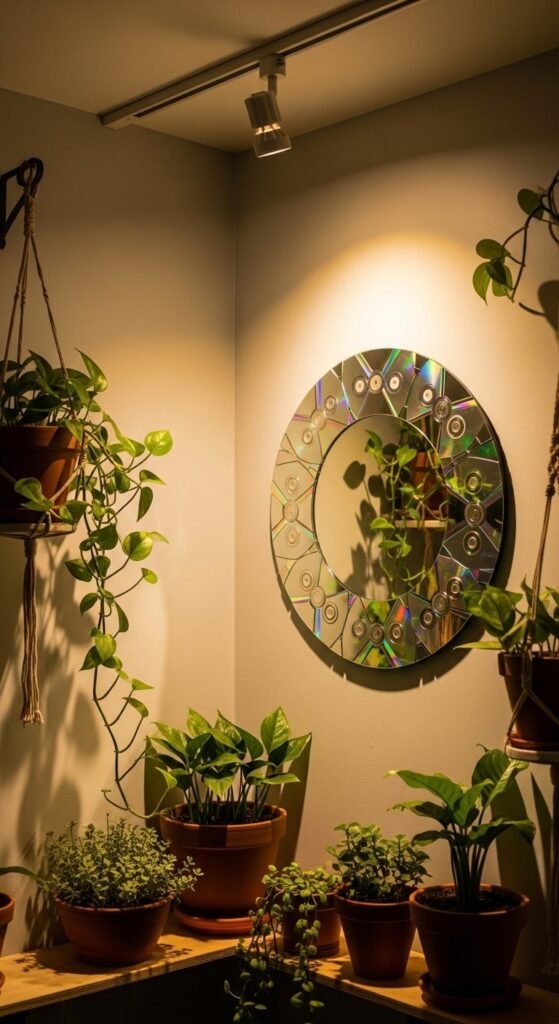
Old CDs add shine without added cost. Cut pieces carefully using scissors and protective gloves. Arrange fragments face-up for reflective sparkle. Strong craft glue holds lightweight plastic securely. Angle pieces slightly to catch light throughout the day. This frame suits small mirrors and art walls. Use dark grout to sharpen contrast. Keep surrounding decor simple so reflections stay readable. This project fits creative rooms and teen spaces well.
10. Stick-and-Bead Boho Mirror
This mirror combines structure with softness. Craft sticks form the base, while beads add rhythm. Paint sticks before assembly for cleaner results. Glue beads last to control spacing. Repeating patterns keep it calm, even with mixed materials. Lightweight designs hang easily without anchors. This style works well above dressers or reading corners. Stick to warm wood tones or muted paint shades. Avoid overcrowding so the mirror surface stays visible.
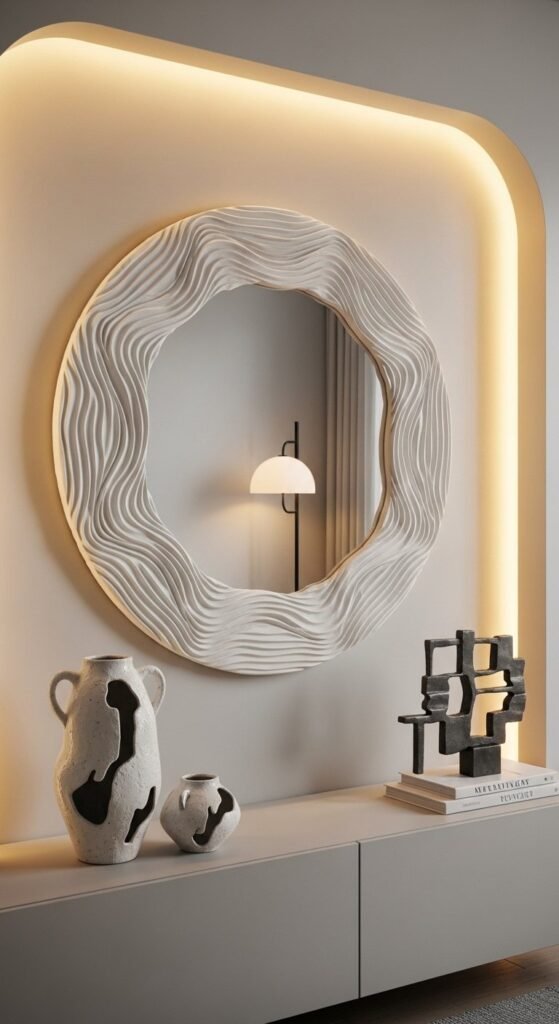
11. Wavy Asymmetrical Blob Mirror Frame
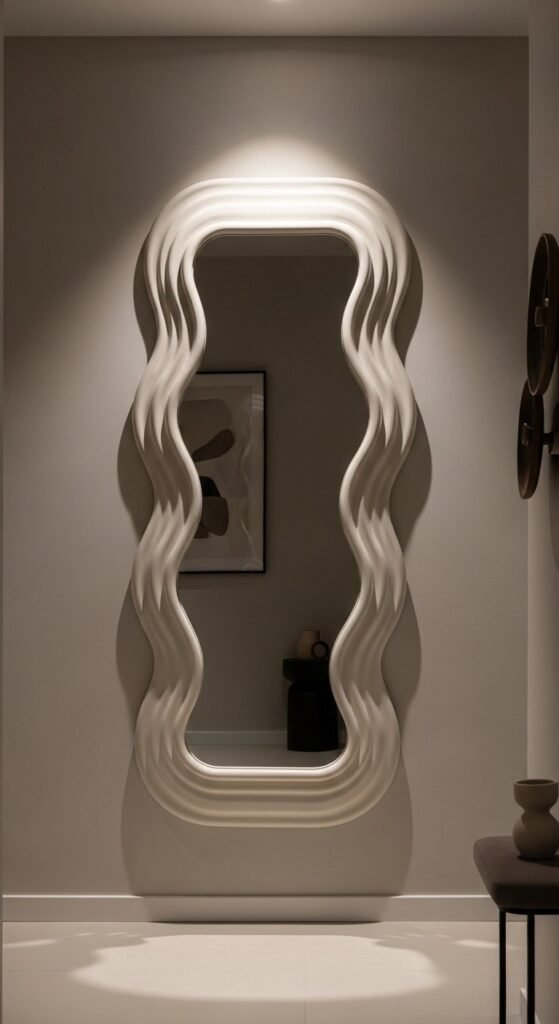
Wavy frames bring movement without loud color. Cut the base from foam board or thin plywood, then build edges with joint compound or clay. Sand lightly once dry. Paint with a soft neutral so curves stay readable. Uneven edges are part of the charm, so don’t over-correct. This style pairs well with minimal interiors and sculptural furniture. Hang it solo so the shape stands out. Hallways and dressing areas suit it best. Keep nearby decor simple to avoid visual clutter.
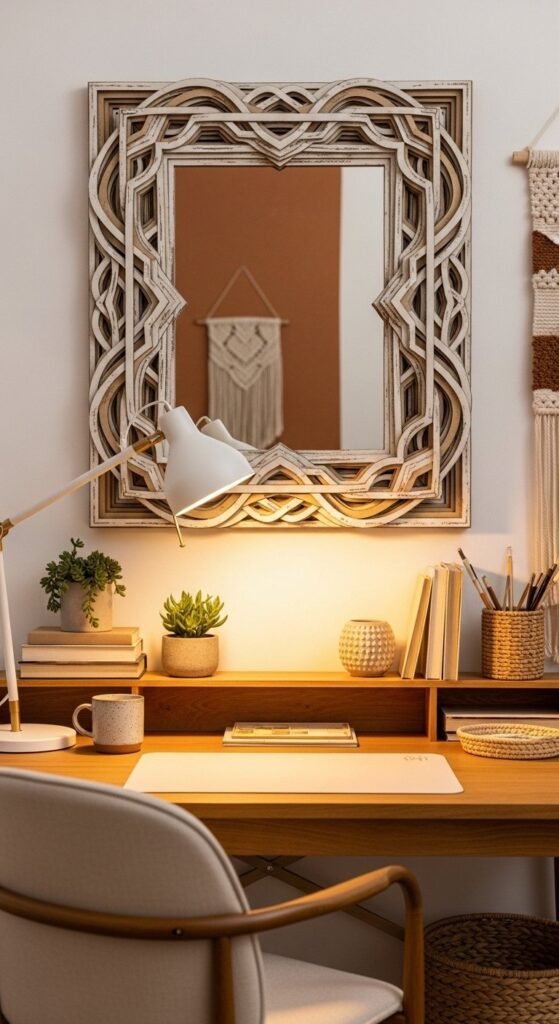
12. Lippan Art Mirror Frame
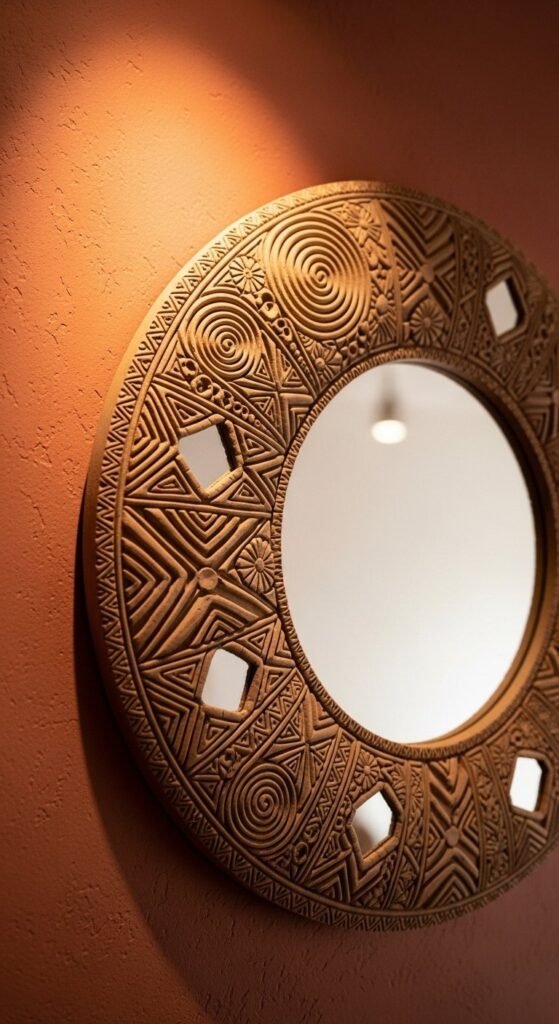
Lippan frames blend texture and shine. Use air-dry clay to build raised patterns around the mirror. Press small mirrors gently into the clay while it’s soft. Let everything cure before painting. White or clay-toned paint highlights detail. Symmetry keeps the design grounded, even with ornate patterns. This piece works as wall art more than utility. Living rooms and accent walls suit it well. Keep surrounding decor understated so craftsmanship stays front and center.
13. Egg Carton Floral Mirror Frame
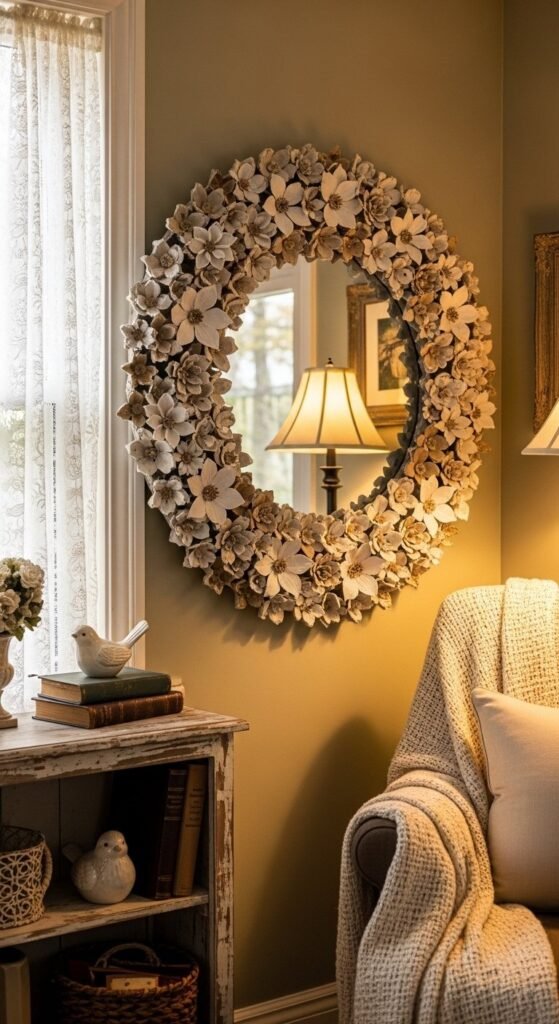
Egg cartons create lightweight sculptural flowers. Cut petals carefully and layer them for depth. Glue pieces onto cardboard backing, not the mirror itself. Paint once assembled for a cohesive look. Dry brushing adds dimension without heavy color. This frame fits cottage and romantic interiors. Keep color palettes neutral for balance. Seal with clear spray to protect the paper texture. Best used on small to medium mirrors.
14. Rustic Pallet Wood Mirror Frame
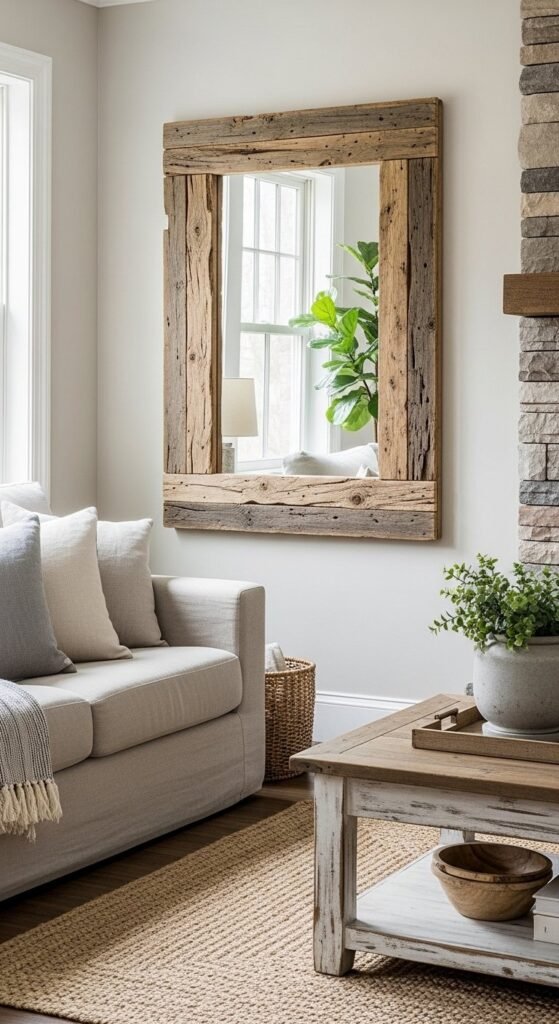
Pallet wood adds instant character. Sand lightly to remove splinters but keep grain visible. Cut boards evenly for clean corners. Wood glue and clamps help keep alignment steady. Natural imperfections add warmth, so avoid over-finishing. This frame pairs well with neutral walls and linen textures. Entryways and bathrooms handle this look well. Seal wood to prevent moisture damage. Keep the mirror size balanced so the frame doesn’t overpower it.
15. Gold Leaf Glam Mirror
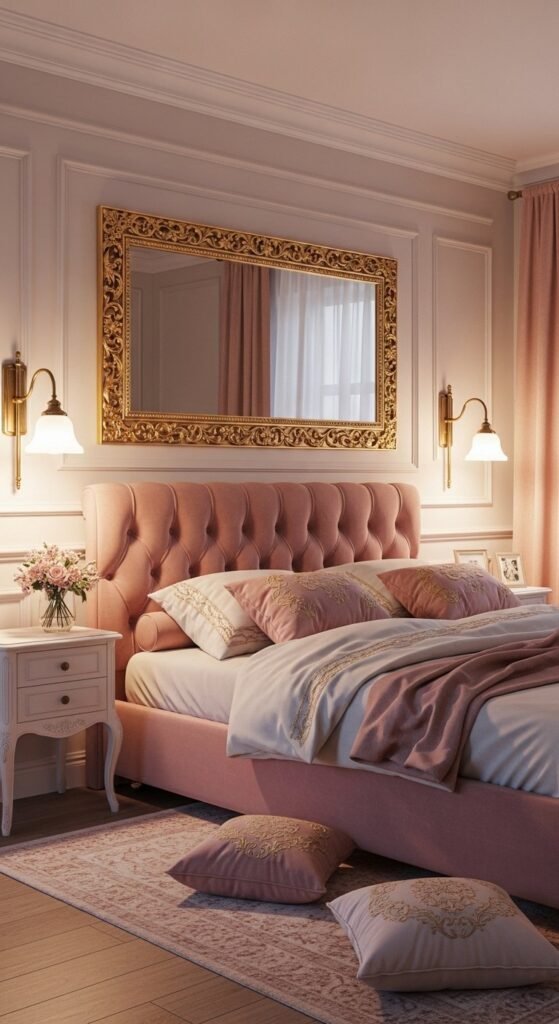
Gold leaf adds shine without heavy materials. Apply adhesive size to trim before laying leaf sheets gently. Seal once dry to prevent flaking. Pair with muted wall colors so gold doesn’t overwhelm. Small imperfections read handcrafted, not messy. This style suits bedrooms and dressing areas. Use sparingly on narrow trim for a refined look. Keep nearby decor simple and tonal for balance.
16. Command-Strip Renter-Friendly Mirror Frame
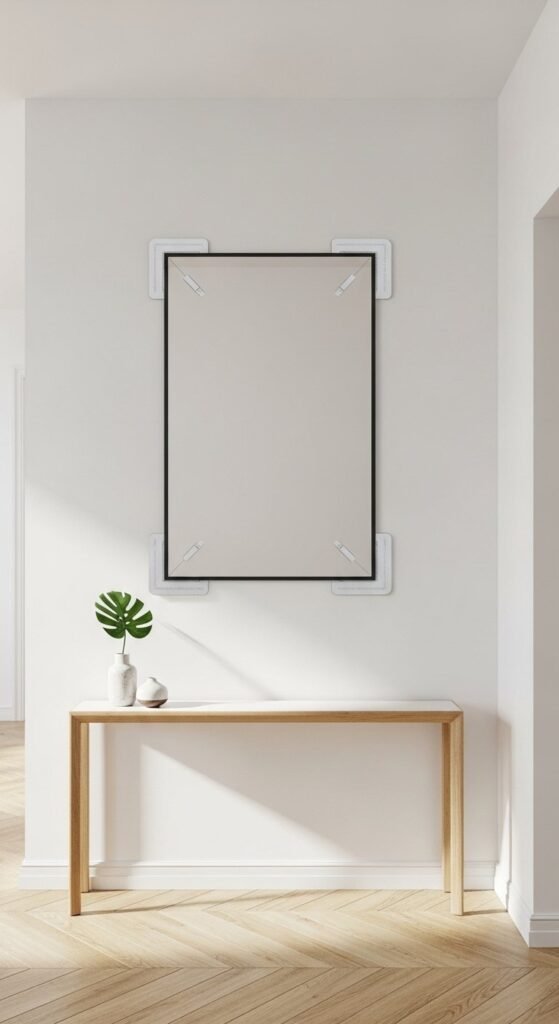
This approach works well where drilling isn’t allowed. Use lightweight trim or foam moulding to keep weight low. Assemble the frame off the wall, then attach using high-quality adhesive strips. Press firmly and let it rest before hanging. Weight limits matter, so check packaging carefully. This style suits small to medium mirrors. Neutral colors help it blend into rentals easily. Remove gently when moving out to avoid marks. Hallways and bedrooms handle this setup best.
17. Decoupage Patterned Frame Mirror
Decoupage frames allow endless pattern play. Choose thin paper or napkins so edges stay smooth. Apply adhesive in light layers to avoid bubbles. Seal with matte finish for a soft look. Small-scale patterns read calmer than bold prints. This mirror fits cottage, eclectic, or vintage rooms. Keep paper tones within one color family. Use a sanding block lightly once sealed to soften edges.
18. PVC Panel Shine Mirror
PVC panels create reflective shine without glass weight. Cut pieces evenly and test layouts before gluing. Paint panels in metallic tones or leave white for contrast. Straight lines give it a modern edge. This frame suits minimalist or industrial spaces. Keep grout lines tight so reflections stay crisp. Use strong adhesive made for plastic. Works best as a statement piece rather than clustered decor.
19. Layered Cardboard Depth Mirror
Layered cardboard adds depth without heavy materials. Cut repeated shapes and stack them gradually. Glue layers flat so edges stay clean. Paint after assembly to unify the look. Depth comes from repetition, not thickness. This mirror works well in creative rooms and studios. Seal with clear coat for durability. Keep shapes simple so layers read clearly from a distance.
20. Gallery Cluster Mini Mirror Frames

Small mirrors grouped together expand visual space. Mix round and rectangular shapes for rhythm. Keep spacing consistent so the wall feels organized. Lightweight frames hang easily. Odd numbers feel more natural in clusters. This layout suits living rooms and dining areas. Stick to one color family for cohesion. Step back often during layout to check balance before hanging.
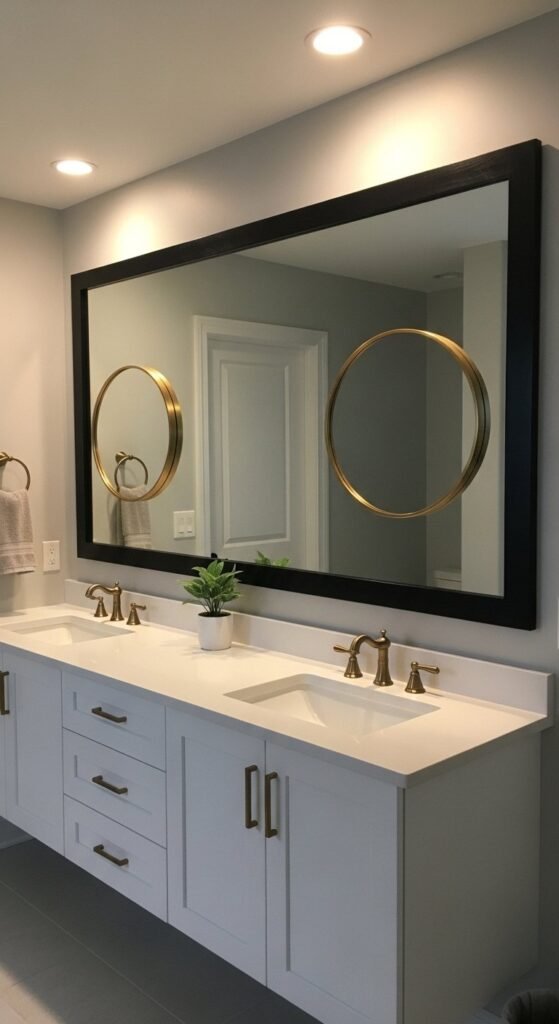
21. Clip-Hiding Bathroom Mirror Frame
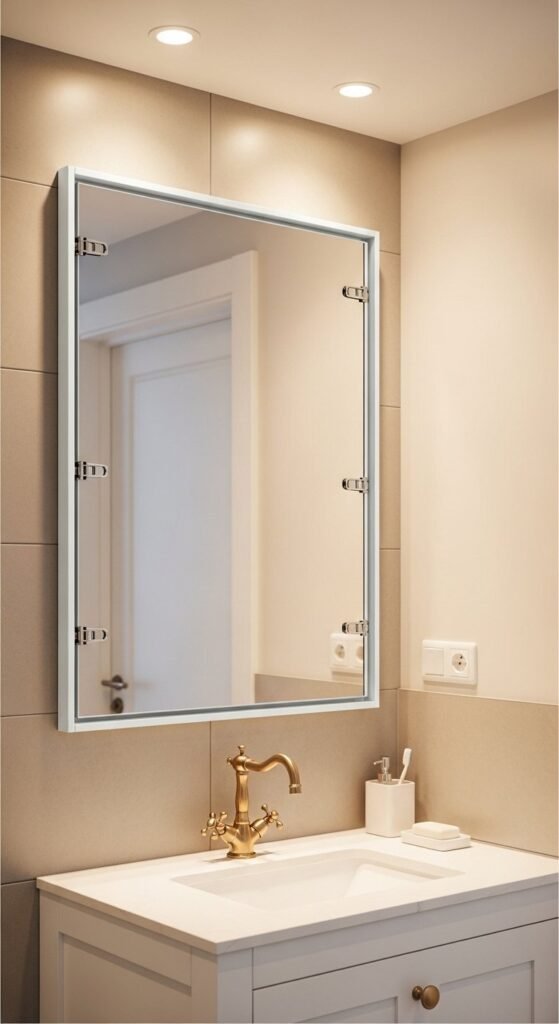
Mirror clips break the look of many bathroom upgrades. This frame style works around them instead of removing them. Cut trim with small notches so it fits snugly over clips. Paint before installation for sharp edges. Construction adhesive bonds well to glass and tile. Thin moulding keeps the frame subtle, not bulky. This approach suits rentals and permanent homes alike. Stick to moisture-safe paint finishes. Once installed, the mirror looks custom without major effort.
22. Beaded Kids-Friendly Craft Mirror
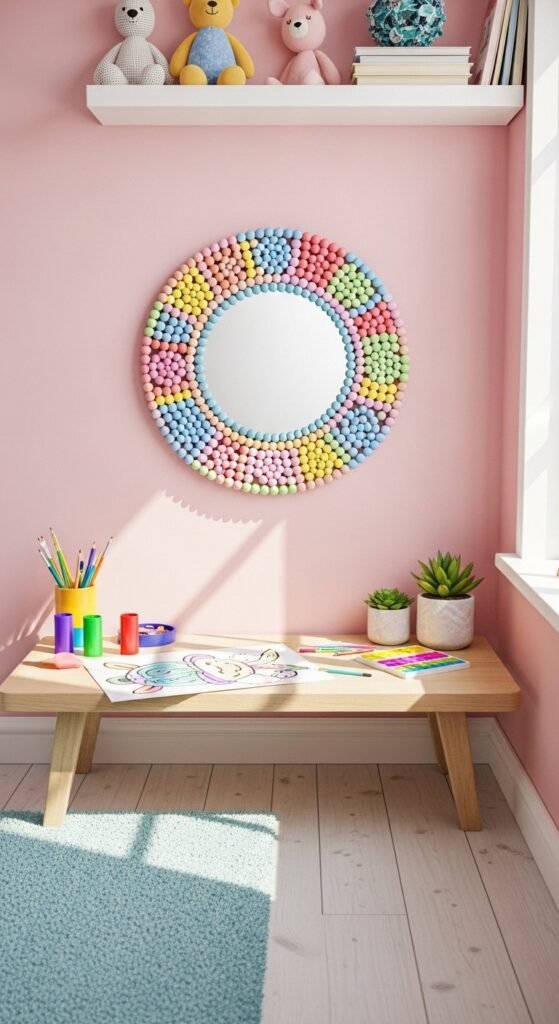
Beaded frames work well for beginner projects. Wooden beads are lightweight and easy to glue. Lay out colors first so patterns feel balanced. Glue slowly to avoid shifting. Repeating colors keeps it playful but tidy. This mirror fits nurseries, playrooms, or craft corners. Use non-toxic glue and sealed paint. Keep mirror size small so weight stays manageable. A simple hook handles hanging with ease.
23. Charred Wood Modern Rustic Mirror
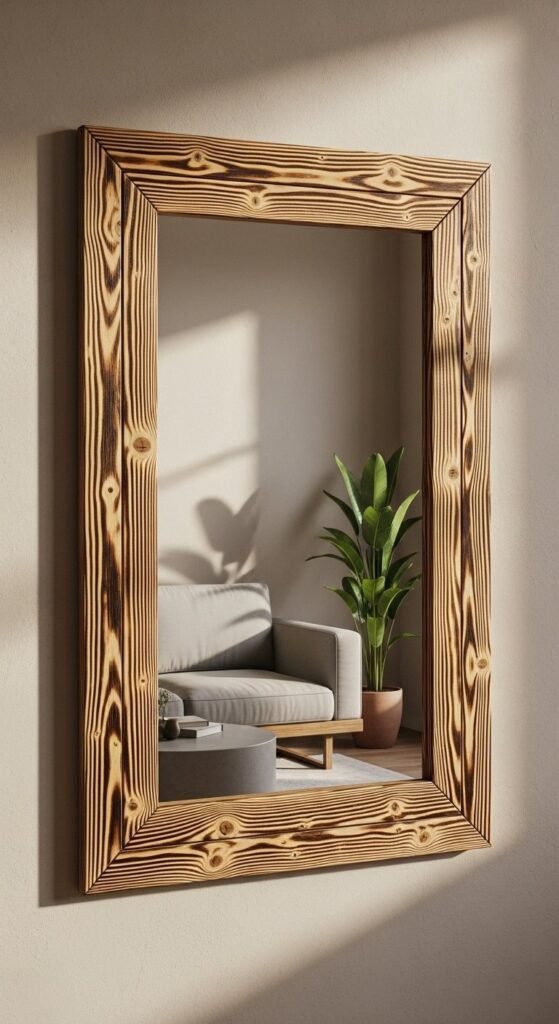
Charred wood adds contrast without heavy color. Lightly torch wood, then seal it once cooled. Keep burns shallow so texture stays visible. Pair with clean-lined mirrors for balance. Dark grain draws the eye inward, making the mirror feel grounded. This style works well in modern rustic or industrial rooms. Avoid high humidity areas unless fully sealed. Simple corners look better than ornate cuts here.
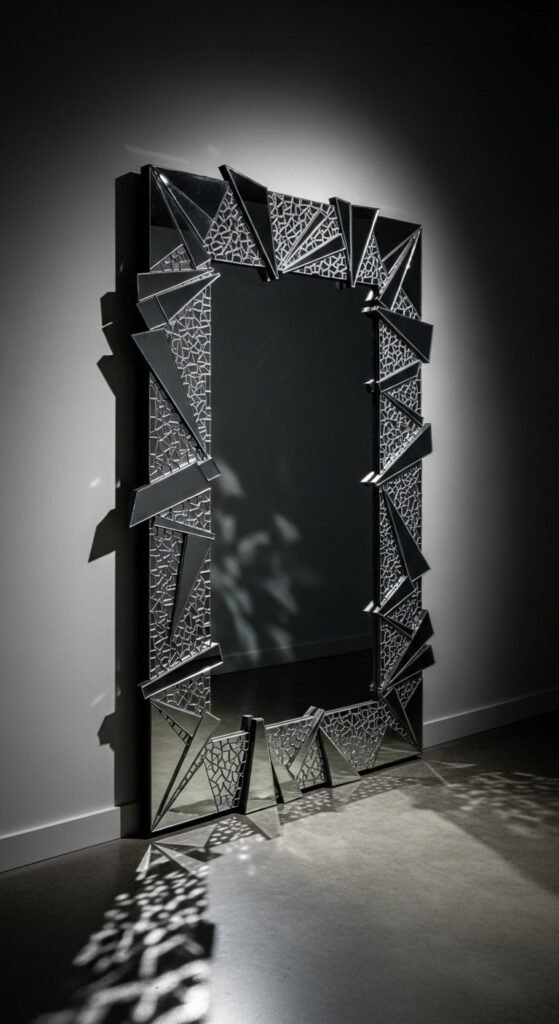
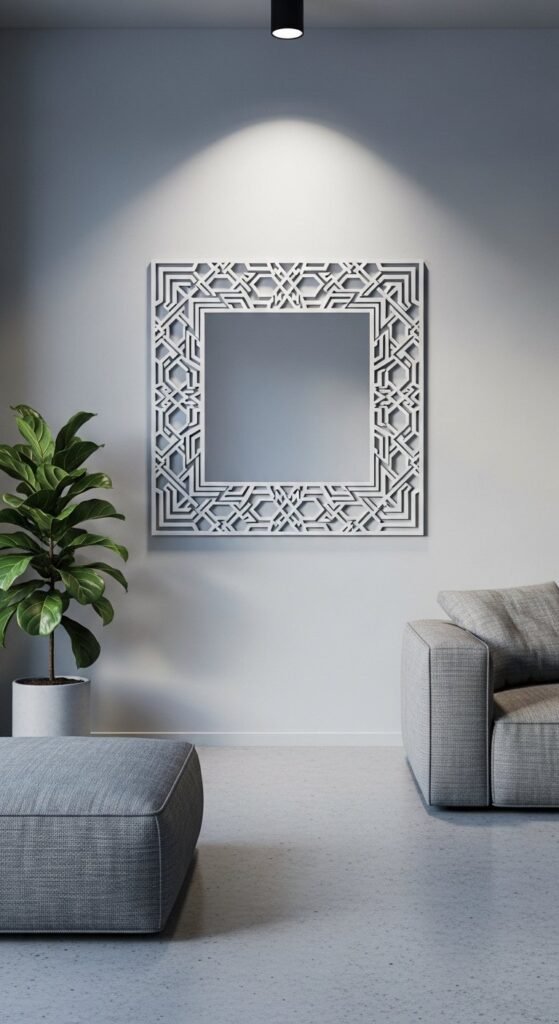
24. Sculptural 3D Art Mirror
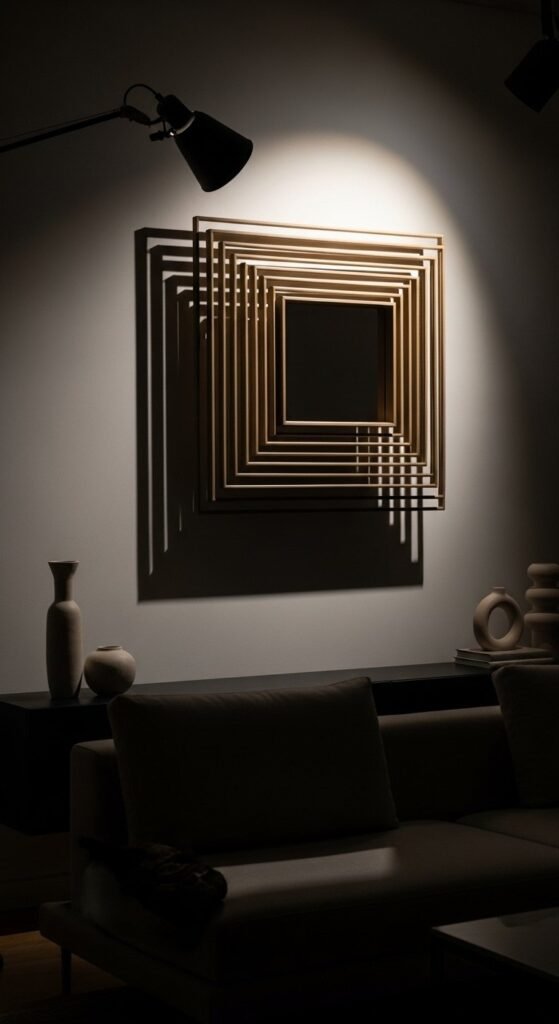
Sculptural frames blur the line between mirror and art. Use foam board, cardboard, or clay to build layers outward. Keep shapes intentional and spaced evenly. Paint in one tone so form stays dominant. Shadows create the drama, so directional lighting matters. This mirror works best as a solo piece. Entryways and feature walls suit it well. Keep nearby decor minimal so the structure stands out.

Leave a Reply