
1. Dollar Tree Grid Wall Mirror
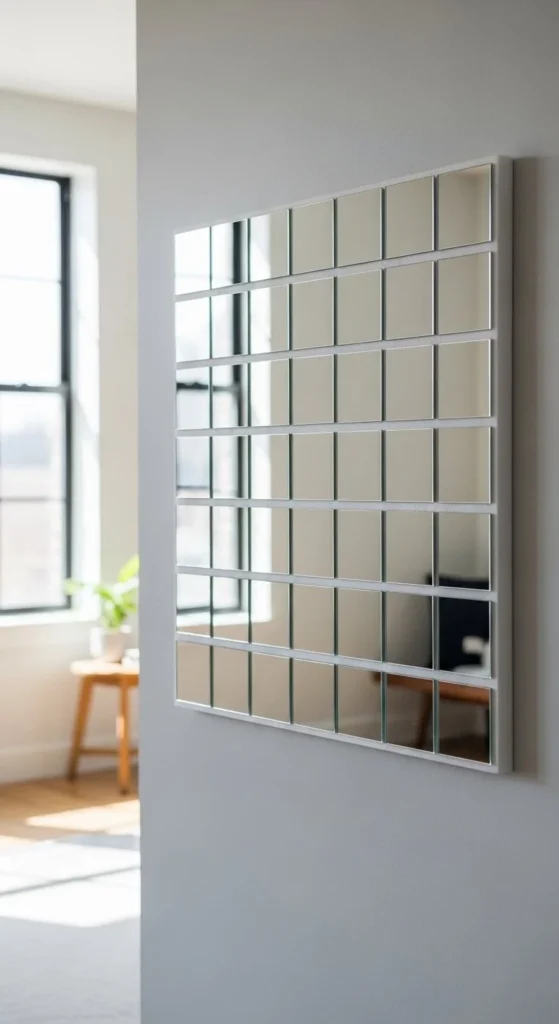
Grouping small mirrors creates an oversized statement on a budget. Start by arranging Dollar Tree mirrors on a foam board for easy alignment. Use hot glue for a quick hold or construction adhesive for durability. Painting the backing helps seams disappear and adds cohesion. This style brightens entryways or living areas. Spacing should be consistent, and a single large panel simplifies hanging. Keep furniture low-profile nearby to let reflections open the room. Black-painted seams create subtle contrast, while white or neutral tones maintain minimalism. This is a budget-friendly DIY that feels high-end. Perfect for renters, the panel can be hung with removable strips without damaging walls. Square layouts feel structured and intentional. Lighting impacts how mirrors shine, so place near windows or lamps. A simple console below emphasizes scale without distraction. Using foam board keeps the piece light and easy to move, while painting after assembly ensures a seamless finish. Reflections double the perception of space, making small apartments feel larger and more curated.
2. Rustic Stick Scrap Frame
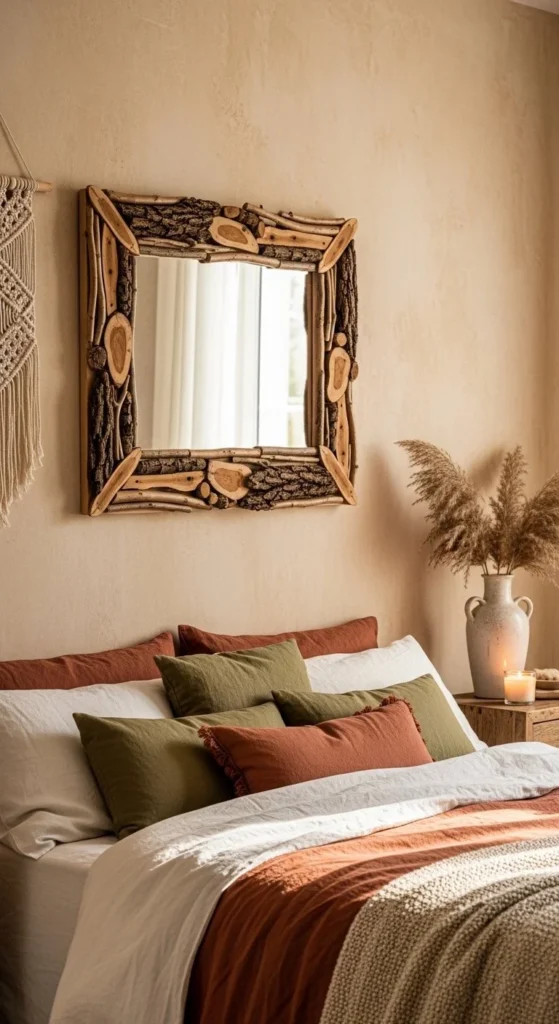
Rustic stick frames add texture and character instantly. Collect sticks of varying thickness, then trim ends flat to fit snugly around the mirror. Dry-fit all pieces before gluing. Hot glue is fast, wood glue is stronger for heavier mirrors. Eco-friendly mirror upcycles pair well with plants and woven textiles. Leaving bark exposed adds contrast against painted walls. Lightly seal with matte spray to prevent shedding. Imperfect spacing enhances charm rather than looking messy. Stick frames fit bedrooms, reading nooks, and living areas. Neutral wall colors make textures pop, and minimal surrounding decor keeps the focus on the frame. Layering sticks or combining them with small wooden shapes adds depth. Stick frames are low-cost, beginner-friendly, and easy to customize with stains or paint. Arrange multiple mirrors together for a boho gallery effect. Ensure the wall can support weight or consider a lightweight backing. The final look is casual yet curated, blending nature with indoor design effortlessly.
3. No-Tools Polystyrene Trim Mirror
Polystyrene trim is ideal for beginner mirror glow-ups. Cut with a utility knife and miter box for precise corners. Double-sided tape attaches trim to mirrors without damaging walls. Paint trim before attaching for clean edges. This technique works in bathrooms, hallways, or rented spaces. Narrow trim keeps the design modern, while satin finishes reflect light softly. Press each piece firmly to ensure adhesion. Using foam board or lightweight backing keeps everything flush. Trim width should match mirror size for proportion. After assembly, touch up edges to hide gaps. This no-tool approach allows quick updates in under an hour. Minimal decor around the mirror emphasizes the clean lines. Use consistent paint across all trim pieces for cohesion. Small mirrors can be clustered for a gallery look. This project is accessible, affordable, and renter-friendly. Clean glass first to ensure tape sticks well. Soft lighting highlights trim detail without overpowering reflections. It’s an easy way to transform plain mirrors with minimal investment.
4. Resin Jewel Glam Mirror
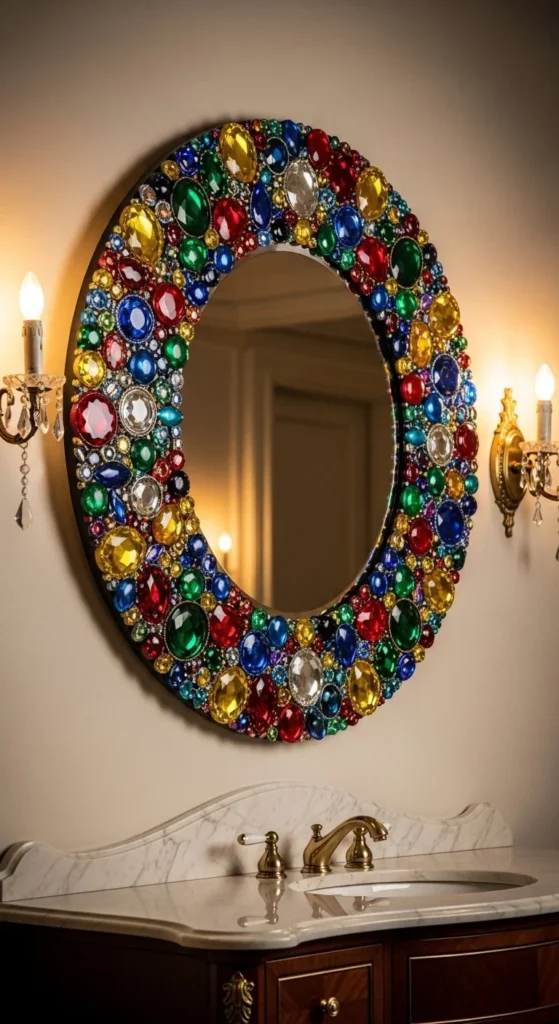
Resin jewels create glam mirror makeovers with visual sparkle. Work in small sections so placements stay precise. Painter’s tape protects edges. Cluster jewels for richness, not uniform spacing. Use clear resin for durability. Allow full curing to avoid movement. Glam mirrors shine in bedrooms and dressing areas. Metallic paints or frames enhance reflective appeal. Keep surrounding decor minimal to make the mirror the focal point. Use dark or neutral wall backgrounds for contrast. Hot glue can temporarily hold gems while resin sets. Consider symmetry or deliberate asymmetry for design interest. Accessories nearby, like trays or lighting, complement reflections. Resin adds depth without weight, so mirrors remain easy to hang. Choose colors that match room accents for cohesion. This technique transforms inexpensive mirrors into statement pieces. Lightweight mirrors with resin can still hang safely on drywall with standard anchors. The tactile texture of resin contrasts beautifully with smooth glass, giving visual interest from multiple angles. Lighting placement above or near the mirror amplifies shine.
5. Arched Dollar Tree Mirror Cluster
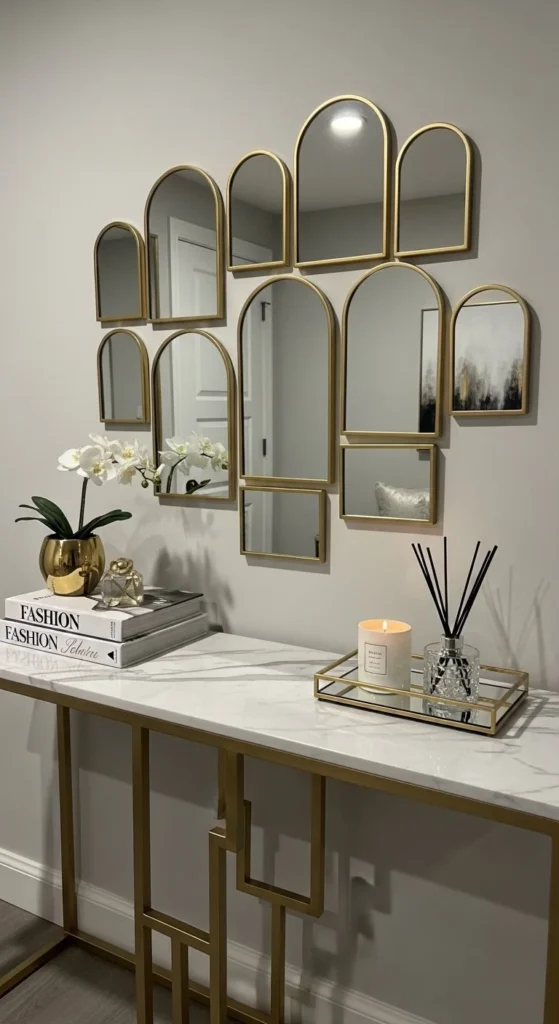
Arched mirrors create movement and rhythm on flat walls. Mount all mirrors on a single backing for easier hanging. Dry-fit mirrors to keep spacing consistent. Paint frames after assembly for uniformity. Gallery wall mirror clusters look stunning in dining areas, stairwells, or hallways. Neutral or metallic finishes let reflections shine. Low furniture ensures mirrors remain the focus. Clusters mimic high-end installations on a tight budget. Soft lighting enhances reflective surfaces without glare. Arches complement straight lines in furniture or trim. Use foam board or lightweight paneling for stability. Hanging one large panel reduces wall damage and simplifies leveling. Repeat arched shapes for cohesion or mix small sizes for visual interest. Keep surrounding wall decor minimal so shapes stand out. Reflections enlarge perceived space and light. This approach turns ordinary mirrors into eye-catching focal points with minimal cost. The DIY process is beginner-friendly and fast, making it perfect for quick room updates.
6. Scrap Pine Rabbet Frame
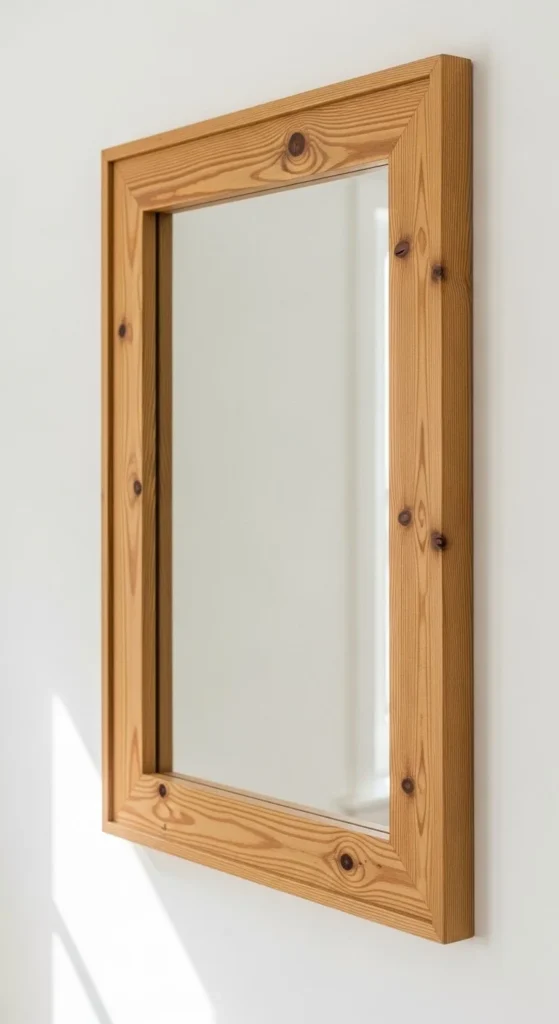
Rabbet cuts allow the mirror to sit flush against the frame and wall. Use scrap pine for a low-cost, professional-looking solution. Sand all edges smooth before assembly. Flush wall-hanging designs work well in narrow hallways or above console tables. Hot glue can temporarily hold pieces before using Titebond or wood glue. Staining or sealing highlights natural grain while protecting wood. Ensure precise measurements for tight-fitting rabbets. Paint or stain edges to match decor. Lightweight mirrors pair with plywood backing to prevent warping. Keep surrounding walls simple to emphasize clean lines. Rabbet techniques mimic custom frames without expensive materials. Frames can be narrow or wide depending on visual impact. Align mirror centrally for symmetry. Maintain consistent depth so the frame sits flat. Recycled pine adds rustic charm while keeping the project eco-conscious.
7. Hot Glue Sunburst Mirror
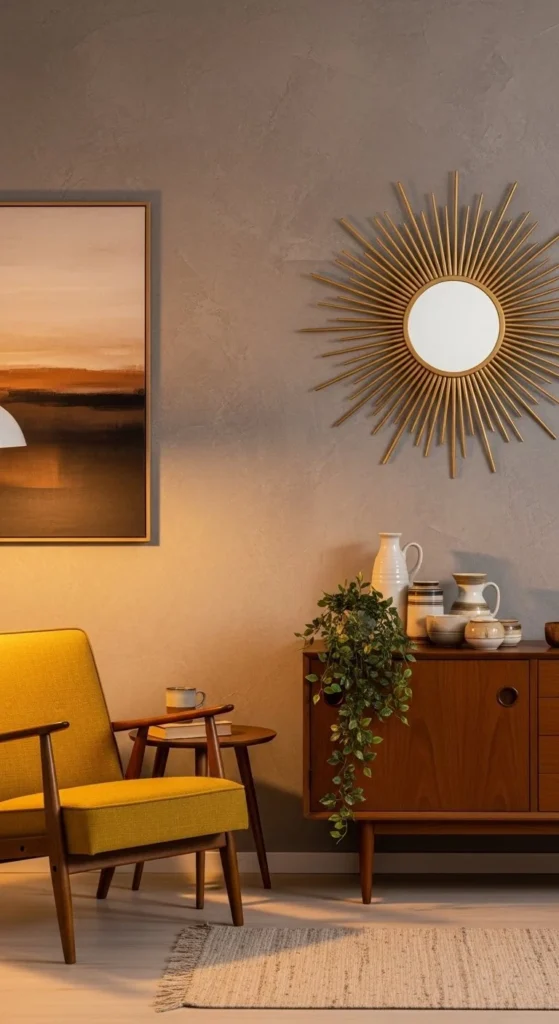
Sunburst mirrors are striking glue gun mirror wins. Lay out dowels or skewers first to maintain even spacing. Hot glue sets fast, so work steadily. Metallic paint adds glamour. Sunburst mirrors work above consoles, mantels, or beds. Consider layering shorter sticks in the center for depth. Keep furniture low to let the rays dominate the space. Use lightweight backing to ensure wall support. Gold or silver finishes enhance reflections. Experiment with varying lengths or shapes for unique patterns. Clamping or pressing pieces briefly ensures secure adhesion. This style transforms inexpensive materials into a designer-inspired focal point. Sunburst mirrors suit mid-century, glam, or transitional interiors. Ensure wall anchors match mirror weight. These mirrors reflect light, drawing attention to walls and creating perceived space. Skewers can be spray-painted before attachment for consistent finish.
8. Sculpted Cardboard Frame
Layered cardboard builds dimension without heavy materials. Cut and stack layers, securing with hot glue. Sand edges smooth before painting. Recycled material frames are zero-cost and creative. Matte white paint emphasizes shape over color. Works well in studios, living rooms, or bedrooms. Layered shapes can be geometric, circular, or organic. Keep decor around minimal to maintain focus. Cardboard responds well to curves and arcs. Seal lightly to prevent warping in humid rooms. Lightweight frames are easy to hang with adhesive strips. Repeat patterns or alternate layers for texture. Contrast wall colors to enhance the 3D effect. This DIY is beginner-friendly and fast, giving a gallery feel at minimal expense. Cardboard allows experimentation before committing to wood or expensive trims.
9. Celestial Moon Phase Spackle Mirror
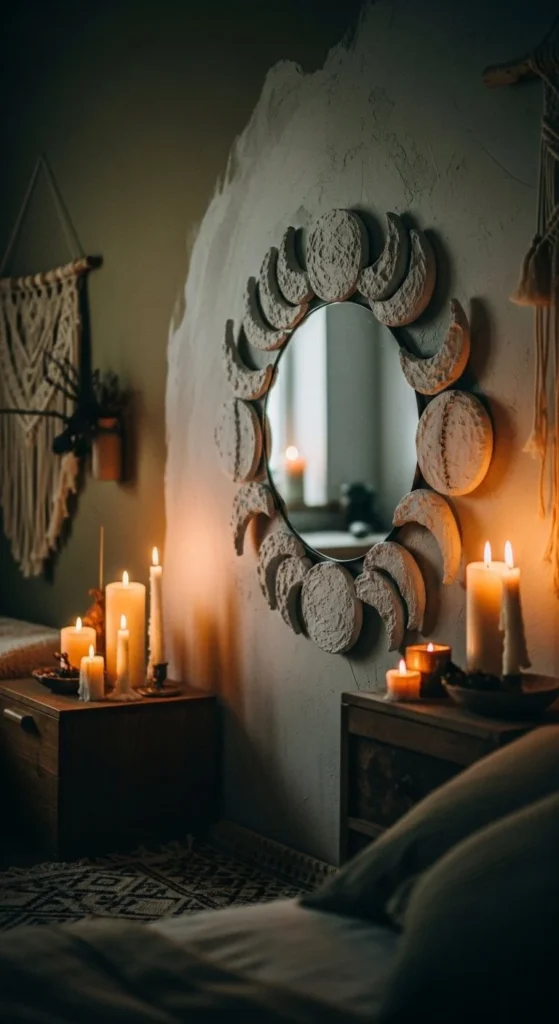
Spackle adds texture for mystical mirror DIYs. Apply phases with a palette knife in raised patterns. Sand lightly before painting. Paint in muted tones to highlight shadows. Soft candlelight or ambient lighting brings out texture. Works in bedrooms, meditation corners, or studios. Use painter’s tape to protect mirror edges. Moon phases can be full, crescent, or mixed. Let the spackle cure fully to avoid cracks. Minimal furniture ensures the mirror dominates the wall. Neutral walls increase contrast. Lightweight mirrors can be mounted with standard anchors. Combine with natural decor like plants or textiles. This creates a whimsical, tactile focal point with low-cost materials. Soft finishes emphasize boho charm while maintaining elegance.
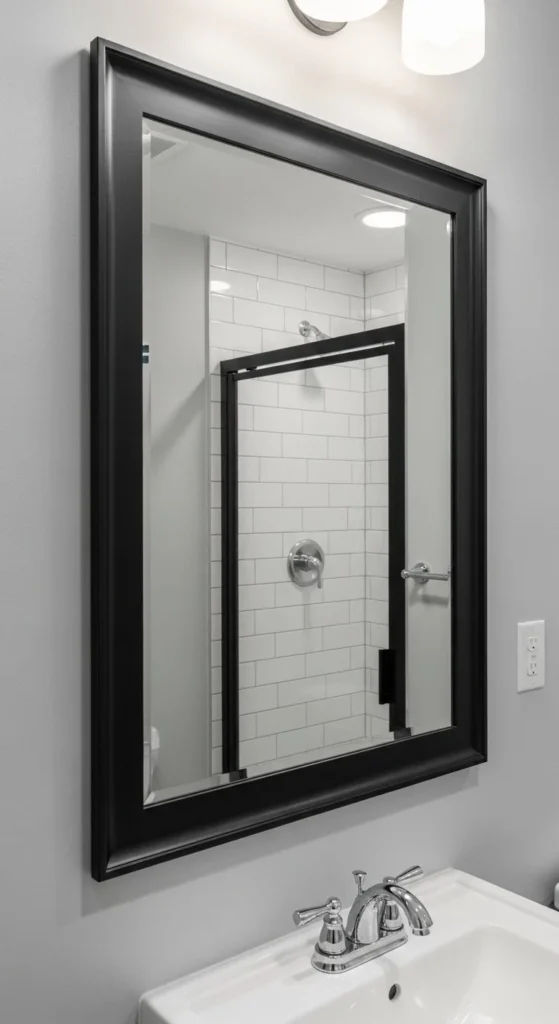
10. Minimal Black Tape Frame

Thin black tape creates a crisp border on a frameless mirror. One-hour mirror projects are ideal for rentals or temporary installations. Clean glass thoroughly for adhesion. Use a ruler to ensure straight lines and sharp corners. Black tape contrasts well with white or light walls. This method is beginner-friendly and fast. Narrow trim keeps proportions sleek. Avoid overlapping tape edges for smooth appearance. Highlight reflection with ambient lighting. Works best in hallways, bathrooms, or small spaces. Tape can be removed later without damage. Multiple mirrors can be outlined for consistency. Use high-quality tape for durability. Minimalist surroundings keep focus on geometric lines. The mirrored surface reflects light, enlarging small spaces. Clean finish enhances modern interiors.
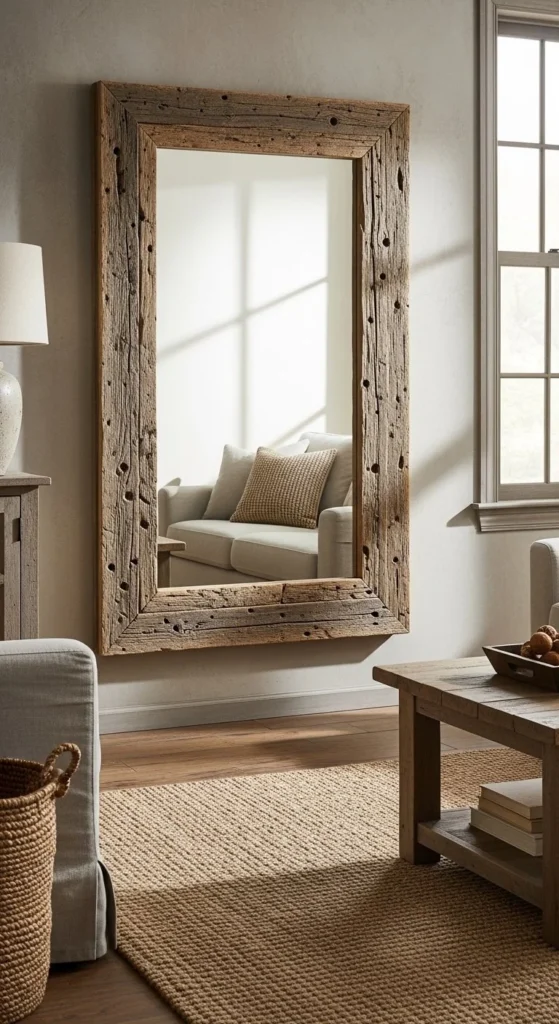
11. Reclaimed Wood Slat Mirror
Reclaimed wood adds rustic charm and height. Vertical slats create a tall, narrow effect. Attach to a lightweight backing for stability. Lean mirrors to avoid wall damage. Wood scrap mirror frames are sustainable and inexpensive. Leave imperfections for character. Sand edges smooth for safety. Works well in lofts, studios, or living rooms. Neutral wall colors complement wood tones. Arrange multiple mirrors for gallery effects. Use light stain or sealant to enhance durability. Keep nearby furniture minimal to emphasize scale. Slat thickness adds dimension. Leaning placement simplifies installation. Mirrors reflect light and enlarge the room visually.
12. Rope-Wrapped Coastal Mirror
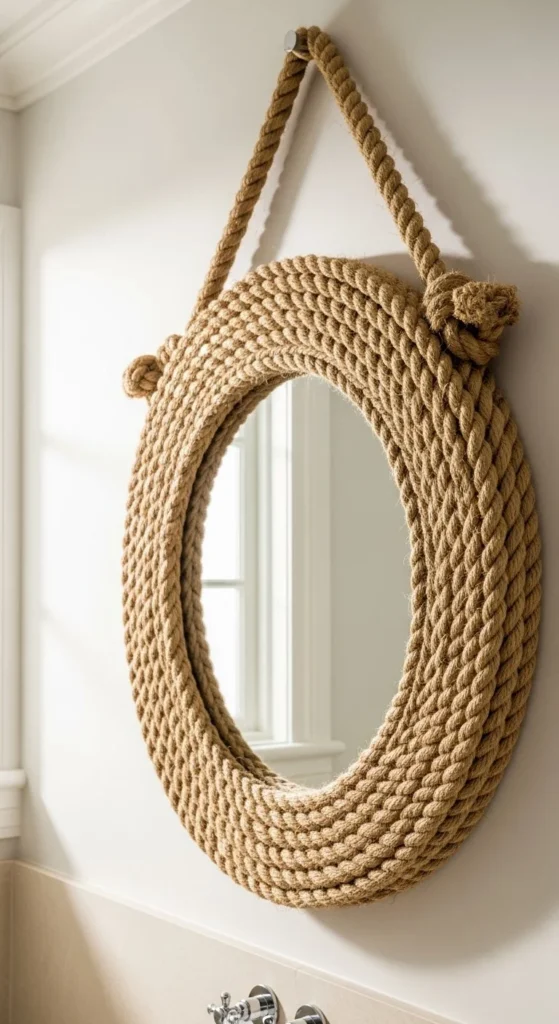
Rope frames bring softness and texture. Wrap rope tightly around the mirror perimeter, securing it with hot glue. Coastal mirror decor pairs well with light wood and sandy walls. Natural fibers contrast smooth glass. Use lightweight mirrors to reduce wall stress. Soft daylight enhances texture. Minimalist surroundings allow the rope to stand out. Seal rope lightly for durability. Works well above vanities, in bathrooms, or entryways. Rope thickness affects visual impact. Secure hanging hooks ensure safety. This technique transforms simple mirrors into statement pieces. Keep decor subtle to highlight tactile frames. DIY is affordable and quick.
13. Painted Checker Frame
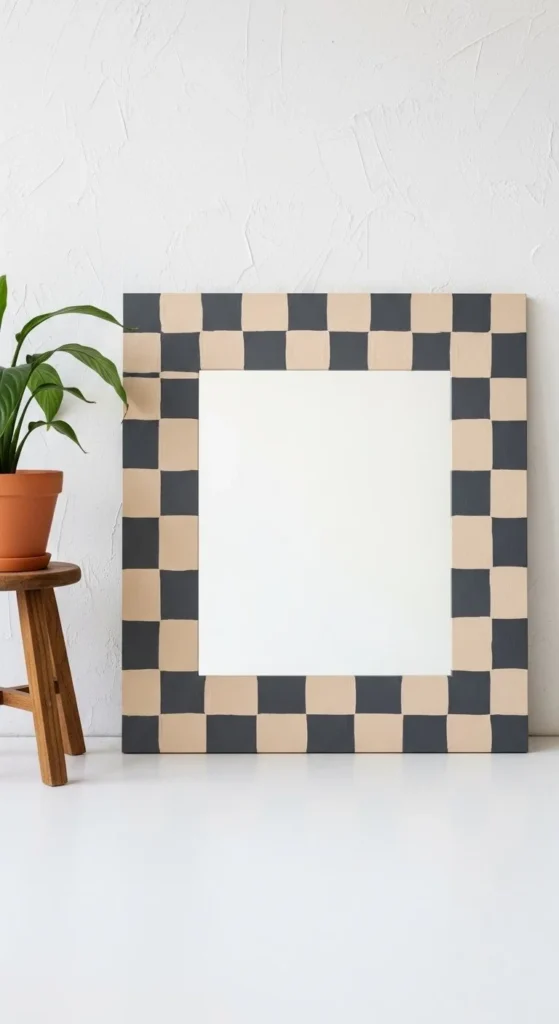
Checker frames create playful contrast. Tape squares for crisp lines. Paint in two colors for clarity. DIY mirror frames fit studios, offices, or bedrooms. Seal paint for longevity. Minimal surrounding decor highlights the pattern. Vary square size for subtle complexity. Keep colors complementary to room accents. Use lightweight backing for easier hanging. Ensure tape removal before paint dries. Matte finish reduces glare. Frame transforms inexpensive mirrors into visual centerpieces. Checker patterns can be repeated on multiple mirrors for rhythm. Works with neutral walls for maximum contrast.
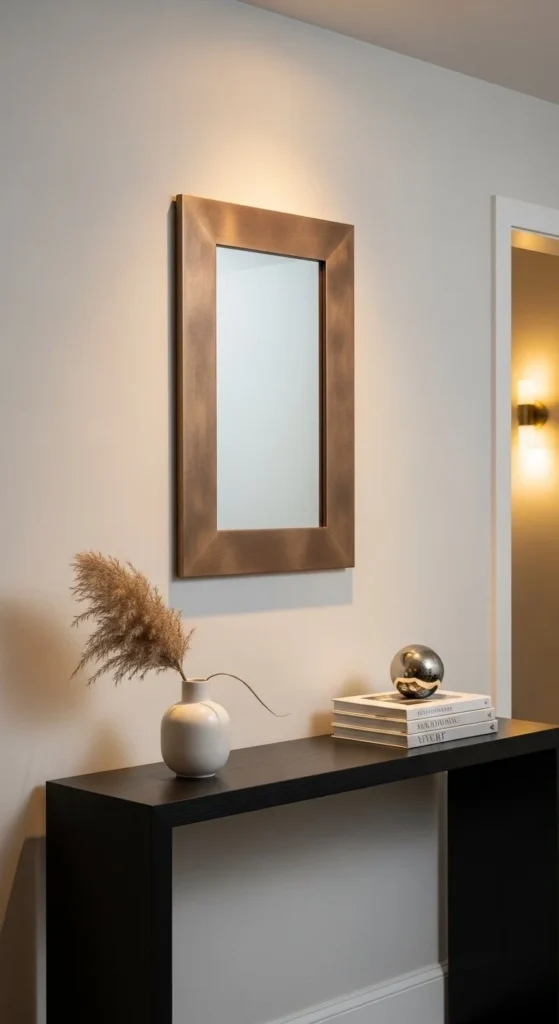
14. Slim Brass Strip Mirror
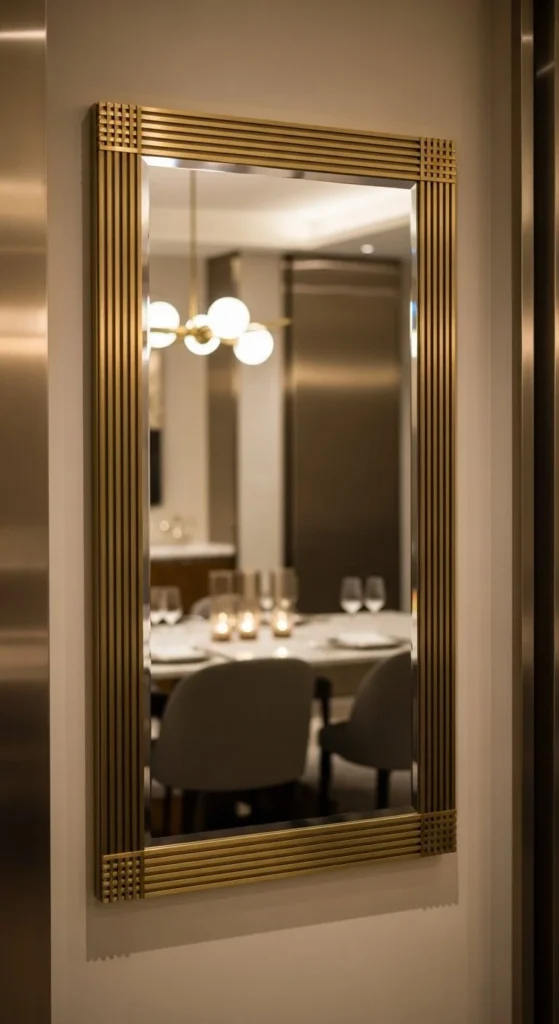
Brass strips create a high-end looking mirror quickly. Use adhesive rated for metal. Narrow strips maintain sleek proportions. Pair with dark walls for contrast. Works above buffets or consoles. Minimal furniture ensures focus. Measure carefully for tight corners. Keep strips flush to avoid shadows. Metallic paint alternatives mimic brass affordably. Use lightweight mirrors to reduce anchor stress. Clean surfaces before gluing. Reflective strips catch light, adding subtle glamour. DIY-friendly for beginners, brass strips transform a simple mirror into a sophisticated centerpiece.
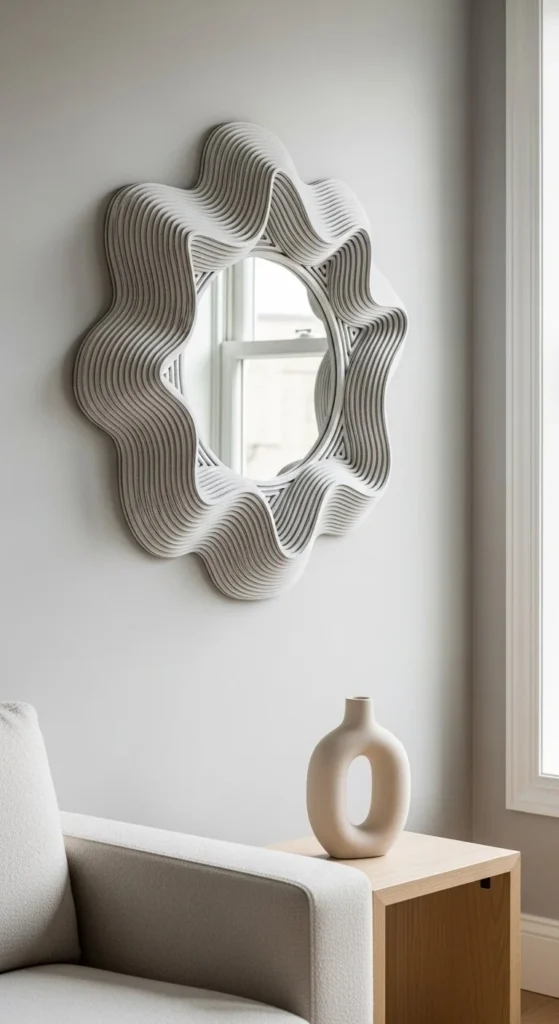
15. Layered Arch Foam Frame
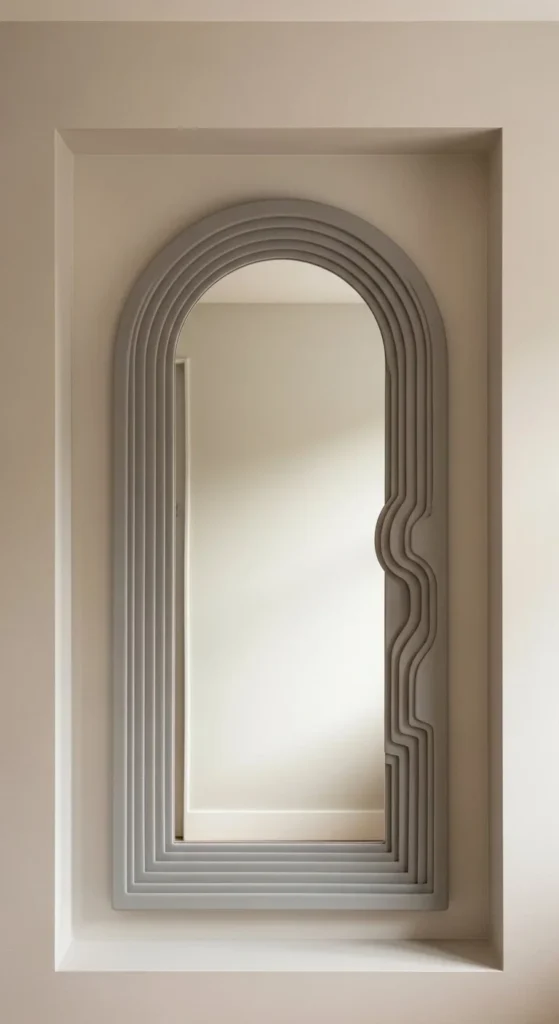
Layered foam adds depth and curves cheaply. Cut arcs progressively for smooth edges. Beginner-friendly mirror decor fits narrow spaces. Paint layers after assembly for consistency. Lightweight backing prevents warping. Neutral colors keep focus on shape. Works well in hallways, entryways, or bathrooms. Layering allows experimentation with pattern and dimension. Secure with removable strips or tape. Minimal furniture emphasizes arches. Foam is easy to cut and manipulate. The final look feels custom without heavy tools. Curves contrast straight architecture for interest.
16. Pebble Mosaic Spa Mirror
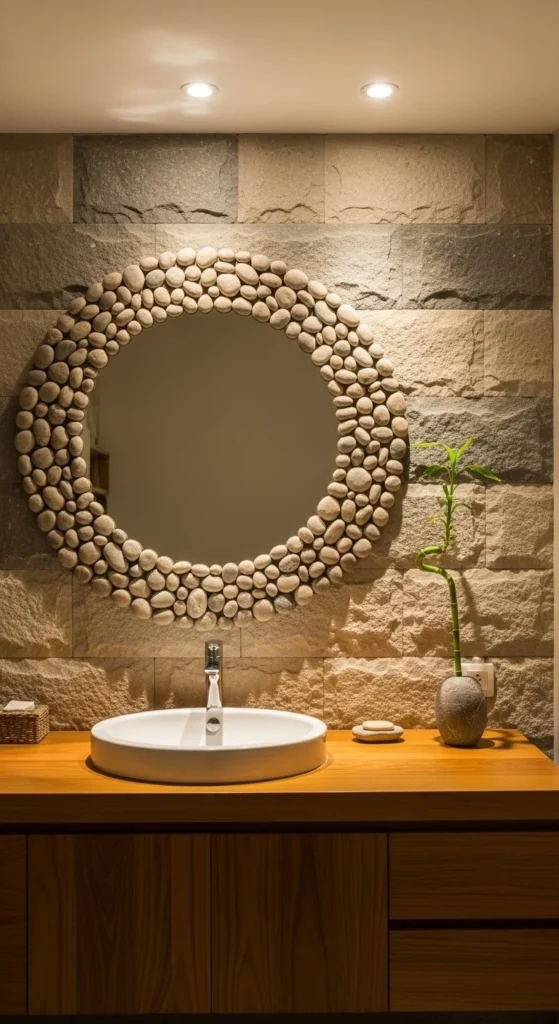
Pebbles add tactile detail and organic shape. Arrange by size for visual balance. Bathroom mirror makeovers benefit from sealed grout for durability. Use lightweight adhesive to attach stones. Natural tones complement sand-colored walls. Pebbles create a subtle focal point without overwhelming space. Soft lighting highlights texture. Works in bathrooms, powder rooms, or spas. Keep the surrounding decor minimal. Grout fills gaps and enhances cohesion. Smooth pebbles prevent snagging on towels. Securely hang the mirror to support extra weight. Use a neutral frame behind pebbles to unify design. The tactile surface contrasts smooth glass, adding interest.
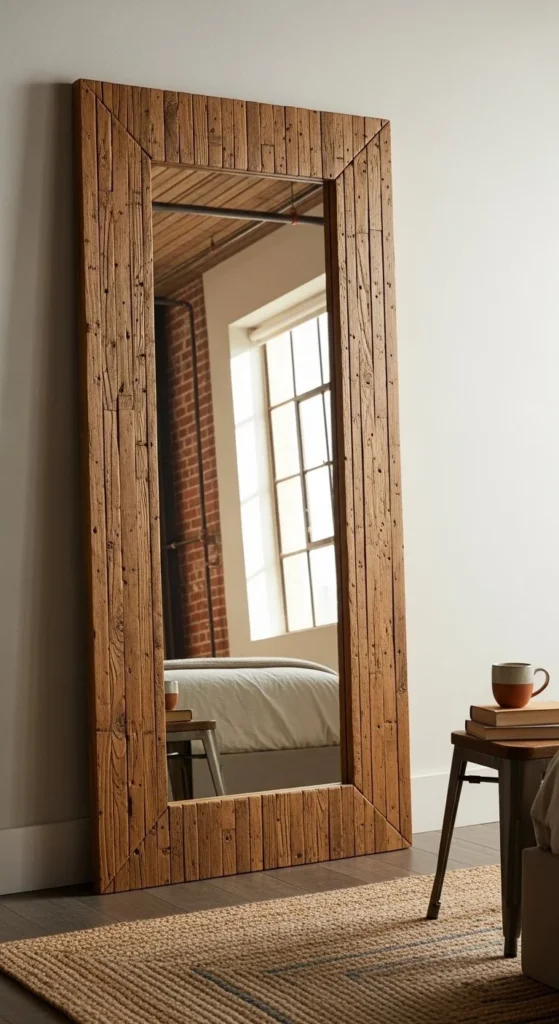
17. Oversized Leaning Floor Mirror
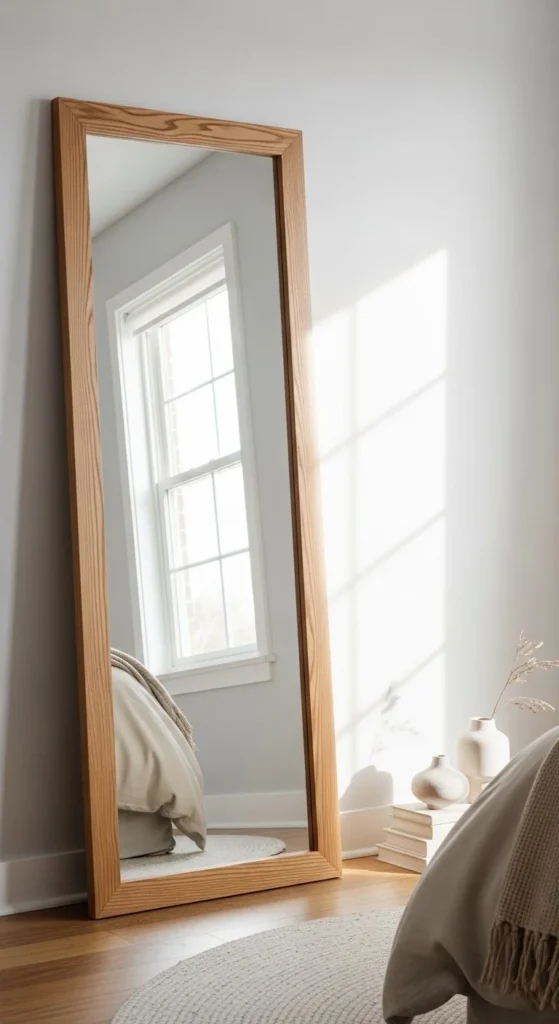
Leaning mirrors create scale without wall anchors. Large mirror decor opens small rooms visually. Use simple frames to let size impress. Ensure the top is secured against the wall for safety. Works well in bedrooms, living rooms, or dressing areas. Neutral walls enhance reflections. Minimal surrounding furniture emphasizes size. Wood finish adds warmth. Avoid heavy frames for easier movement. Place near windows to maximize light. Leaning also allows repositioning for seasonal decor. Reflective surfaces enlarge spaces. Minimalist styling keeps focus on mirror impact. Wood grain adds tactile visual interest. DIY-friendly for beginner carpenters.
18. Mixed Trim Collage Frame
Layered trim adds depth with minimal expense. Dry-fit all pieces before gluing. Molding-based mirror frames suit traditional or transitional interiors. Single-color paint keeps cohesion. Works above mantels, consoles, or entryways. Vary trim widths for visual texture. Light sanding improves adhesion. Minimal surrounding decor ensures focus remains on the frame. Layering allows experimentation with pattern. Lightweight backing supports structure. Use painter’s tape to maintain straight edges. Finish edges with matte or satin paint. Reflective surfaces enhance light. Trim collage creates handcrafted, high-end looks on a budget.
19. Ombre Painted Edge Mirror

Ombre edges soften mirror appearance. Blend colors while paint is wet for smooth transition. Art-driven mirror decor adds subtle color without overwhelming space. Works in bedrooms, studios, or living rooms. Keep the reflective center clear. Matte paint reduces glare. Layer colors gradually for control. Minimalist surroundings highlight gradients. Light walls enhance color flow. Secure mirror safely with standard anchors. Ombre technique can match bedding or wall accents. Small projects can combine multiple mirrors for rhythm. Protect edges with painter’s tape. Quick, affordable, and visually impactful DIY.
20. Compass-Cut Circular Frame
Compass tools ensure perfect arcs for curvy mirror mastery. Mark carefully and cut slowly for precision. Arc segments attach with wood glue or hot glue for temporary hold. Natural oak adds warmth and timeless appeal. Works well in entryways, hallways, or feature walls. Keep adjacent decor minimal to emphasize curves. Lightweight backing prevents sagging. Layered arcs create dimension. Sand edges for smooth, flush joins. Finish with a clear coat or stain. Precise geometry elevates simple mirrors into standout designs. Round shapes complement angular furniture. Soft lighting highlights depth and grain. DIY-friendly for mid-level crafters seeking custom look.
21. Geometric Foam Hexagon Mirror
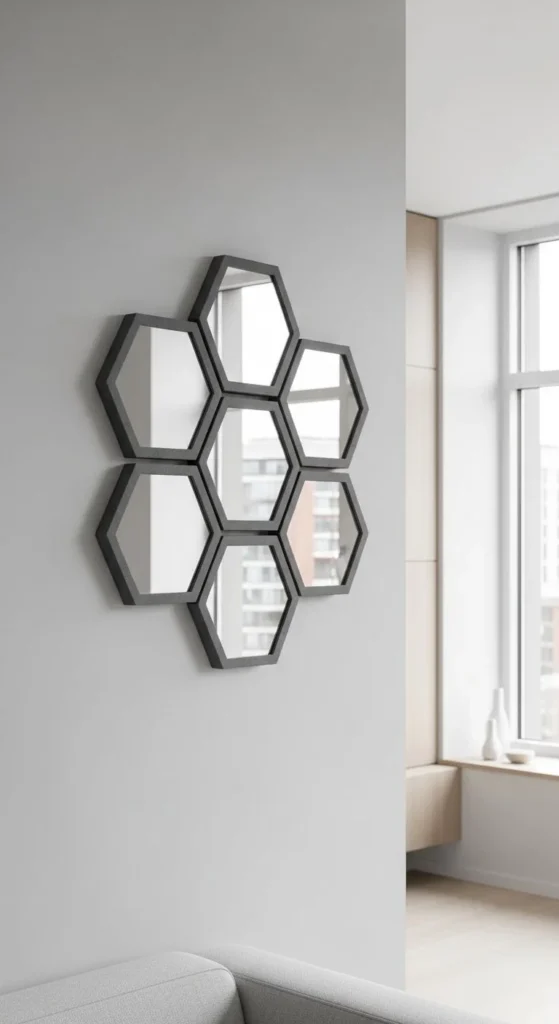
Hexagon mirrors create a structured modern mirror gallery. Cut foam board hexagons to fit around each mirror precisely. Hot glue works well for quick assembly. Paint all pieces for a unified look. Arrange in honeycomb patterns above consoles, desks, or beds. Neutral colors keep the design cohesive. Lightweight materials simplify hanging and adjustments. Use consistent spacing for symmetry. Mirrors reflect light and make small spaces appear larger. Pair with minimal furniture to let shapes stand out. This DIY is beginner-friendly and budget-conscious. Try mixing sizes for visual interest. Matte finishes reduce glare. The geometric arrangement adds depth without heavy construction. Perfect for apartments or rented spaces where wall damage should be minimized.
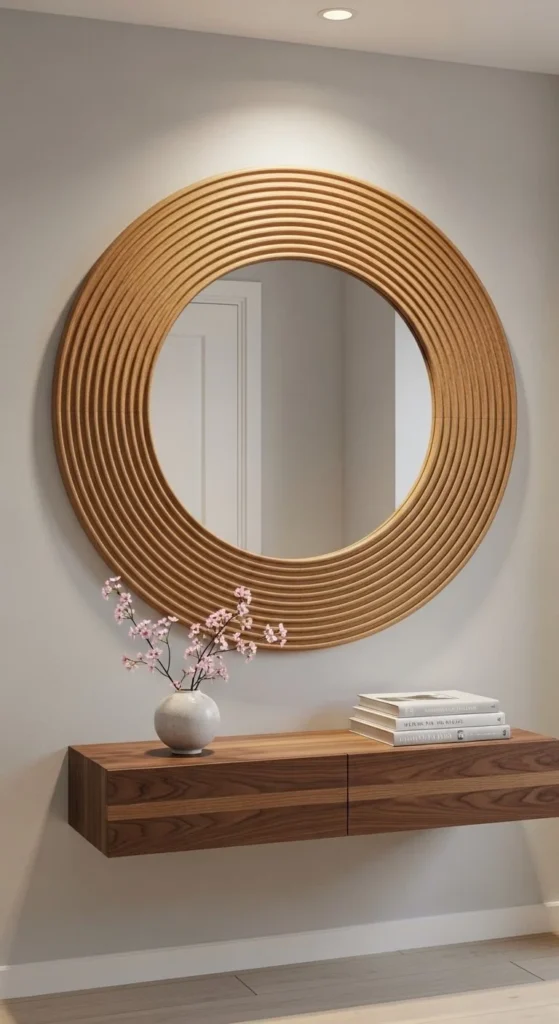
22. Layered Circular Cardboard Frame
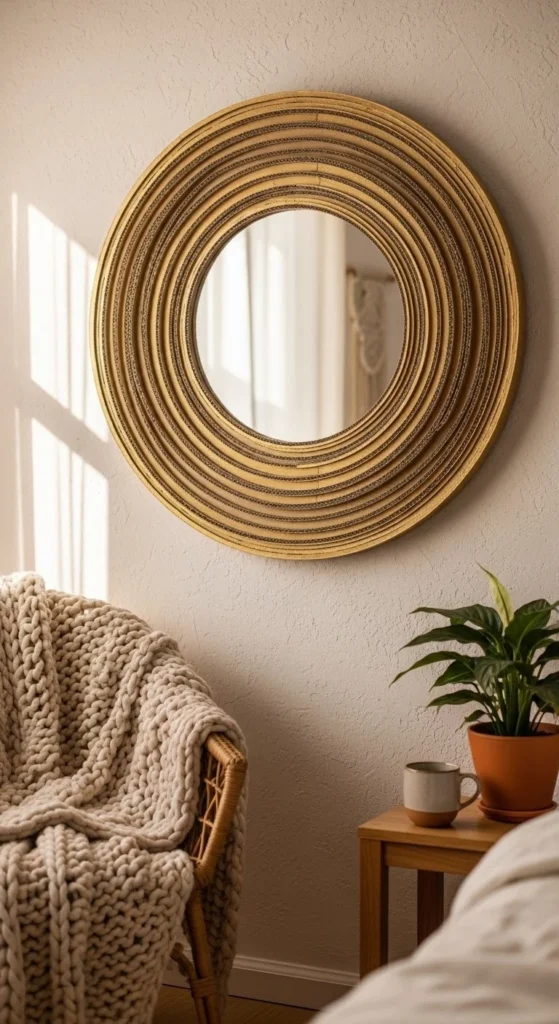
Layered cardboard rings mimic carved wood at a fraction of the cost. Glue rings together before painting for consistent alignment. Sustainable mirror frames are lightweight and easy to hang. Matte or soft metallic paint adds dimension. Works in bedrooms, living rooms, or creative spaces. Vary ring thickness for visual interest. Use painter’s tape to maintain clean edges. Minimal surrounding decor emphasizes layered texture. Lightweight backing ensures stability. This project is beginner-friendly and fast, transforming a simple mirror into a statement piece. Soft lighting enhances subtle metallic sheen. Cardboard is flexible, allowing curves or scallops. DIY framing lets you experiment before committing to heavier materials.
23. Metallic Spray-Painted Dollar Tree Mirror
Spray paint gives inexpensive mirrors high-end appeal. Attach Dollar Tree mirrors to the foam board first for stability. Mask edges for clean lines. Metallic paint turns budget mirrors into luxe decor. Works in hallways, bathrooms, or entryways. Use lightweight panels to simplify hanging. Matte or satin finishes prevent glare. Layer mirrors together for gallery walls. Minimal surrounding furniture ensures focus remains on the metallic shine. Hot glue secures the mirror back quickly. Optional sealant protects paint. Spray painting is fast, cost-effective, and beginner-friendly. Metallic mirrors reflect light beautifully, enhancing room ambiance.
24. Mosaic Tile Frame Mirror

Mosaic tiles add textural focal points to mirrors. Arrange tiles dry first to find a pattern. Attach with strong adhesive and grout afterward. Works well in bathrooms, kitchens, or entryways. Light grout emphasizes individual tiles, dark grout adds contrast. Choose lightweight mirrors to avoid wall strain. Minimal surrounding decor allows mosaics to dominate. Seal grout to prevent moisture damage. Reflective surfaces double impact. Mosaic tiles can follow geometric or organic patterns. Experiment with alternating colors for rhythm. Hot glue may temporarily hold tiles while adhesive sets. Coastal blues pair beautifully with sandy or neutral walls. This DIY is fun, affordable, and highly customizable.
25. Reclaimed Barn Wood Frame
Barn wood frames add rustic charm and character instantly. Select planks with complementary tones. Sand lightly to remove splinters. Use wood glue and brad nails for secure attachment. Works above mantels, desks, or consoles. Natural imperfections enhance appeal. Seal lightly to protect wood. Minimal wall decor ensures focus stays on frame. Use recycled scrap wood to reduce costs. Wide frames emphasize mirror size. Lean or mount securely depending on wall type. Reflections brighten rooms with neutral walls. Rustic frames pair with soft textiles and plants. This approach creates high-impact, eco-friendly focal points.
26. Resin Accent Starburst Mirror
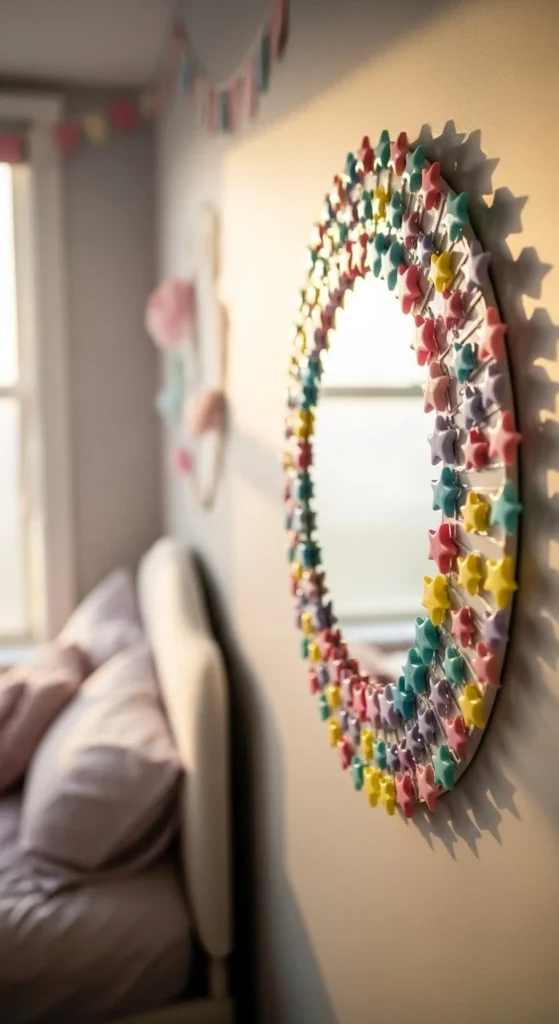
Resin accents add sparkle and playful detail. Place stars around the mirror perimeter before securing with clear resin or glue. Glamorous mirror DIYs shine in bedrooms or creative studios. Keep surrounding decor minimal to emphasize burst patterns. Resin provides depth and subtle reflection. Use lightweight mirrors to avoid wall strain. Colors can complement a room palette. Painter’s tape keeps glass clean during work. Allow full curing before hanging. Layer stars in clusters for dimension. Soft lighting enhances reflective surfaces. Resin starbursts are beginner-friendly and transform simple mirrors into whimsical focal points.
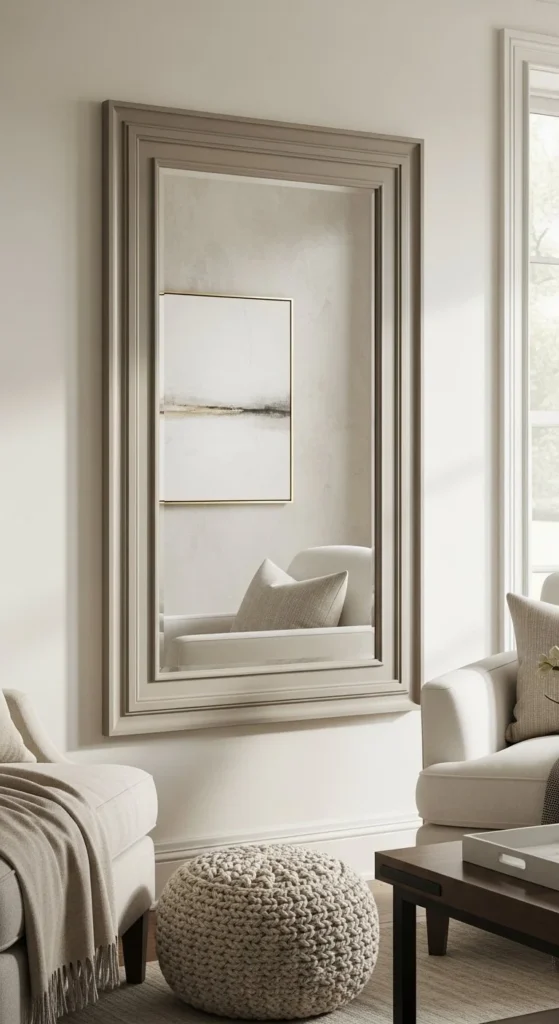
27. Minimalist Floating Frame Mirror
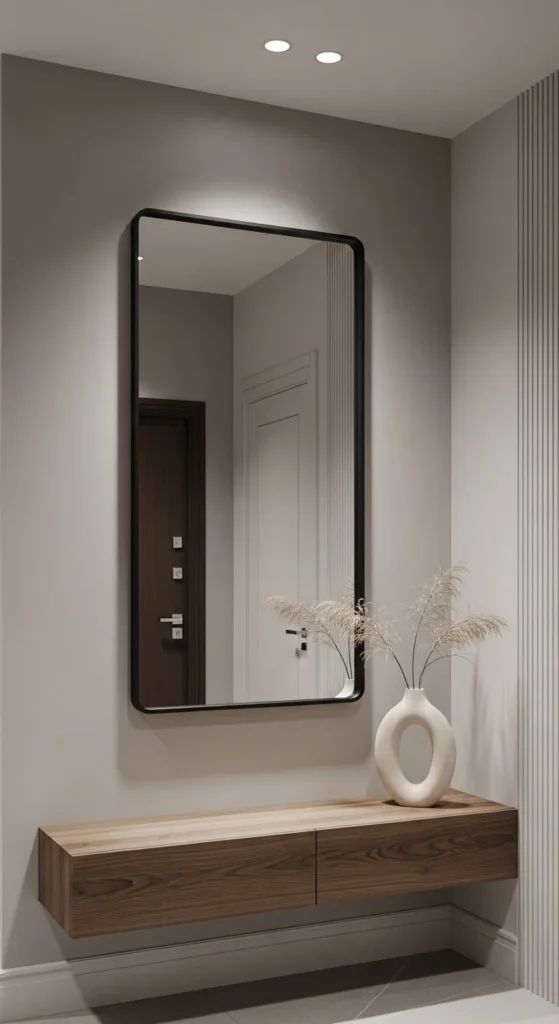
Floating frames create a sleek modern mirror look with subtle depth. Use thin wood strips or foam board for frame. Attach to mirror edges with strong adhesive. Works in hallways, bathrooms, or bedrooms. Matte black or dark finishes emphasize reflections. Lightweight backing simplifies wall mounting. Keep surrounding furniture minimal to enhance floating effect. Accurate mitered corners improve clean lines. Soft lighting highlights depth subtly. This DIY provides a high-end aesthetic on a budget. It’s quick, beginner-friendly, and versatile across rooms. Reflective surfaces enhance natural light and room perception.

Leave a Reply