
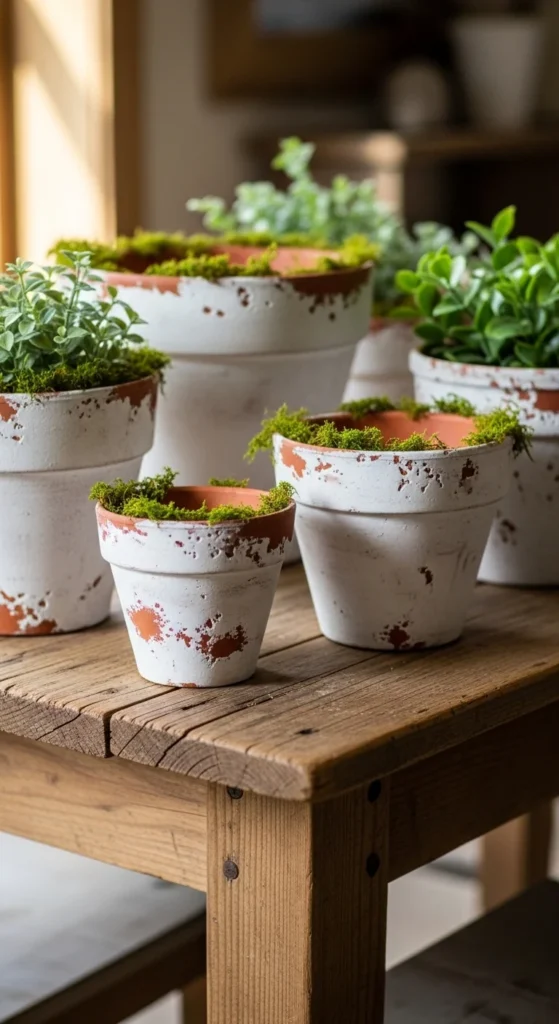
There’s something irresistibly charming about a clay pot that looks like it has lived a hundred lives.
The soft chalky fade… the worn edges… the hint of mossy age distressed clay pots instantly bring that cozy shabby chic / farmhouse / French-country aesthetic into any space. And the best part? You don’t need antique planters or expensive décor to get the look.
With a few simple supplies and a little creative mess, you can transform plain terracotta into beautifully aged statement pieces perfect for porches, shelves, centerpieces, or gifts.
What Does “Distressing” a Clay Pot Mean?
Distressing is the art of making something new look aged, weathered, or vintage.
Instead of smooth, bright terracotta, you create:
- Faded paint layers
- Chalky textures
- Worn rims and edges
- Natural patina effects
- Moss or mineral aging looks
It’s less about perfection and more about character.
Think: flea-market finds, French cottages, garden antiques.
Supplies You’ll Need
You likely have most of these already which makes this DIY even better.
Basic Materials
- Terracotta clay pots
- Chalk paint (white, cream, sage, grey)
- Acrylic paint (optional for layering)
- Sandpaper (medium + fine grit)
- Paintbrushes or sponge brushes
- Water bowl
- Paper towels or cloth
Optional Aging Add-Ons
- Baking soda (for texture)
- Cinnamon or garden soil (for patina tones)
- Moss or faux moss
- Matte sealer spray
Step-by-Step: How to Distress Clay Pots
Step 1 Start with a Clean Base
Wipe your clay pot to remove:
- Dust
- Dirt
- Price stickers
- Oils from handling
If the pot is glossy, lightly sand it first so paint sticks better.
No need to seal raw terracotta; its natural absorbency helps create that aged effect.
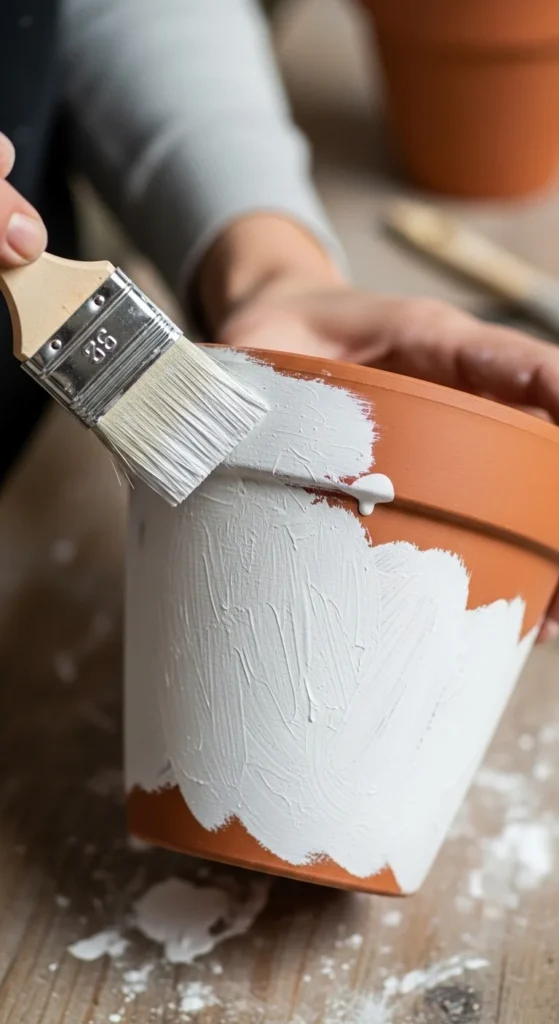
Step 2 Apply the First Paint Layer
Choose your base color:
- White → classic shabby chic
- Cream → vintage warmth
- Sage → farmhouse garden
- Grey → French country
Lightly brush paint across the pot.
Do NOT aim for full coverage. Uneven strokes create authenticity.
Pro tip:
- Add a little water to thin paint for a faded wash effect.
Step 3 Create Texture (Optional but Powerful)
If you want an older, crusted look:
Mix into paint:
- Baking soda → chalky mineral texture
- Fine sand → gritty weathered feel
Dab the mixture unevenly using:
- Sponge
- Stiff brush
- Paper towel
Focus on:
- Rim edges
- Raised details
- Pot base
This mimics natural aging from minerals and time.
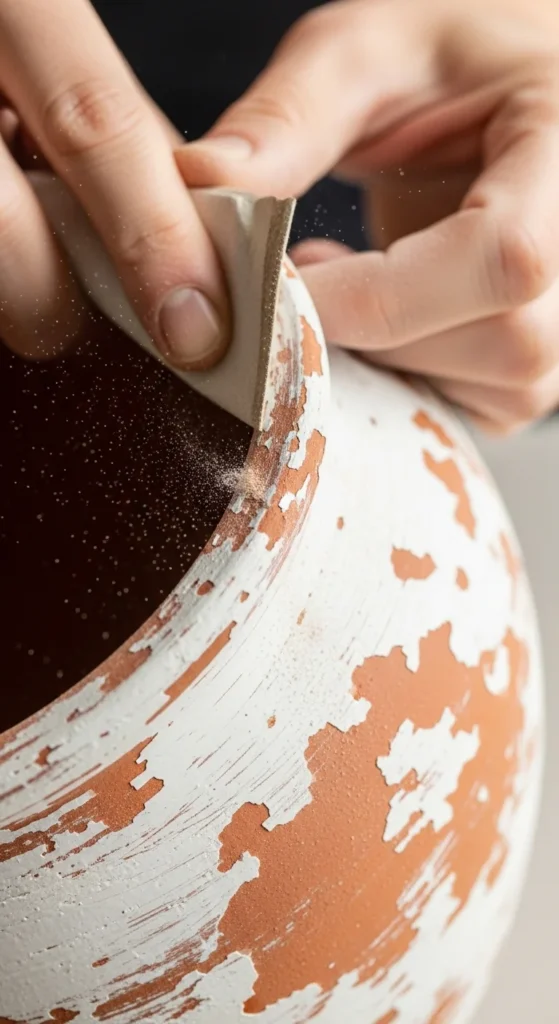
Step 4 Sand for Authentic Wear
Once paint dries, sand lightly.
Target areas that would naturally age:
- Top rim
- Pot edges
- Raised patterns
- Bottom curve
Use:
- Medium grit → stronger wear
- Fine grit → subtle distress
You’ll reveal terracotta underneath the magic moment where “new” becomes “vintage.”
Step 5 Add Aging Layers & Patina
This is where personality comes alive.
Try these aging techniques:
Dry Brush Method
- Dip brush lightly in darker paint
- Wipe most off
- Drag across texture
Creates shadow depth.
Soil or Cinnamon Rub
- Rub lightly into crevices
- Seal to preserve
Adds antique warmth.
Moss Effect
- Glue small moss patches
- Focus near base or cracks
Perfect for garden styling.
Layers slowly aging look best when subtle.
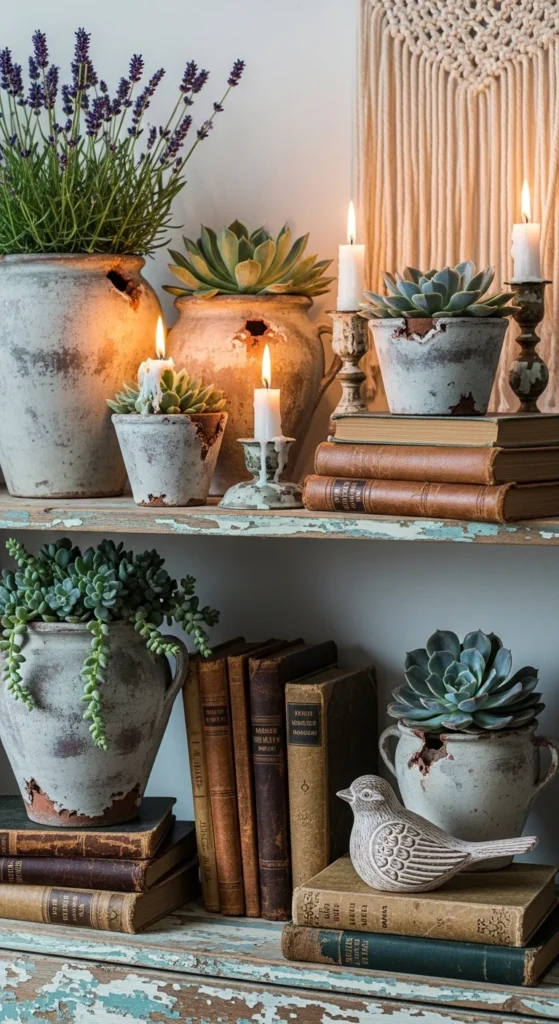
Styling Your Distressed Pots
Now the fun part is decorating with them.
Use distressed pots for:
- Indoor plant shelves
- Coffee table centerpieces
- Porch steps
- Kitchen herb gardens
- Wedding décor
- Gift baskets
They pair beautifully with:
- Lavender
- Succulents
- Faux greenery
- Dried florals
Pro Tips for the Best Shabby Chic Finish
1) Stick to Muted Colors
Bright tones ruin the vintage illusion.
2) Imperfection Wins
Uneven paint = authenticity.
3) Layer Light to Dark
Build age gradually.
4) Focus on Edges
Natural wear happens where pots are handled.
5) Seal for Longevity
Use matte sealer, never gloss.
Common Mistakes to Avoid
- Over-painting (looks modern)
- Skipping sanding (no depth)
- Using glossy paint
- Perfect brush strokes
- Too much moss or dirt
Remember: distressed ≠ dirty, it’s curated aging.
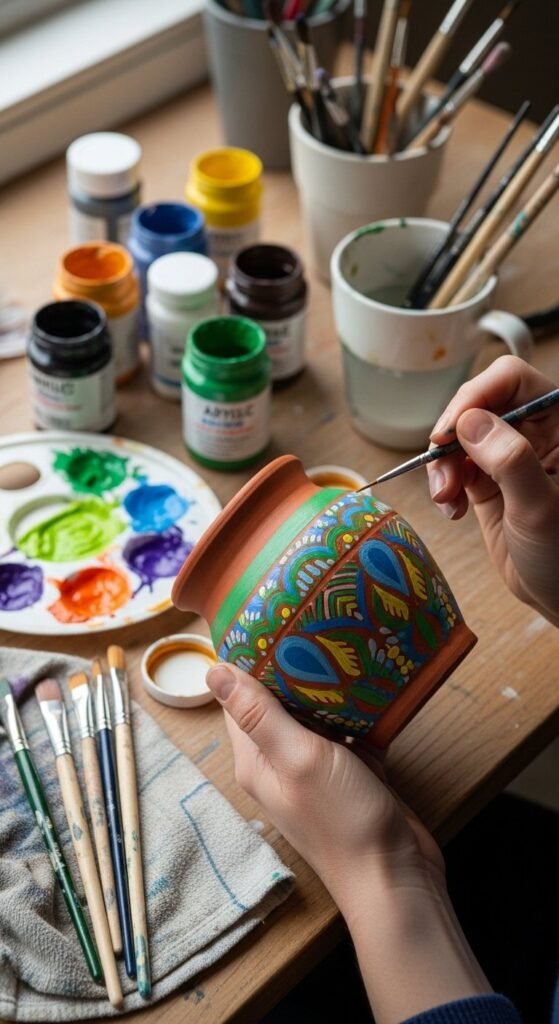
Easy Variations to Try
Once you master the basics, experiment:
- French script stencils
- Floral decoupage + distress
- Two-tone layered paint
- Limewash finishes
- Crackle medium effects
Each variation adds a new story to your pots.
Final Thoughts
Distressing clay pots is one of those rare DIYs that’s:
- Affordable
- Beginner-friendly
- Highly aesthetic
- Instantly rewarding
You’re not just painting pots, you’re creating décor that feels storied, warm, and lived-in.
And the more imperfect they look… the more beautiful they become.
So grab a brush, embrace the mess, and start aging your own little pieces of vintage charm.
Save this guide for later and pin your finished pots for inspiration!

Leave a Reply