
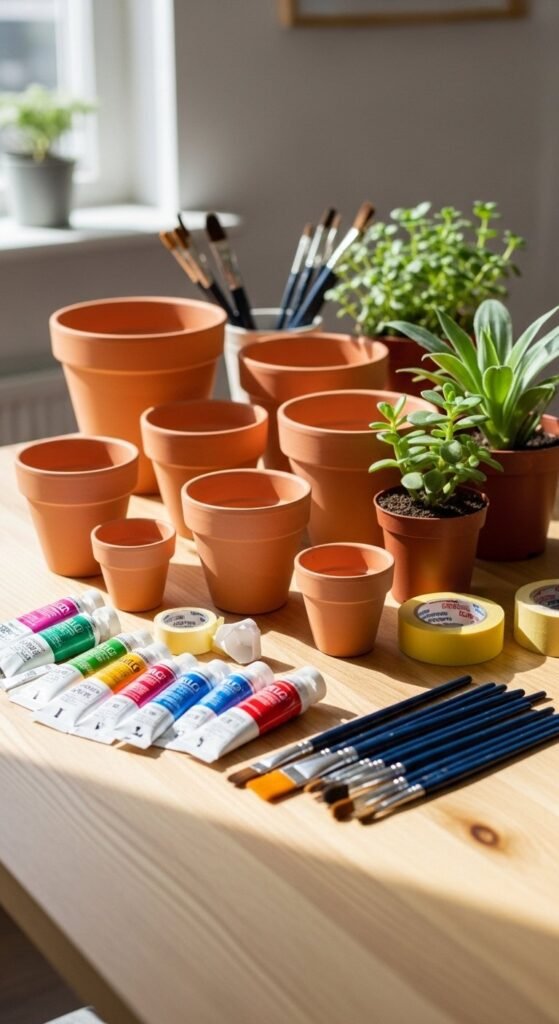
Plain clay pots are everywhere and that’s exactly why they’re such a perfect canvas. With just a little paint, texture, or creativity, you can turn an ordinary terracotta pot into something that looks custom, stylish, and Pinterest-worthy. The best part? You don’t need expensive tools or advanced skills. Most designs are beginner-friendly, affordable, and even fun for families.
Whether you’re decorating your home, upgrading your plant corner, or making a heartfelt gift, this guide will walk you through simple ways to create stunning designs on plain clay pots step by step.
1. Start With the Right Prep (Don’t Skip This!)
Before any paint or decoration, prep makes all the difference. Clay pots are porous, so a little groundwork helps your design last longer and look cleaner.
Quick prep checklist:
- Wipe the pot with a dry or slightly damp cloth to remove dust
- Let it dry completely
- Apply a base coat of white or neutral acrylic paint if you want colors to pop
- Optional: seal the inside with a clear varnish to reduce moisture damage
This step alone can turn a “crafty” look into a polished one.
2. Easy Paint Techniques That Always Look Good
Painting is the most popular way to decorate clay pots—and for good reason. These techniques are simple but effective.
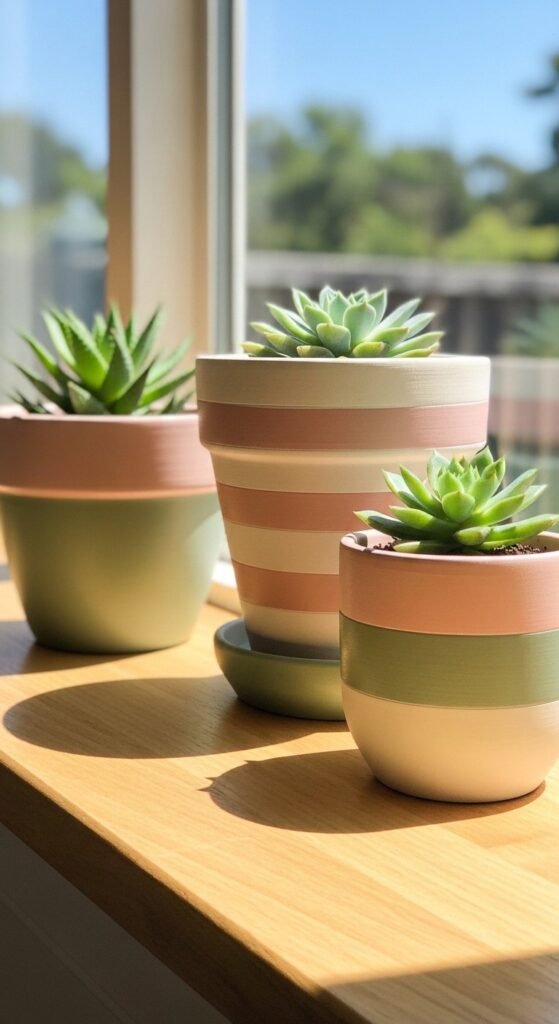
Color Blocking
Clean, modern, and foolproof.
- Use painter’s tape to section off areas
- Stick to 2 to 3 complementary colors (pastels, neutrals, or earthy tones)
- Peel tape once paint is slightly dry for crisp edges
Geometric Patterns
Perfect for minimal or modern decor.
- Tape triangles, stripes, or zigzags
- Paint over the tape
- Remove tape carefully for sharp lines
Polka Dots & Stripes
Fun and beginner-friendly.
- Use the end of a brush or a cotton swab for dots
- Freehand stripes or guide them with tape
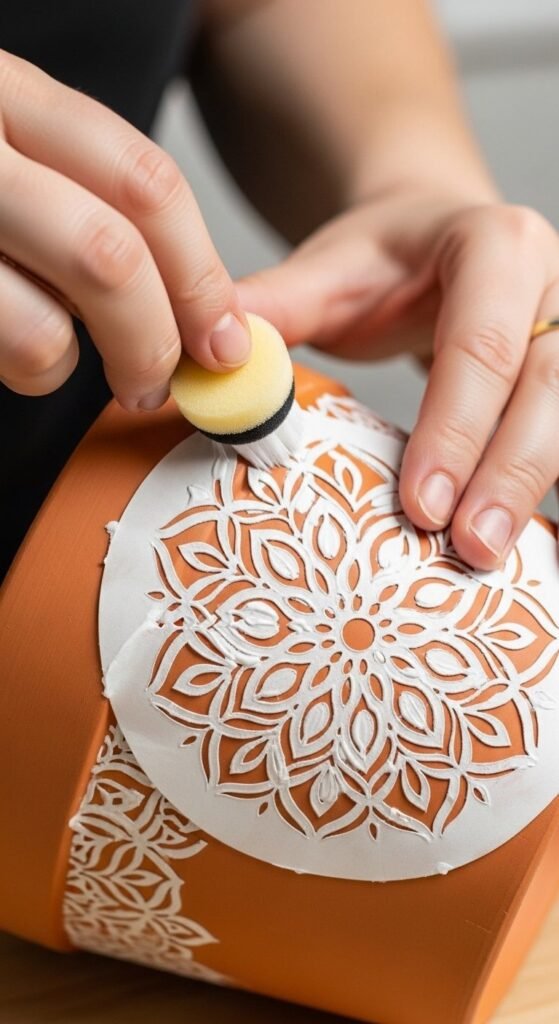
3. Stencils for Foolproof Designs
If freehand painting feels intimidating, stencils are your best friend. They create professional-looking results with very little effort.
Popular stencil styles:
- Mandala or paisley for boho decor
- Simple florals for farmhouse looks
- Geometric shapes for modern homes
Pro tip: Dab paint gently with a sponge instead of brushing to avoid bleeding under the stencil.
4. Texture & Embellishments for a Handmade Feel
Paint isn’t your only option. Adding texture can completely change the look of a pot.
Yarn or Rope Wraps
- Wrap jute or yarn around the pot
- Secure with hot glue
- Leave the top rim exposed for a clean finish
Fabric or Paper Decoupage
- Cut fabric or printed paper to size
- Glue it onto the pot smoothly
- Seal with a clear topcoat
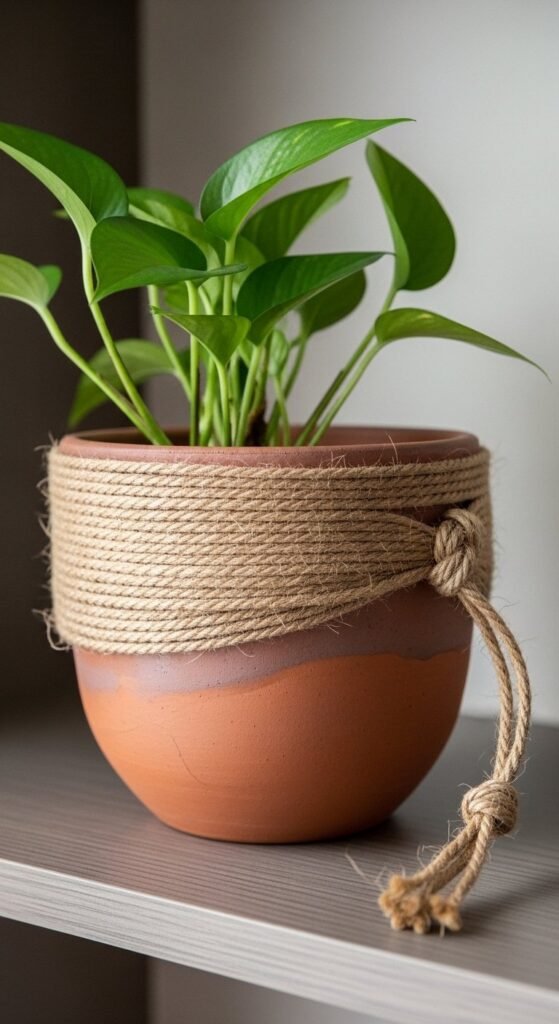
These styles are great for cozy, rustic, or bohemian interiors.
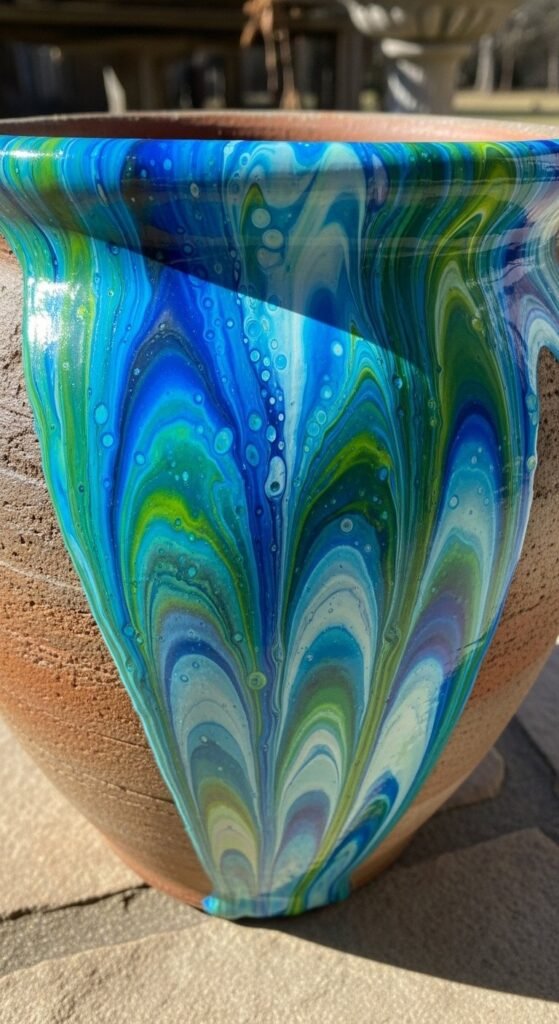
5. Try Acrylic Pouring for Abstract Art
For something more artistic and trendy, acrylic pouring creates dreamy, one-of-a-kind patterns.
Basic method:
- Mix acrylic paint with a pouring medium
- Pour colors slowly over the pot
- Let them flow naturally
- Allow 24 to 48 hours to dry fully
This works especially well with blues, greens, and earthy tones for calm, modern plant displays.
6. Personalize Pots for Gifts & Special Occasions
Personalized clay pots make thoughtful, low-cost gifts.
Ideas to try:
- Hand-painted names or initials
- Simple plant puns for herb pots
- Seasonal designs (pumpkins for fall, florals for spring)
- Cute faces or animals for kids’ rooms
Keep lettering simple and bold; it reads better from a distance.
7. Seal It for a Long-Lasting Finish
Once your design is dry, sealing protects your work from chipping, fading, and moisture.
Choose a sealer based on use:
- Indoor pots: matte or satin clear spray
- Outdoor pots: weatherproof or waterproof sealant
Apply 1–2 thin coats and let dry fully before planting.
Final Takeaway
You don’t need fancy supplies or artistic talent to make stunning designs on plain clay pots. With simple paint techniques, stencils, texture, and a bit of creativity, you can turn basic terracotta into decor that looks custom and intentional.
Start with one pot, experiment freely, and let the imperfections be part of the charm.
👉 Save this guide for later and try one idea this weekend!

Leave a Reply