
A plain terracotta pot might look humble, but in the world of DIY decor, it’s a blank canvas waiting for personality. With just a bit of paint, texture, or imagination, simple clay pots can turn into statement pieces for your home, garden, or even thoughtful handmade gifts. Whether you’re a total beginner or someone who loves weekend crafts, this guide will walk you through easy, creative ways to transform clay pots into eye-catching art without stress or fancy tools.
Step 1: Prep Your Clay Pots the Right Way
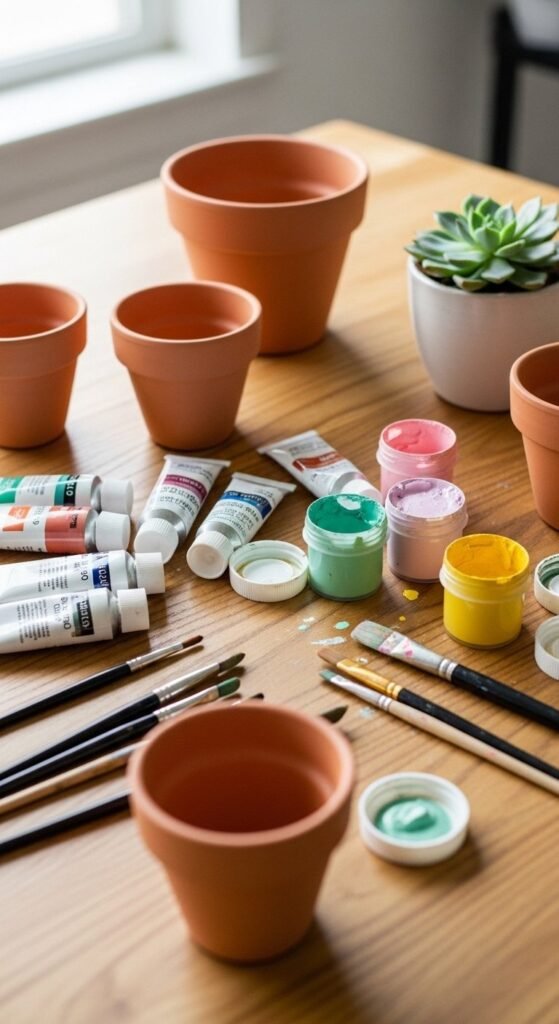
Before you touch paint, preparation makes all the difference. Clay is porous, which means paint can soak in unevenly if you skip this step.
What to do:
- Soak new pots in water for 30–60 minutes, then let them dry completely.
- Wipe off dust with a dry cloth.
- Apply a thin coat of primer or white acrylic paint if you want bright, even colors.
Why it matters:
Good prep helps paint stick better and prevents patchy results—especially important for outdoor pots.
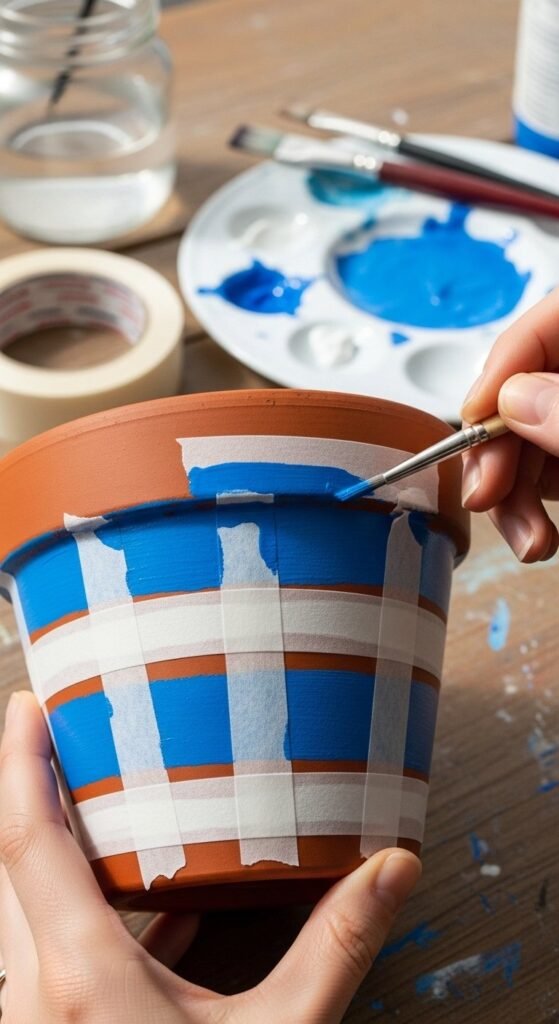
Step 2: Choose a Beginner-Friendly Painting Style
You don’t need advanced skills to get great results. These styles are simple, forgiving, and look impressive.
Easy ideas to start with:
- Solid colors: One bold shade instantly upgrades a pot.
- Polka dots or stripes: Use painter’s tape or a sponge.
- Abstract brush strokes: No rules, no pressure.
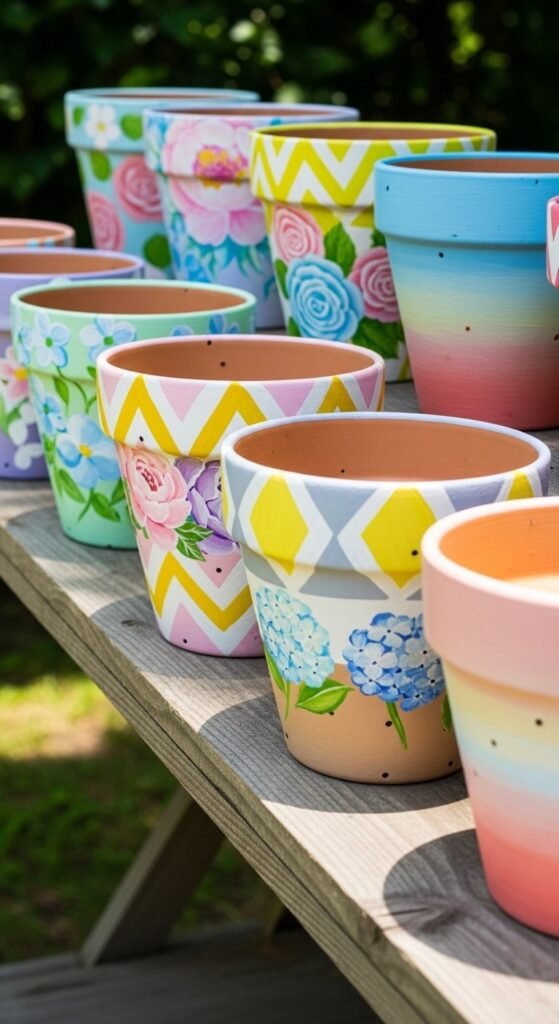
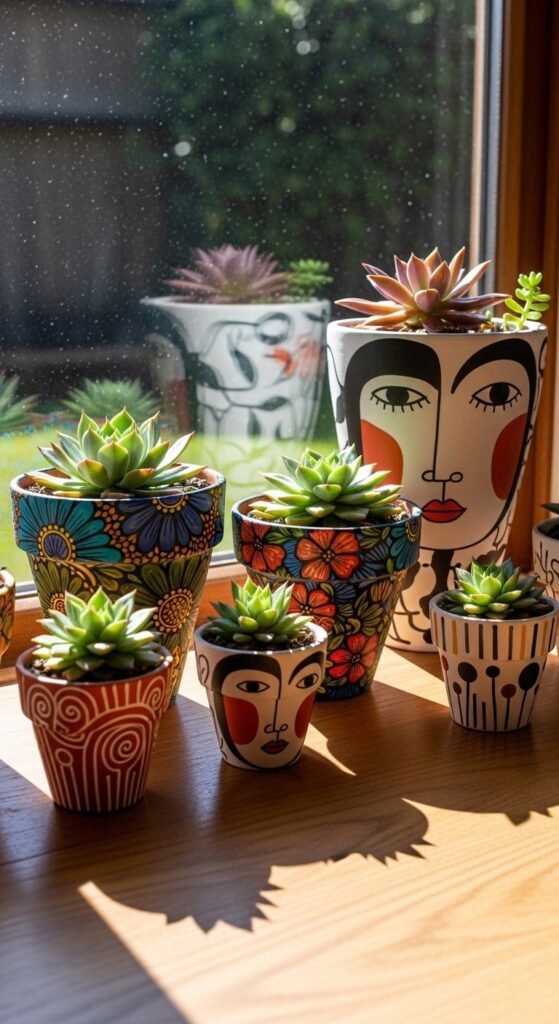
Step 3: Try Trendy Designs That Always Look Good
If you want your pots to feel modern and Pinterest-worthy, these ideas are trending for a reason.
Popular design themes:
- Floral patterns: Soft pastel flowers and leafy vines for spring vibes.
- Animal faces: Foxes, owls, ladybugs—especially fun for kids’ crafts.
- Geometric patterns: Triangles, half-dips, and bold shapes for a minimalist look.
- Ombre gradients: Blend two colors while the paint is still wet for a smooth fade.
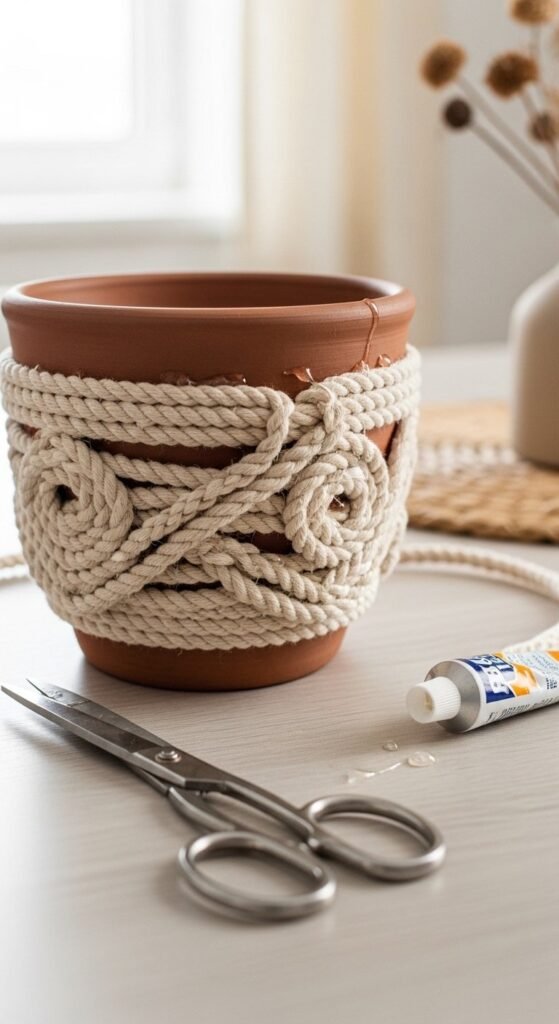
Step 4: Add Texture Without More Painting
Paint isn’t the only way to decorate clay pots. Texture adds depth and makes your project stand out.
Creative texture ideas:
- Wrap pots with cotton rope or twine using craft glue.
- Add beads, buttons, or small stones for mixed-media designs.
- Lightly sand chalk-painted pots for a rustic, farmhouse finish.
These techniques are perfect if you want a unique look or prefer a no-paint option.
Step 5: Seal for Durability (Especially Outdoors)
This step is non-negotiable if your pots will live outside.
Seal it properly:
- Use a clear acrylic sealer or outdoor-safe finish.
- Apply 1–2 thin coats with drying time in between.
- Seal both the inside and outside for extra protection.
Sealing prevents fading, peeling, and water damage—so your artwork lasts.
Step 6: Style and Use Your Finished Pots
Once dry and sealed, it’s time to show them off.
Ideas for display:
- Pair small painted pots with succulents for shelves or desks.
- Group different designs together for a table centerpiece.
- Use character or animal pots as gifts or kids’ room decor.
Final Takeaway
Turning simple clay pots into eye-catching art pieces doesn’t require talent—just curiosity and a willingness to try. Start small, experiment with colors or textures, and don’t worry about perfection. Each pot becomes more personal the moment you touch it.
✨ Save this guide for later, grab a few pots, and let your creativity take over!

Leave a Reply