
Nothing ruins a cozy garden aesthetic faster than bright, brand-new orange clay pots. They look fresh… but not in a charming way. If you love farmhouse gardens, French patios, or antique-inspired décor, you already know the magic lies in that soft, weathered, time-worn finish.
The good news? You don’t have to wait years for nature to do the work.
With a few simple household ingredients and beginner-friendly techniques, you can transform basic terra cotta into stunning vintage showpieces in hours, days, or weeks depending on the look you want.

Why Vintage Clay Pots Are So Popular
Vintage-style pots instantly elevate any space. They add:
- Old-world European charm
- Farmhouse garden warmth
- Visual texture and depth
- A softer, less “manufactured” look
They’re perfect for:
- Porch styling
- Shelf displays
- Herb gardens
- Faux topiary arrangements
- Hanging wall planters
And the best part? You can create the look on a budget often under $5 per pot.
Method 1 Lime Wash Aging (Fast & Natural)
If you want a soft, chalky, weathered finish, lime wash is the easiest place to start.
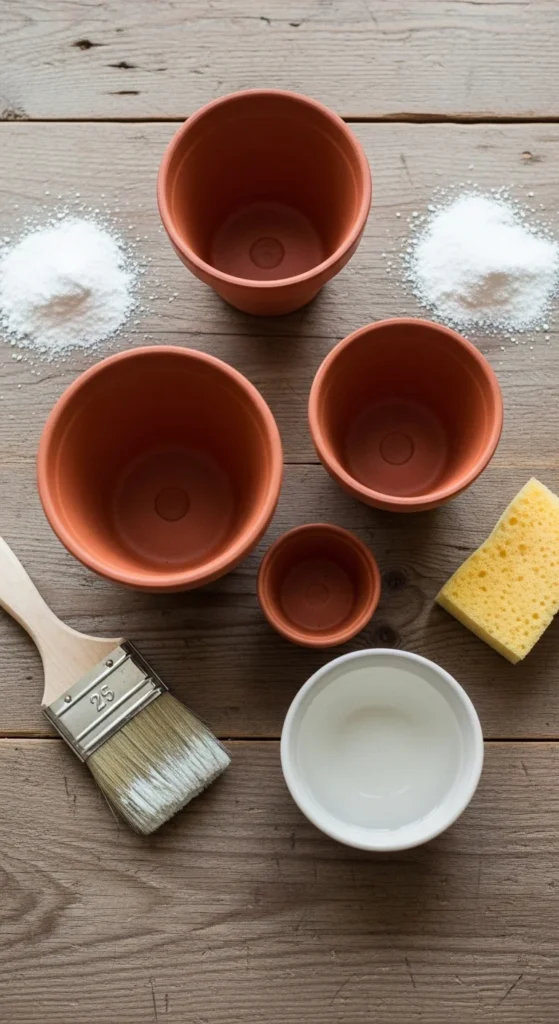
What You’ll Need
- Garden lime
- Water
- Sponge brush or paintbrush
- Bowl for mixing
- Sandpaper (optional)
Step-by-Step
- Mix garden lime with water until it forms a thin paste.
- Brush the mixture unevenly onto the pot.
- Let it dry completely.
- Lightly sand edges for natural wear.
Pro Tip:
Avoid perfect brush strokes. Uneven coverage looks more authentic.
This method gives a soft white haze like a pot that’s been sitting in a European garden for decades.
Method 2 Yogurt Moss Patina (Slow but Stunning)
If you love green, mossy textures this method creates the most realistic aged effect.
But patience is key.
What You’ll Need
- Plain yogurt (or buttermilk)
- Paintbrush
- Outdoor storage area
- Optional: real or preserved moss
Steps
- Brush yogurt generously over the pot.
- Press moss into areas if desired.
- Place pots outdoors in shade.
- Lightly mist every few days.
- Wait 3–4 weeks for patina to develop.
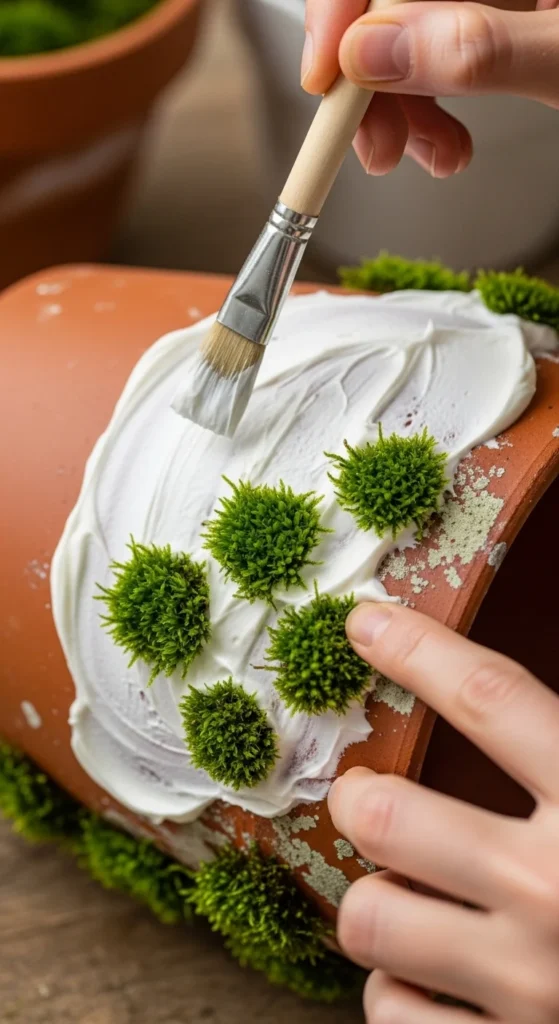
Over time, natural green growth forms creating that authentic antique garden look.
Reader Hack:
Crushed moss in a sealed bag can speed up growth by spreading spores.
Method 3 Chalk Paint Chippy Finish (Instant Vintage)
Want results today? This is your fastest transformation.
Perfect for farmhouse or French cottage styling.
Supplies
- Chalk paint
- Mod Podge or glue
- Baking soda (optional texture boost)
- Paintbrush
- Sandpaper
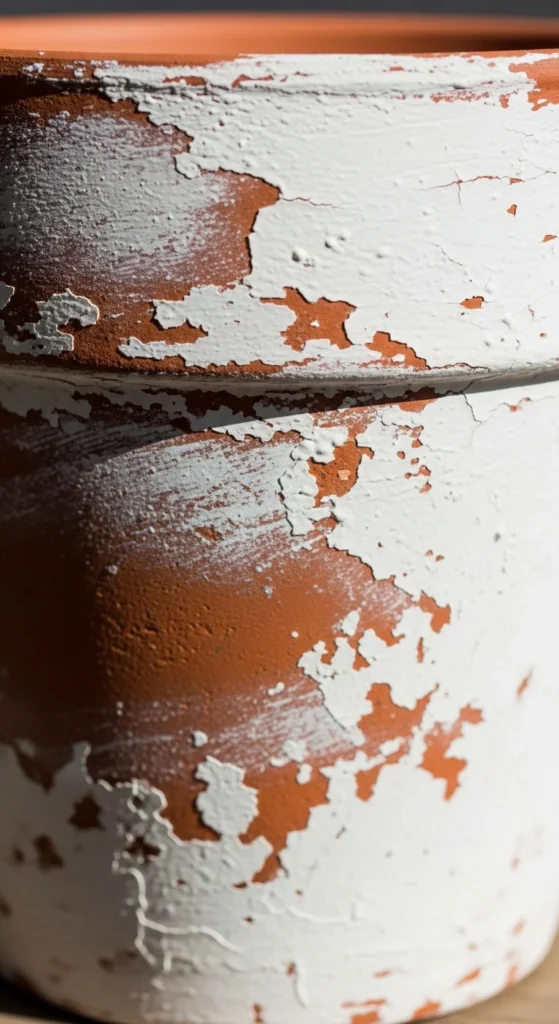
How to Do It
- Apply a base layer of Mod Podge or glue.
- Let it get slightly tacky.
- Paint over with chalk paint.
- Sprinkle baking soda for texture (optional).
- Let it dry.
- Sand edges and raised areas.
The glue prevents full adhesion so paint chips naturally as it dries.
Result? A perfectly imperfect antique finish in under an hour.
Texture Hacks That Make Pots Look Truly Old
Paint alone isn’t enough. Real vintage pots have depth.
Try layering texture with:
- Spray adhesive + preserved moss
- Plaster of Paris for sculpted wear
- Tile adhesive for French antique thickness
- Bone meal paste for calcium patina
Use these sparingly to focus on rims, bases, and natural wear zones.
Distressing Like a Pro
Distressing is where the magic happens.
Focus sanding on:
- Rim edges
- Raised patterns
- Bottom curves
- Random side patches
Use light, uneven pressure.
Golden Rule:
If it looks too perfect, keep sanding.
Vintage = irregular.
Weatherproofing Your Vintage Finish
If pots live outdoors, sealing matters.
Options
- Matte sealer → protects paint effects
- Outdoor Mod Podge → light protection
- No sealer → allows natural aging
Many gardeners prefer skipping sealer so nature continues the patina process.
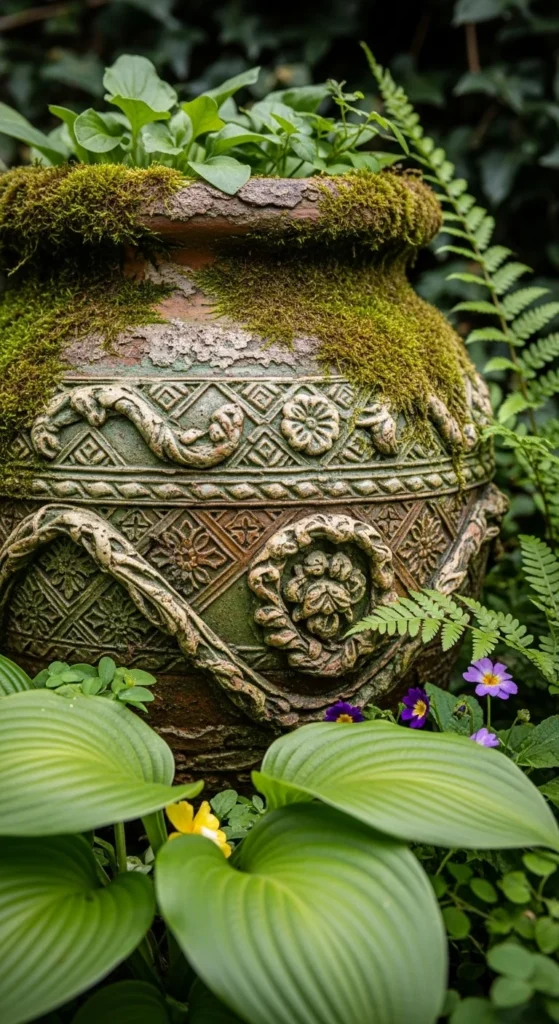
Styling Ideas for Aged Clay Pots
Once finished, don’t just plant them.
Use vintage pots for:
- Hanging wall shelves
- Window box displays
- Potting bench décor
- Faux lavender topiaries
- Herb kitchen gardens
- Vertical garden ladders
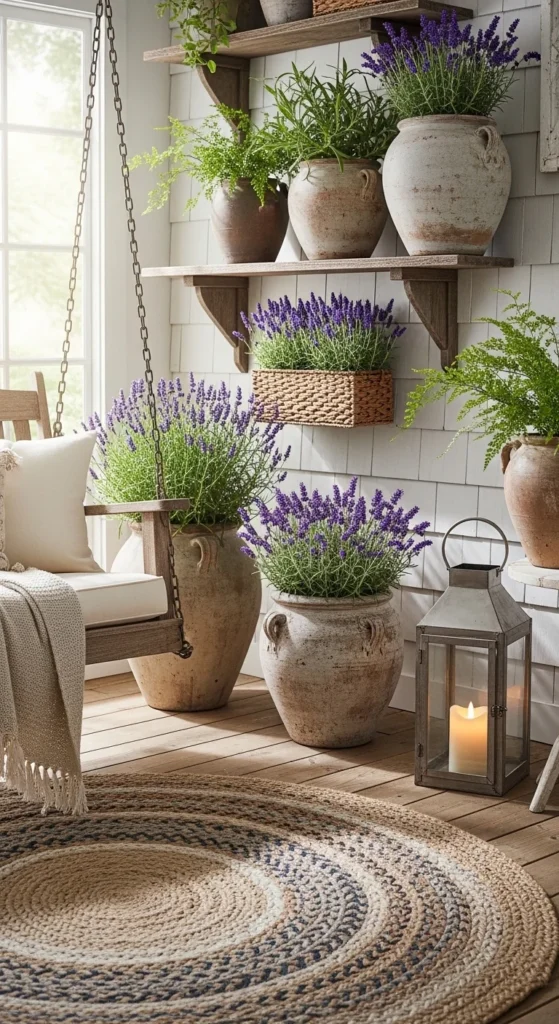
Mix sizes and finishes for the most natural look.
Budget vs Antique: Is DIY Worth It?
Let’s compare:
| Option | Cost | Look | Time |
| New pot + DIY aging | $1–5 | Custom vintage | Hours–weeks |
| Store antique replica | $40–120 | Authentic | Instant |
| Real antique | $$$ | True vintage | Rare |
DIY wins for affordability and creativity.
Common Mistakes to Avoid
- Over-painting evenly
- Skipping sanding
- Using glossy sealers
- Forgetting texture layers
- Aging only one pot (sets look better)
Cluster styling always looks more authentic than single pieces.
Final Thoughts
Giving clay pots a vintage finish is one of the easiest ways to upgrade your garden, porch, or indoor plant styling without spending a fortune.
Whether you choose:
- Lime wash for soft aging
- Yogurt for moss patina
- Chalk paint for chippy distress
Each method brings its own character and charm.
And the beauty? No two pots will ever look the same.
So experiment. Layer techniques. Let nature help.
Save this guide for later and start transforming those bright orange pots into timeless vintage treasures.

Leave a Reply