
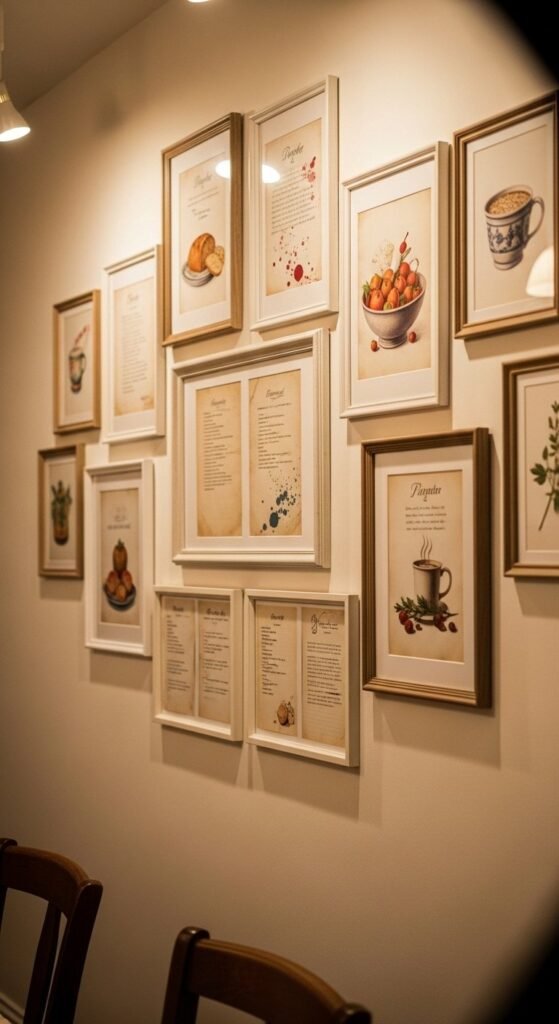
1. Themed Gallery Wall with Everyday Objects
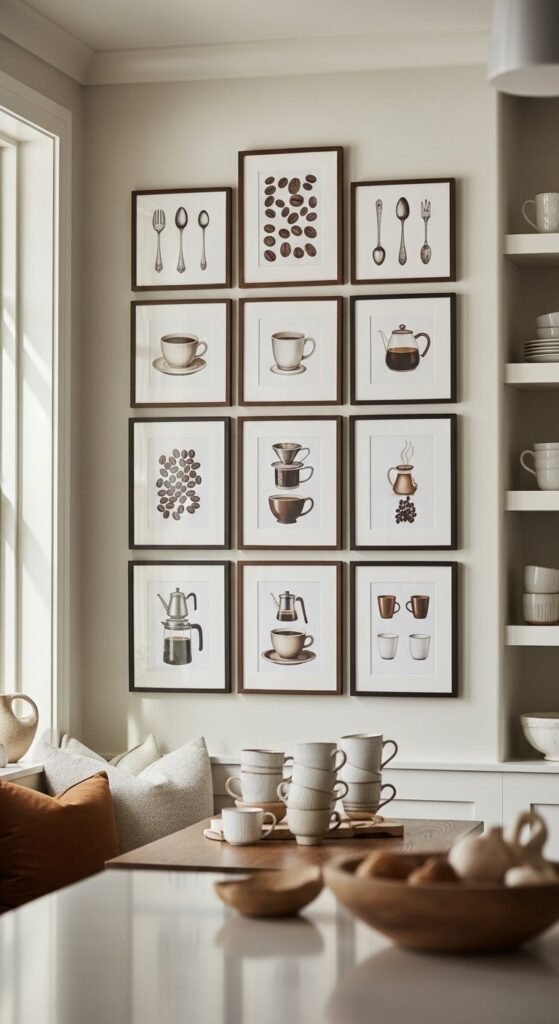
Gallery walls don’t have to rely on art prints. Everyday objects tell better stories. Start with a theme like coffee, baking, or herbs. Keep colors tight so the wall feels intentional. Black, wood, or brass frames work well together. Mix flat frames with shallow shadow boxes for depth. Personalized wall decor connects the room to real habits.
Budget tip: thrift stores sell frames cheaply, especially in bulk. Spray paint mismatched ones for cohesion. Use removable hooks if drilling isn’t an option. Lay everything on the floor first. Snap a photo. Adjust spacing before hanging. Odd numbers look relaxed. Symmetry feels calm. Both work if you commit.
Styling trick: leave breathing room around the cluster. One crowded wall looks better than many scattered ones. Add one unexpected item, like a recipe card or café menu. That detail makes people pause. This idea works in kitchens, hallways, and dining corners. It’s simple, expressive, and easy to update over time.
2. Light Paint Color Reset
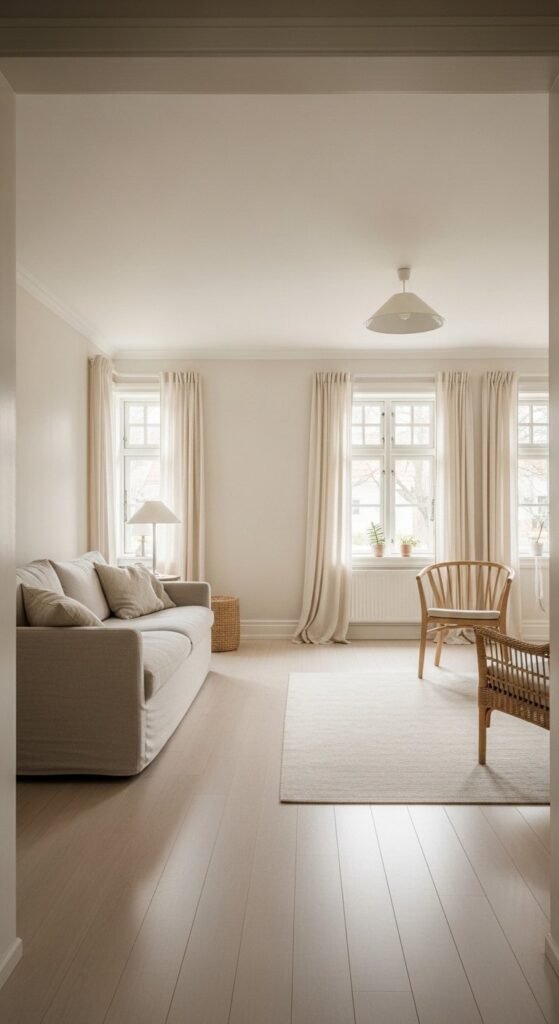
Paint changes how a room feels more than any object. Lighter shades reflect light and soften edges. That helps tight spaces feel open. Whites with warm undertones avoid looking stark. Test samples on multiple walls. Light shifts during the day.
Paint is the cheapest visual change you can make. One gallon often covers a room. Focus on walls first. Ceilings can wait. Use quality rollers to avoid streaks. Prep matters. Patch holes. Wipe dust. Those steps save time later.
Styling trick: pair light walls with texture. Think wood, woven baskets, or linen. Contrast keeps the room grounded. If plain white feels flat, try pale greige or soft clay. Those tones still read light but add warmth.
Renters can paint if allowed, or use peel-off paint sheets on accent sections. Keep trim clean for sharp edges. The result feels calm and intentional without adding clutter. Paint resets the whole space and gives everything else a chance to shine.
3. Beginner Crown Molding or Wainscoting
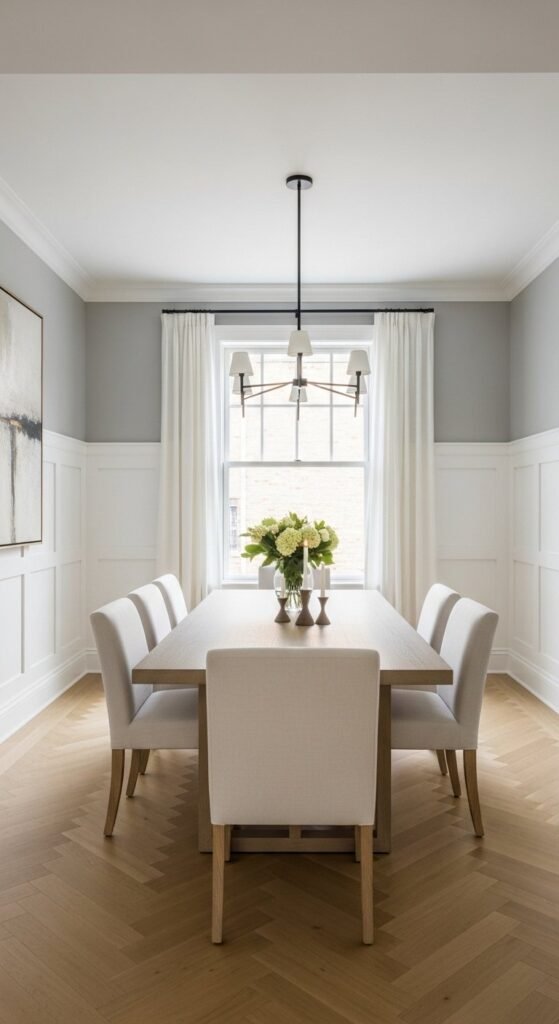
Trim changes proportions. Even basic molding adds structure. Wainscoting draws the eye up and gives walls purpose. Foam or MDF options cut costs and weight. Many installs stay under $50 per wall. Measure carefully. Cut slowly. Caulk hides gaps.
This project looks complex but breaks into steps. Level lines matter more than speed. Paint trim semi-gloss for contrast. Flat paint above keeps balance. Simple trim brings quiet elegance without furniture swaps.
Styling trick: stop wainscoting at one-third wall height. That ratio works in most rooms. For crown molding, thinner profiles suit low ceilings. Thick trim fits taller spaces.
If tools feel intimidating, try peel-and-stick molding. It paints well and removes cleanly. Use it in dining rooms, bedrooms, or hallways. Trim frames the room the way a mat frames art. It’s subtle, but people notice right away.
4. Updated Outlets, Switches, and Vents
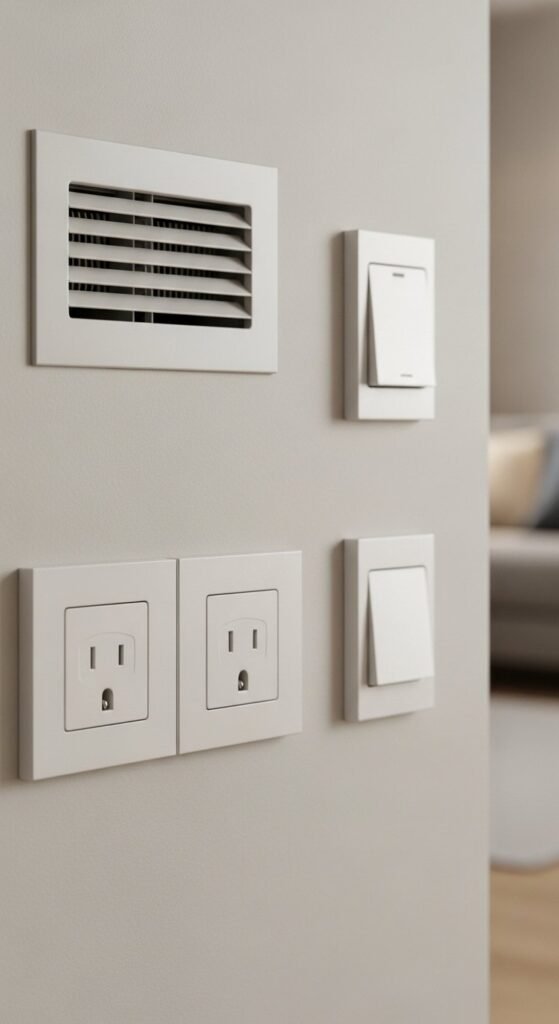
Small details date a room faster than furniture. Yellowed outlets and dusty vents break the illusion of a clean space. Swapping covers takes minutes. Screwless plates look crisp. Matte finishes reading modern.
This is one of those changes guests can’t name but always feel. Tiny updates with big visual payoff work best when done all at once. Replace every cover in the room. Consistency matters.
Budget tip: multipacks cost less per piece. Stick to white, soft gray, or black. Avoid shiny plastic. For vents, remove and spray paint them the wall color. Use light coats. Let dry fully.
Safety note: turn off power before switches. Label breakers. Take photos before rewiring.
Styling trick: match metal finishes across the room. If door handles are black, choose black switch plates. These details pull everything together and make even older homes feel current.
5. Declutter-First Room Reset
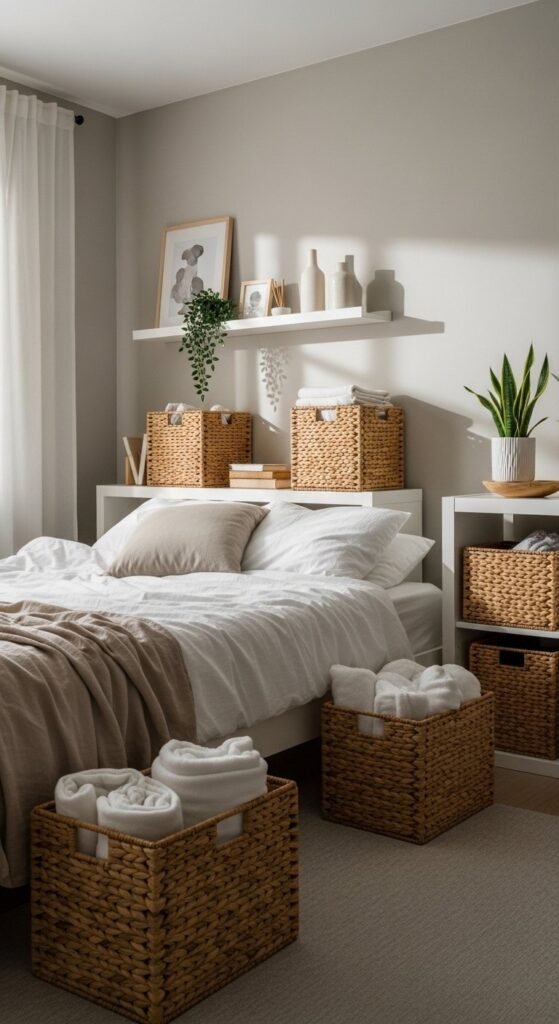
Decor works better after editing. Decluttering clears visual noise. Start with surfaces. Then drawers. Then closets. One zone at a time prevents burnout. Use three piles: keep, donate, recycle. Be honest.
This step costs nothing and changes everything. Less clutter equals calmer rooms. Spaces feel larger. Light moves better. Decor choices stand out instead of competing.
Styling trick: leave some empty space on shelves. Negative space frames objects. Store small items in baskets or boxes. Uniform containers read clean even when full.
Set a timer for 30 minutes. Stop when it rings. Progress counts. You don’t have to finish in one day.
Once cleared, add decor slowly. One piece at a time. That pace keeps rooms from filling back up. Decluttering isn’t dramatic, but it sets the stage for every upgrade that follows.
6. Repurposed Mason Jar Lighting
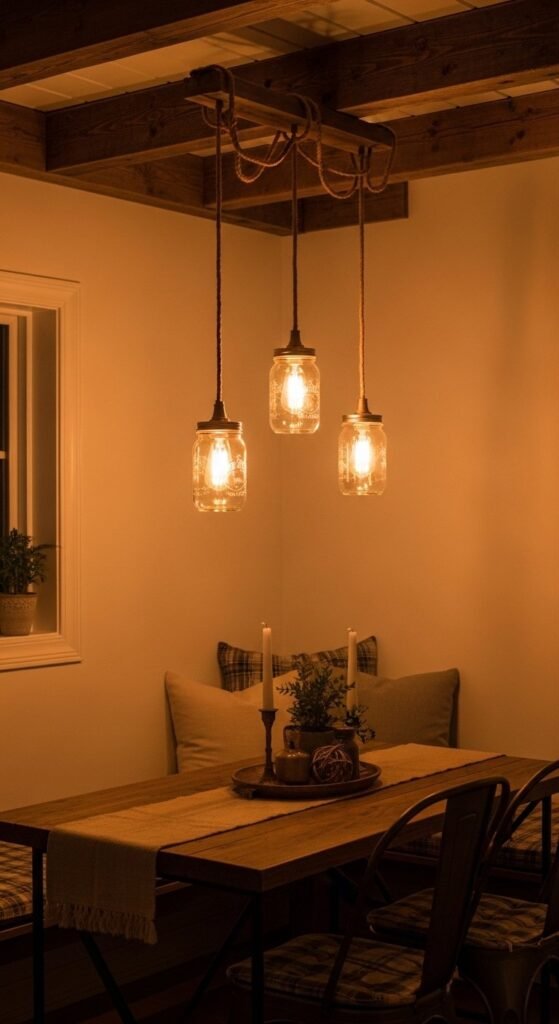
Mason jars work far beyond storage. Turn them into lighting for instant character. Pendant kits are inexpensive and easy to install. Clear jars show off filament bulbs. Frosted jars soften glare. Keep cords simple so the jars stay the focus.
This idea fits kitchens, breakfast nooks, and patios. Upcycled lighting adds warmth without clutter. Use odd numbers when hanging multiples. Vary jar heights slightly for movement.
Budget tip: thrift jars often cost less than a dollar. Rope or twine replaces standard cords for texture. LED bulbs reduce heat and energy use.
Styling trick: pair the lights with wood or metal nearby. That repetition ties the look together. For renters, create a plug-in swag light instead of hardwiring. Hooks handle the weight easily.
The result feels cozy and intentional. It also sparks conversation. People notice handmade lighting right away, especially when it comes from something familiar.
7. Tie-Dye Thrifted Sheets for Kid Rooms
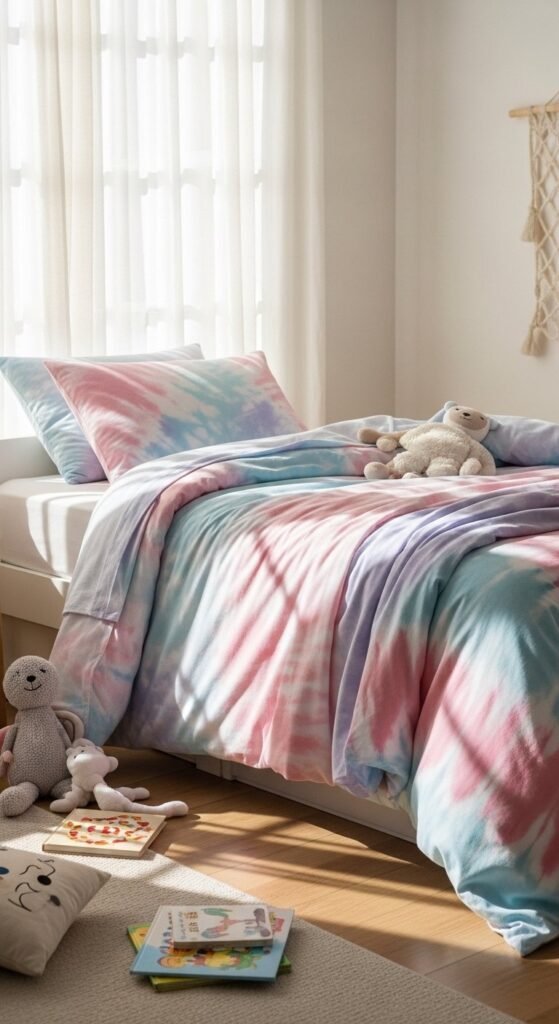
Kids’ rooms change fast. That makes expensive decor risky. Thrifted sheets solve that. Cotton takes dye well. Pastels keep things calm. Bold colors suit playful spaces.
Tie-dye works even for beginners. Use buckets or spray bottles. Rubber bands create patterns. Budget bedding with personality beats store-bought sets every time.
Budget tip: twin sheets are easy to find secondhand. Dye kits cost little and cover multiple projects. Wash separately the first few times.
Styling trick: balance color with neutrals. Keep walls simple. Let bedding do the talking. Add one matching pillow or curtain tie-back using leftover dye.
This project doubles as an activity. Kids enjoy helping. That connection makes the room feel like theirs. When tastes change, re-dye or donate. No guilt. No waste.
8. Chalkboard Paint Accent Zone
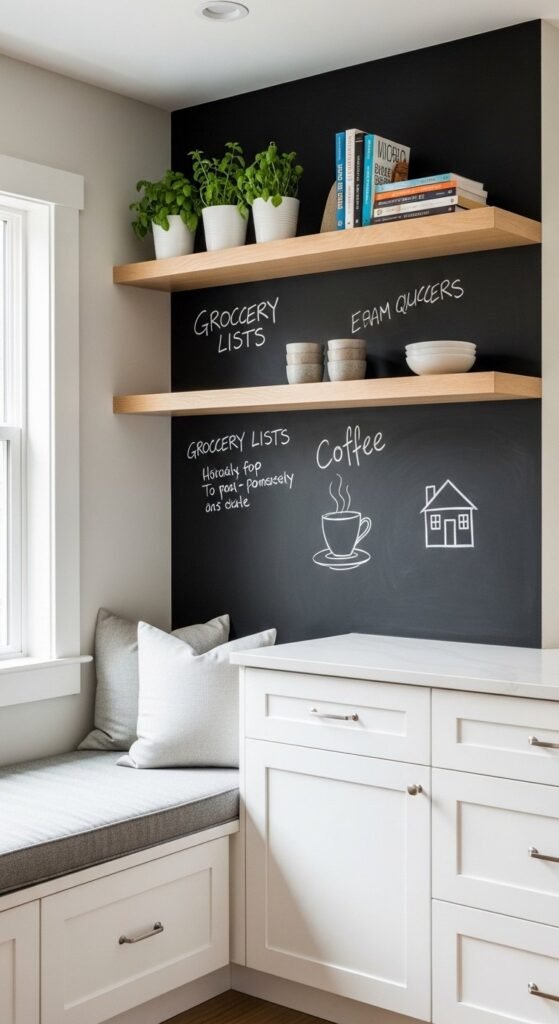
Chalkboard paint turns walls into tools. It invites interaction. Use it in kitchens, offices, or kids’ areas. Limit it to one section so it feels intentional.
Dark paint grounds a room when paired with light surroundings. Functional decor sparks daily use instead of sitting idle. Write menus, reminders, or quotes. Erase when ready for change.
Budget tip: one small can covers a large area. Rollers create smoother finishes than brushes. Condition the surface with chalk before writing.
Styling trick: frame the chalkboard area with thin trim or shelves. That boundary keeps it tidy. White chalk stays classic. Colored chalk adds playfulness.
For renters, removable chalkboard panels offer the same effect. This idea blends creativity with practicality and works well in busy households.
9. Vintage Utensils as Kitchen Wall Art
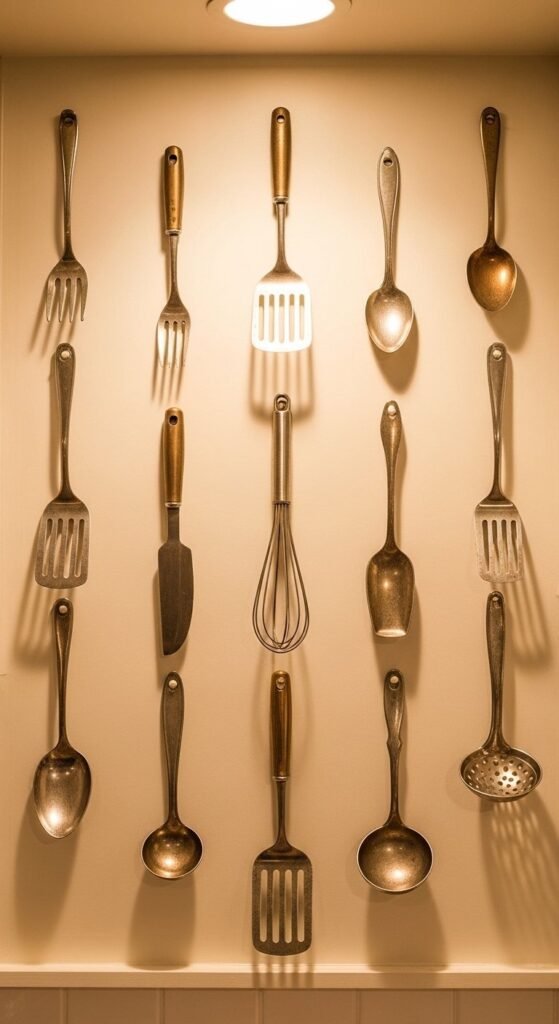
Old utensils carry charm modern tools lack. Ladles, whisks, and rolling pins work as art. Group them by size or function. Keep spacing even.
This decor fits kitchens and dining areas. Kitchen nostalgia adds warmth without crowding counters. Metal finishes reflect light softly. Wood handles add contrast.
Budget tip: flea markets and thrift shops sell utensils cheaply. Clean gently to preserve patina. Avoid polishing too much.
Styling trick: mount on small hooks so pieces can change over time. Mix one framed recipe nearby for context. That pairing feels curated, not random.
This idea celebrates history and craft. It’s personal without being loud. Guests often lean in for a closer look.
10. Stick-On Wallpaper for Renters
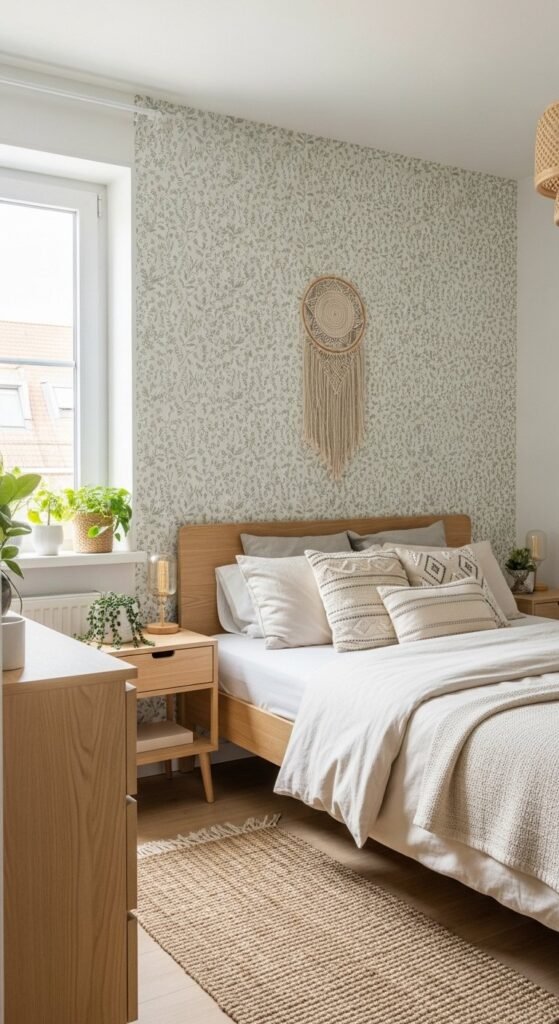
Temporary wallpaper changes rooms fast. Peel-and-stick options are removed cleanly. Use them on one wall for balance. Patterns add interest where paint feels flat.
This works well in bedrooms, bathrooms, and entryways. No-damage wall updates suit renters and commitment-shy decorators alike.
Budget tip: cover a partial wall or nook to save rolls. Many brands offer samples. Align patterns carefully before sticking. Smooth slowly to avoid bubbles.
Styling trick: repeat one color from the wallpaper elsewhere. Pillows or art tie it together. Keep furniture simple so the wall shines.
When it’s time to move or change styles, peel it off. No repairs. No stress. Just a room that finally feels like yours.
11. Power-Washed Exterior Refresh
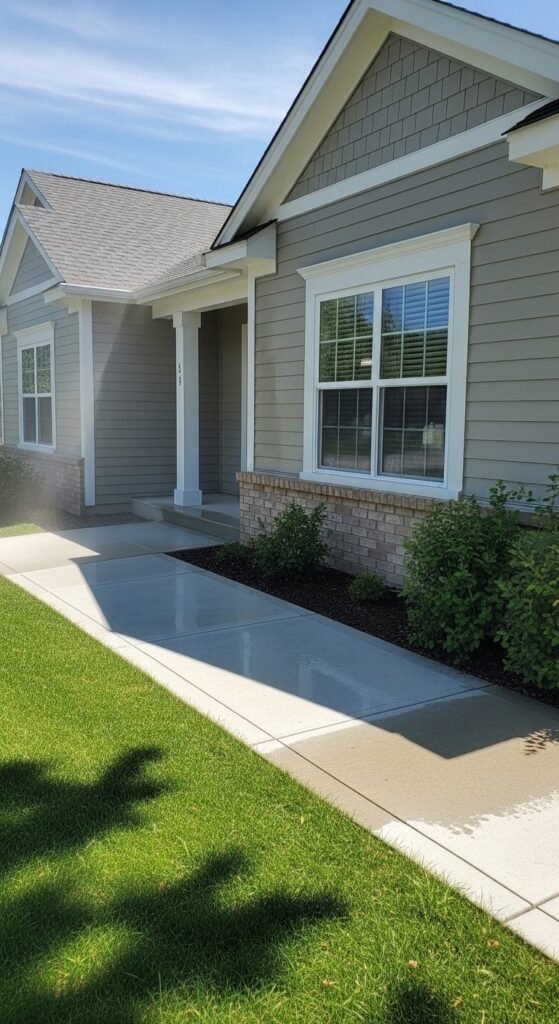
Sometimes the decor starts outside. Power washing resets surfaces fast. Driveways, siding, fences, and patios all respond well. Years of grime disappear in minutes. The difference reads clearly from the street.
This project costs little if you rent a washer for a day. Many hardware stores offer hourly rates. Clean exteriors change first impressions more than new planters ever could. Work top to bottom. Keep the nozzle moving. Avoid fragile areas like old wood.
Styling trick: follow up with simple touches. A new doormat. Trimmed shrubs. Fresh mulch. Those details stand out more against clean surfaces.
Safety matters. Wear eye protection. Test pressure on a hidden spot first. Lower pressure works for siding. Higher pressure suits concrete.
This task feels satisfying and fast. It also makes outdoor spaces more inviting. Once clean, patios and porches beg for seating and lights. It’s an easy way to set the tone before touching interior decor.
12. IKEA Duvet Cover Pillow Hack
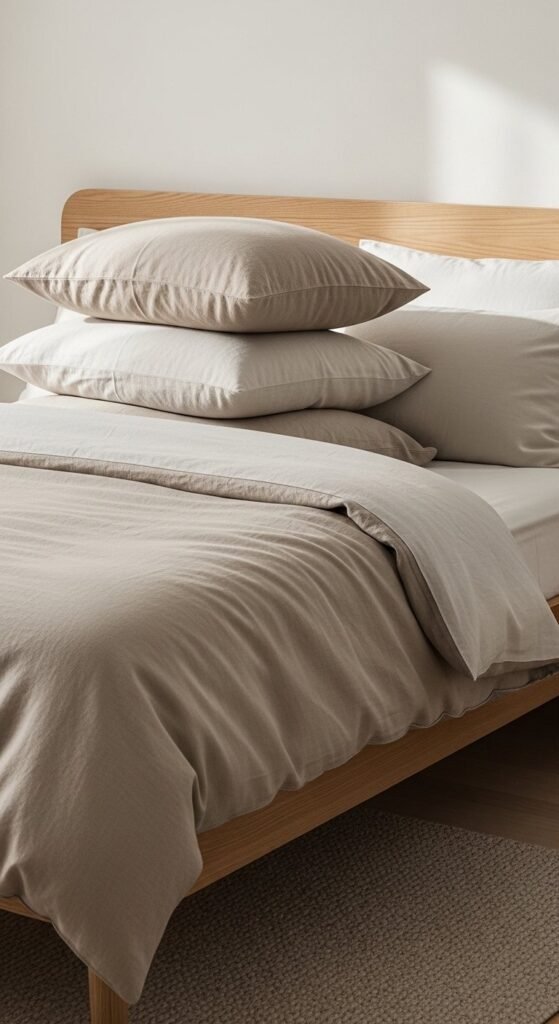
Matching pillows cost a lot. Duvet covers solve that. One cover yields several pillow fronts. Cut panels to size. Sew or use fabric tape. The result looks custom.
This trick works with solids or subtle patterns. Affordable layering creates depth without visual noise. Use inserts one size larger for a full look.
Budget tip: IKEA duvet covers often cost less than two throw pillows. Watch clearance sections. Wash fabric before cutting to avoid shrinkage.
Styling trick: mix sizes. Two large pillows anchor the bed. Smaller ones add interest. Keep colors within one palette for calm balance.
No sewing skills? Envelope-style covers avoid zippers. Fabric glue handles hems.
This idea fits bedrooms and sofas alike. It’s practical, repeatable, and easy to update seasonally. When styles change, swap covers instead of buying new pillows. That keeps storage low and rooms flexible.
13. Miniature Upcycled Decor Displays
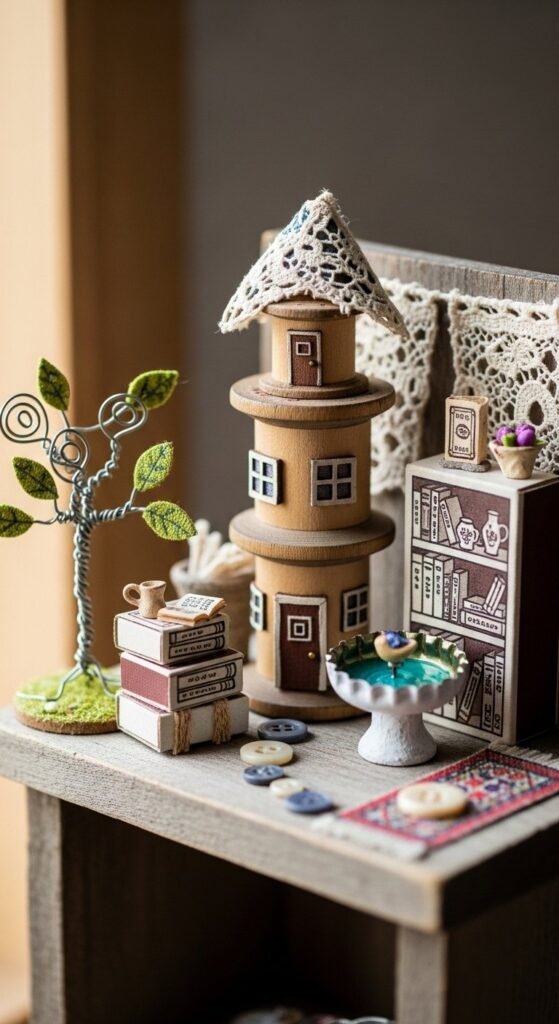
Small decor tells big stories. Miniature displays bring charm without crowding. Old spools become stools. Thimbles turn into planters. Altoid tins become tiny rooms.
This niche project fits shelves, desks, or kids’ spaces. Tiny upcycles reward close attention. Viewers lean in. That interaction makes the decor memorable.
Budget tip: collect materials over time. Craft leftovers work well. Acrylic paint unifies mismatched items.
Styling trick: group miniatures in odd numbers. Use one tray or shelf to contain them. That keeps the look intentional instead of scattered.
This idea suits crafters and collectors alike. It’s also gift-worthy. Each piece feels personal. You don’t need many. Just a few well-made minis can anchor a whole corner with character.
14. Accent Wall with Simple Geometry
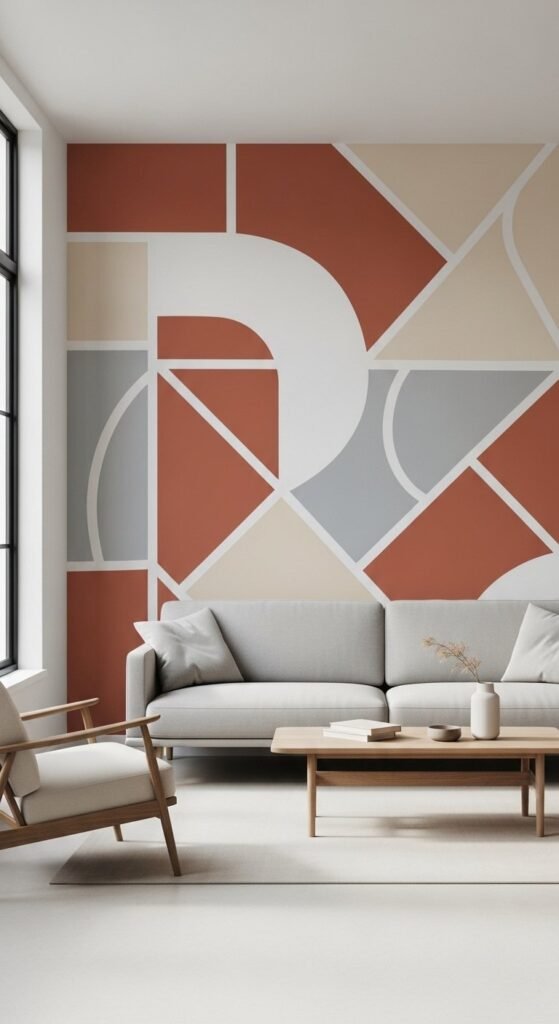
Accent walls work best when restrained. One wall. Limited colors. Clean lines. Tape does most of the work. Choose shapes that fit the room’s scale.
This project adds drama without clutter. One wall can change the room’s rhythm. Use leftover paint to save money. Matte finishes hide flaws better than gloss.
Budget tip: sample sizes often cover accent sections. Painter’s tape creates sharp edges if pressed firmly. Remove tape while paint is slightly wet.
Styling trick: repeat one accent color in pillows or art. That echo makes the wall feel integrated. Keep surrounding decor simple so lines stand out.
Geometric designs suit living rooms, offices, and bedrooms. They offer structure and personality without committing to wallpaper. When tastes change, paint over it easily.
15. Thrift Store Hunt-to-Decor Challenge
Thrifting works best with rules. Set a budget. Choose a color palette. Hunt with intention. That turns browsing into decorating.
This challenge keeps costs low and creativity high. Secondhand finds tell layered stories. Mix eras and textures. Clean items well before styling.
Budget tip: visit weekly. Stock rotates fast. Look past surface flaws. Paint and polish fix a lot.
Styling trick: group thrifted items with one anchor piece. A lamp or rug grounds the look. Keep spacing deliberate so collections don’t feel cluttered.
This approach suits any room. It also builds patience and editing skills. Not every find comes home. That’s the point. Over time, spaces grow richer without rushing or overspending.
16. Herb and Spice Wall Displays

Herbs don’t have to hide in cabinets. Displaying them adds color and function. Use uniform jars for order. Labels keep it tidy. Open shelves work best on unused wall sections.
This setup saves counter space and speeds up cooking. Edible decor blends beauty and use in one move. Dried herbs last longer away from heat. Fresh herbs thrive near windows.
Budget tip: reuse jars from sauces or jams. Soak labels off. Use chalk pens or simple stickers. Wood shelves cost less when cut to size at hardware stores.
Styling trick: limit the palette. Greens, browns, and clear glass keep the look calm. Add one plant nearby to echo the theme.
This idea suits renters and homeowners alike. Shelves mount easily and adjust over time. The wall becomes part of daily routines, not just something to look at.
17. Board Game Pieces Turned Wall Art
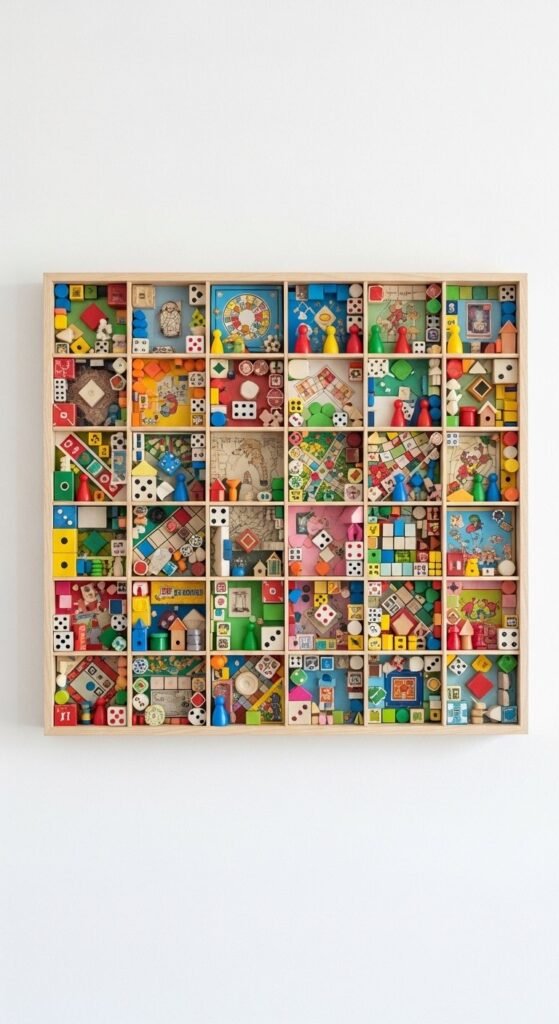
Old board games often miss pieces. Those leftovers still shine. Tokens, cards, and dice turn into art. Frame them or mount directly. Patterns work better than randomness.
This idea fits playrooms, offices, or family rooms. Game-night memories become visual stories. Kids recognize pieces instantly. Adults smile at nostalgia.
Budget tip: thrift stores sell incomplete games cheaply. Shadow box frames add depth without effort. Glue dots allow repositioning.
Styling trick: stick to one game per frame. That keeps the design readable. Repeat frame sizes for order.
This decor feels personal without being sentimental. It also sparks conversation. People lean in to identify pieces. That interaction gives the wall life beyond decoration.
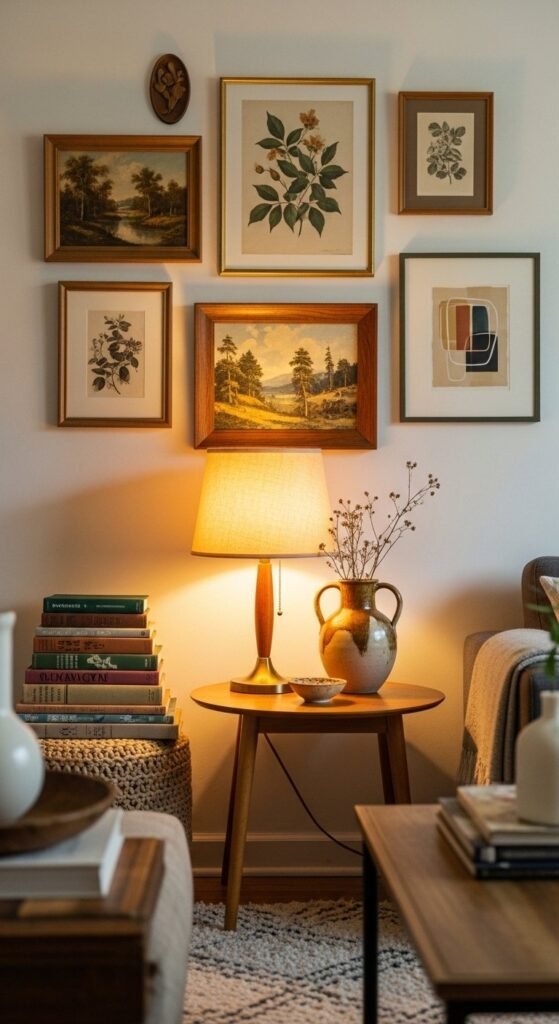
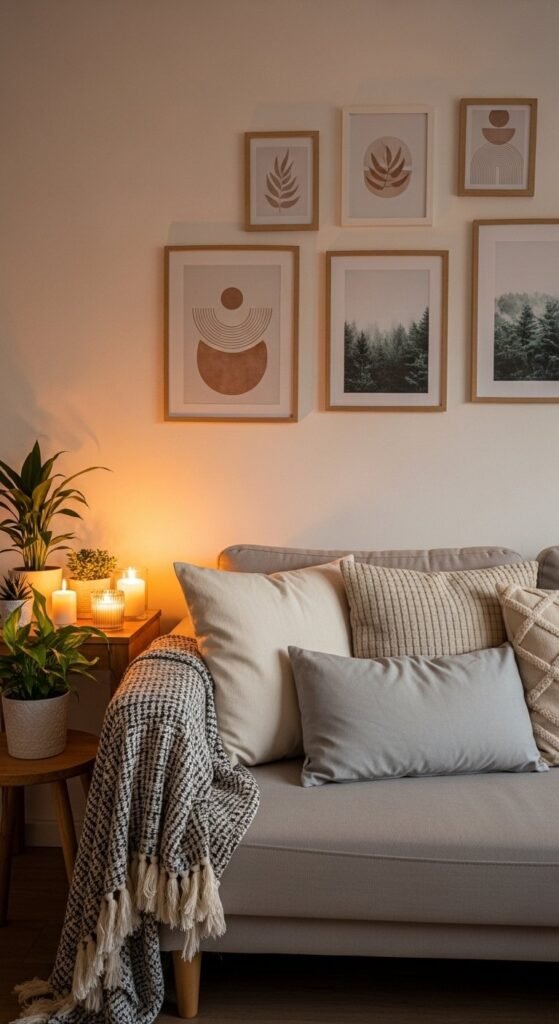
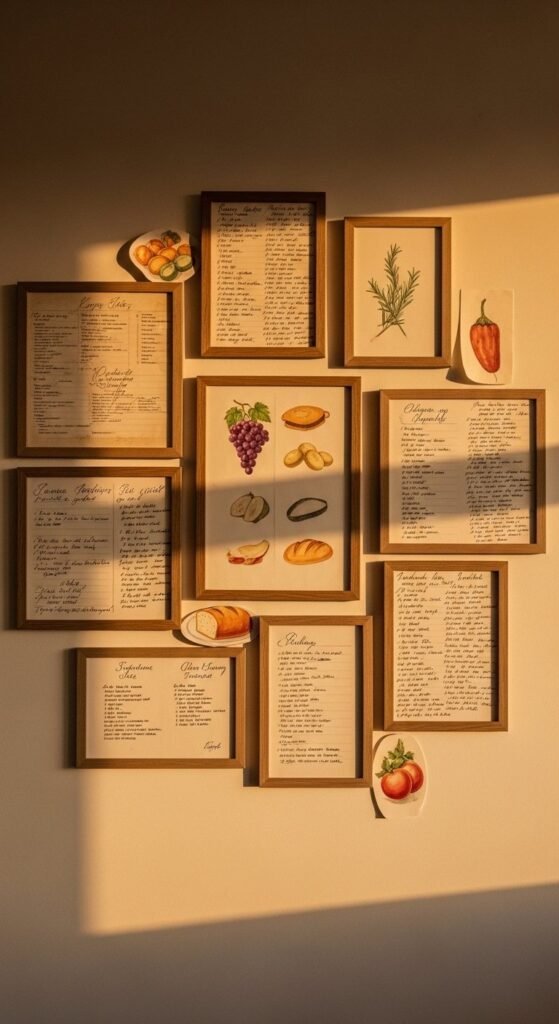
18. Recipe and Handwritten Art Frames
Handwritten items carry emotion. Recipes from family members feel especially meaningful. Frame originals or high-quality copies. Group them by size for balance.
This idea works in kitchens and dining areas. Sentimental touches feel grounded when displayed simply. Avoid ornate frames. Let the writing stand out.
Budget tip: scan originals before framing. Use copies to protect fragile paper. Thrift frames often match well when painted the same color.
Styling trick: mix text with one small illustration. That break keeps the wall from feeling heavy. Leave space between frames. Crowding reduces impact.
This decor grows over time. Add new recipes or notes as they come. The wall becomes a quiet archive of shared meals and moments.
19. Renter-Friendly Ladder Shelving
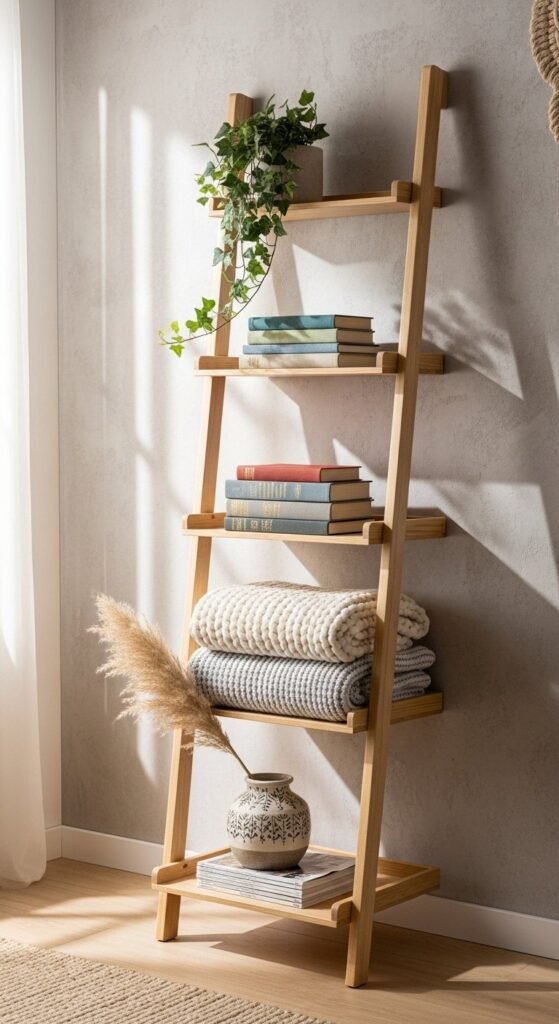
Leaning ladders avoid drilling. That makes them renter-friendly. They also use vertical space well. Keep heavier items lower for stability.
This shelving suits living rooms, bedrooms, and bathrooms. Vertical storage keeps rooms open while adding function. Wood ladders bring warmth. Metal ones feel industrial.
Budget tip: repurpose old ladders with light sanding and sealant. Hardware stores sell basic ladder shelves at low cost.
Styling trick: vary item heights. Stack books horizontally. Add one trailing plant for movement. Leave one shelf partially empty to avoid clutter.
Ladder shelves move easily when layouts change. That flexibility helps small spaces adapt without new furniture purchases.
20. Under-$20 Decor Wins for Busy Homes
Small budgets still allow change. Focus on quick swaps. Pillow covers. Prints. Plants. Candles. Each costs little alone. Together they shift the room’s tone.
This approach suits busy households. Low-cost changes add visible comfort without long projects. Choose items that store easily when not in use.
Budget tip: print art at home or use digital downloads. Dollar stores carry frames and planters. Group purchases to save trips.
Styling trick: repeat colors across items. That repetition creates cohesion. Limit yourself to three colors per room.
These updates don’t require tools or time blocks. They fit into everyday routines. Over time, small wins stack into rooms that feel considered and lived-in.
21. Upcycled Ladder into Plant Stand
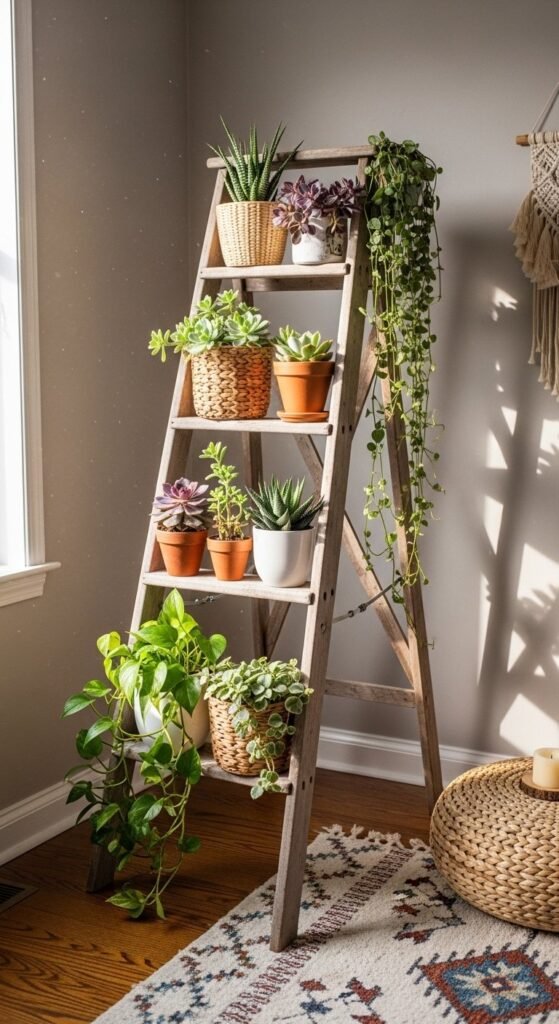
Old ladders get new life as plant stands. Lean them in corners and layer plants by height. Vertical greenery maximizes small spaces and creates a fresh focal point.
Budget tip: Sand and seal ladders before placing plants. Use inexpensive pots or repurpose jars. Felt pads protect floors from scratches.
Styling trick: mix plant textures—tall leaves, trailing vines, and round succulents. Keep heavier plants on the bottom for stability.
This idea works for apartments and homes alike. It adds life without taking up valuable floor space and is flexible for seasonal swaps or rotations.
22. Mason Jar Herb Garden

Mason jars are perfect for indoor herb gardens. Use soil and small pebbles for drainage. Fresh herbs within reach add style and function.
Budget tip: Reuse jars from jams or sauces. Label with chalkboard stickers. Sun-loving herbs thrive on windowsills.
Styling trick: Arrange jars by height or herb type. Tie small twine bows around jars for cohesion. Rotate periodically for even sunlight exposure.
This small project fits kitchens of all sizes. It’s sustainable, visually appealing, and practical, creating a living display that doubles as cooking supplies.
23. Chalkboard Wall in Kid’s Room
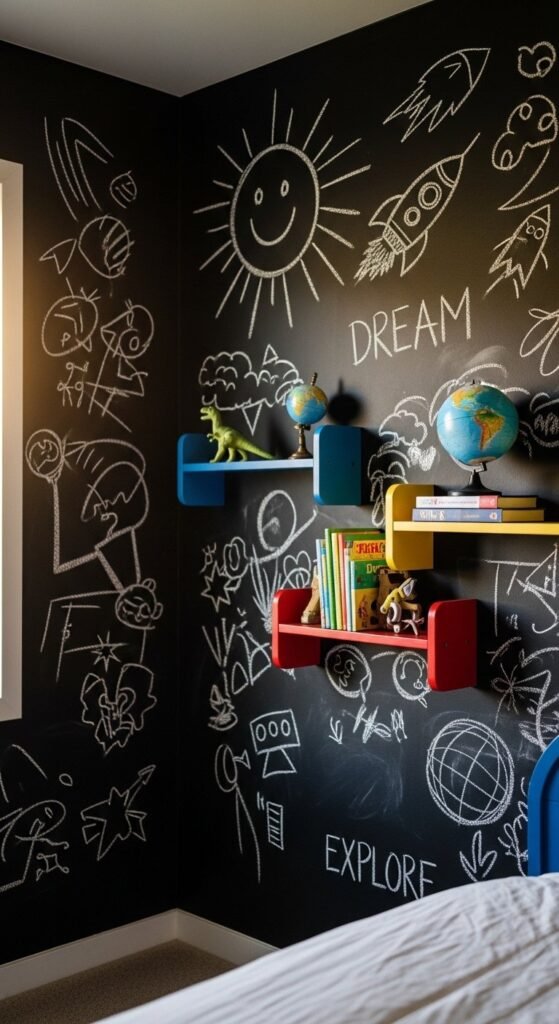
Kids love interactive walls. Chalkboard paint turns any section into a creative canvas. Limit the area to one wall or corner. Interactive decor encourages creativity and changes constantly.
Budget tip: Small cans cover large sections. Use painter’s tape for clean edges. Condition surface with chalk before first use.
Styling trick: Frame the chalkboard wall with trim or shelving to prevent smudges on surrounding walls. Combine with colorful storage bins for a playful effect.
This idea keeps children engaged and adds a dynamic element to their room without long-term commitment or costly changes.
24. Tie-Dye Wall Hangings
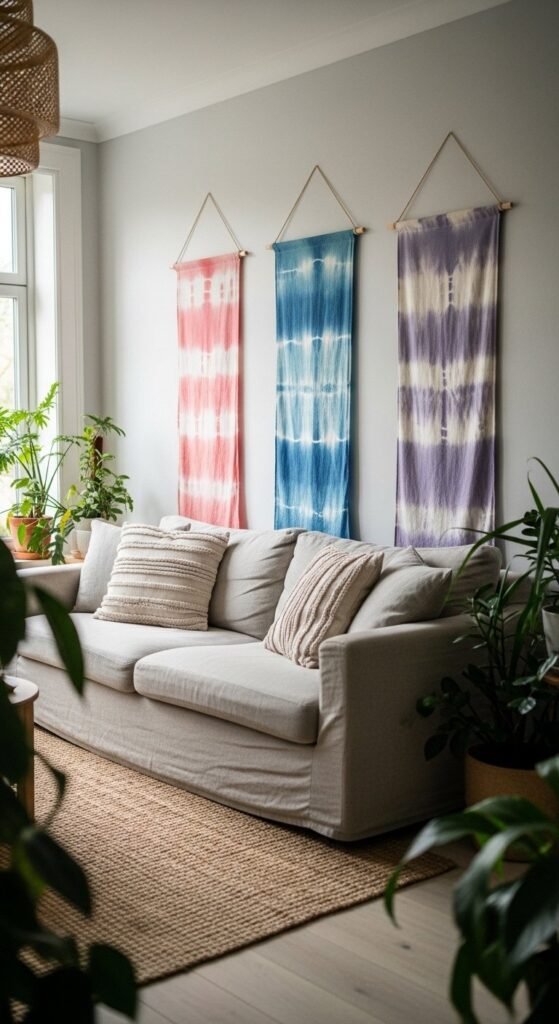
Tie-dye isn’t just for bedding. Fabric wall hangings add color and texture. DIY tie-dye pieces make each wall unique.
Budget tip: Use thrifted sheets or fabric remnants. Prepare in small batches to experiment with patterns and colors.
Styling trick: Mix sizes and colors but maintain a consistent tone palette. Hanging at eye level creates visual impact.
This easy wall treatment suits living rooms, hallways, or bedrooms. It’s flexible—washable, replaceable, and perfect for seasonal updates.
25. Vintage Utensils Repurposed as Hooks
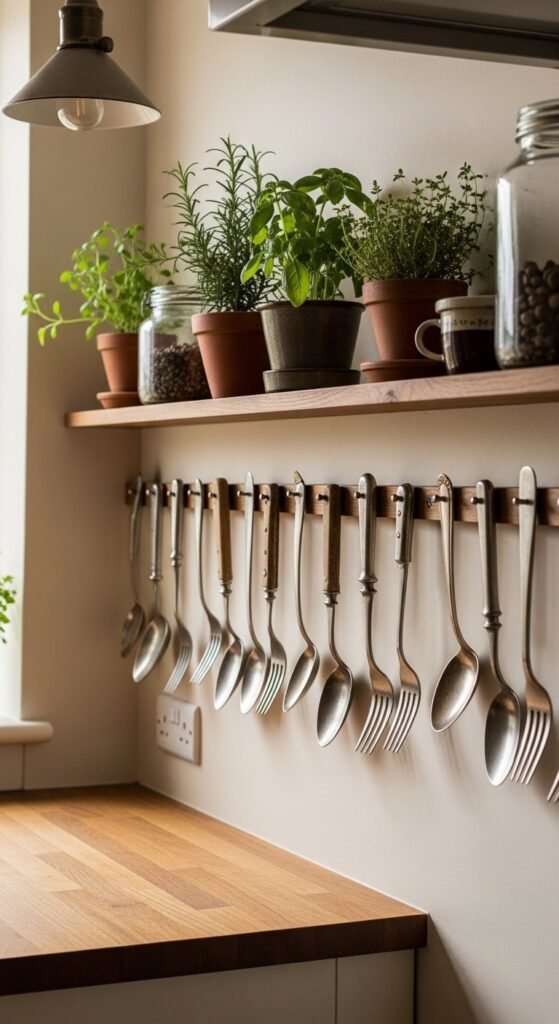
Old utensils can serve new functions. Bend them slightly to create hooks for towels or mugs. Functional art merges decor and utility in small spaces.
Budget tip: Use thrifted or inherited utensils. Drill carefully and use wall anchors for stability. Paint handles if desired.
Styling trick: Mount in a straight line or subtle stagger. Pair with a small shelf for additional storage.
This inexpensive update adds personality and history to kitchens, keeping surfaces clear while making decor interactive and memorable.
26. IKEA Duvet Cover Upcycle into Curtains
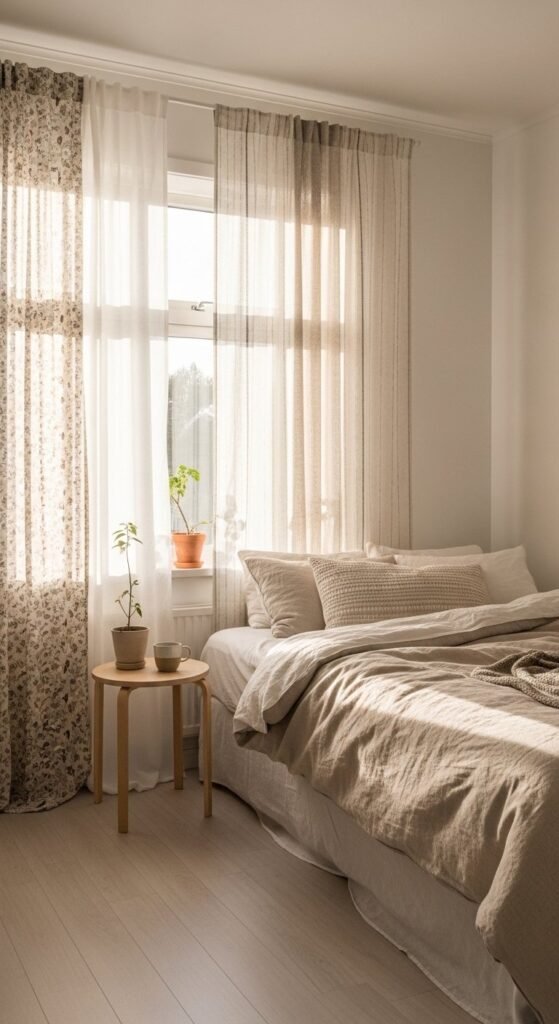
Duvet covers aren’t limited to beds. Cut them to make budget-friendly curtains. Light fabrics allow natural light while adding softness.
Budget tip: Buy clearance or secondhand covers. No-sew fabric tape works for quick hemming. Iron edges for crisp lines.
Styling trick: Keep curtain rods simple and neutral. Repeat colors from bedding or pillows for cohesion.
This idea works in apartments or homes. Fabric can be swapped seasonally or updated without new purchases, offering flexibility and style on a tight budget.
27. Personalized Recipe Display Wall
Family recipes deserve display. Frame cards or print handwritten recipes. Sentimental walls combine memory and decor seamlessly.
Budget tip: Scan originals to protect them, then use inexpensive frames. Group by size or theme for consistency.
Styling trick: Add one small piece of related art per frame to balance the wall. Keep spacing even for a neat appearance.
This wall grows over time. Each addition enhances the story of your kitchen, blending personal history with visual charm, perfect for kitchens and dining areas.

Leave a Reply