
1. Thrifted Frame Shard Mosaic
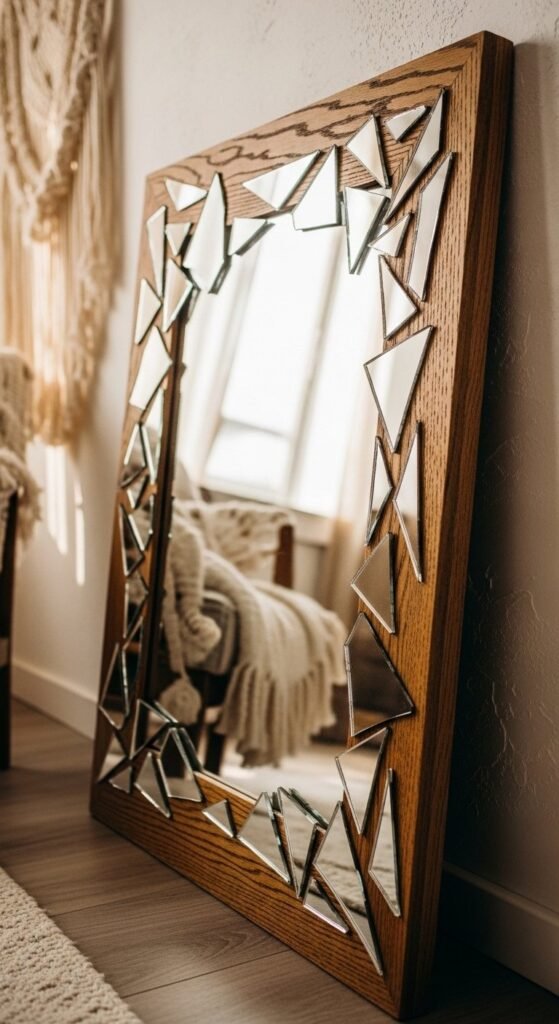
A thrifted mirror frame covered in broken mirror shards creates instant drama without requiring expensive supplies. Start by finding a solid wood frame with enough width to hold glass pieces. Seal the wood using diluted Weldbond or a water-based sealer so moisture from adhesive and grout will not soak in. Wrap an old mirror in a thick towel before breaking to control fragments. Safety glasses and gloves should be worn at every step. Arrange larger shards first, placing them face-up in thin-set mortar. Rotate pieces so reflective angles vary. This prevents a flat appearance. Fill gaps with smaller fragments using wheeled nippers for shaping.
Spacing does not have to be perfect. Irregular layouts actually enhance this style. Once adhesive cures, sand sharp edges with diamond grit or sanding blocks. Choose grout color based on mood. Black grout creates bold contrast, while light gray gives a softer look. Work grout into joints using a rubber float. Wipe excess with a damp sponge in gentle passes. After curing, apply grout sealer for durability.
For hanging, use heavy-duty D-rings or French cleats. These frames carry weight. Styling works well in entryways, bedrooms, or above dressers. Pair with neutral walls to let reflections shine. This project delivers high-impact decor using mostly recycled materials.
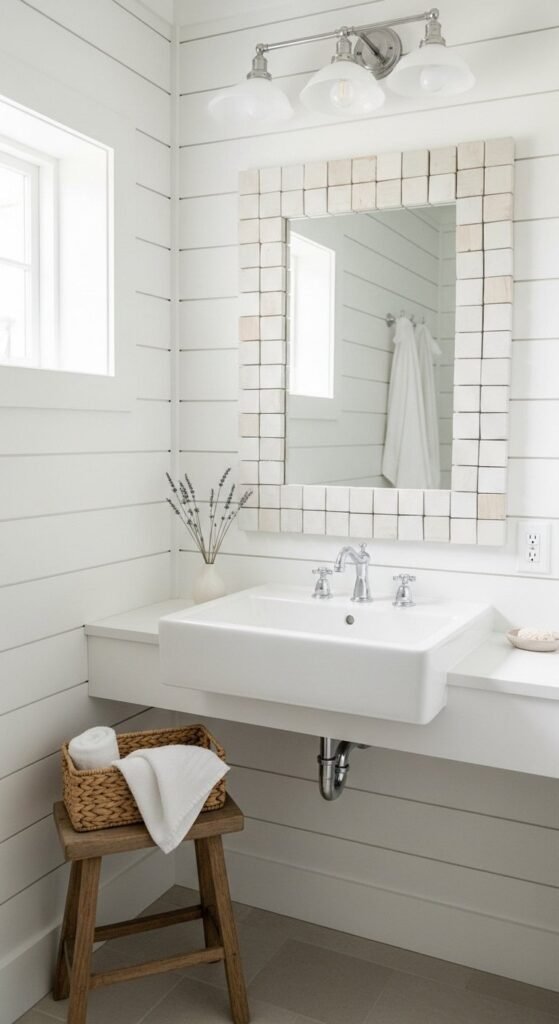
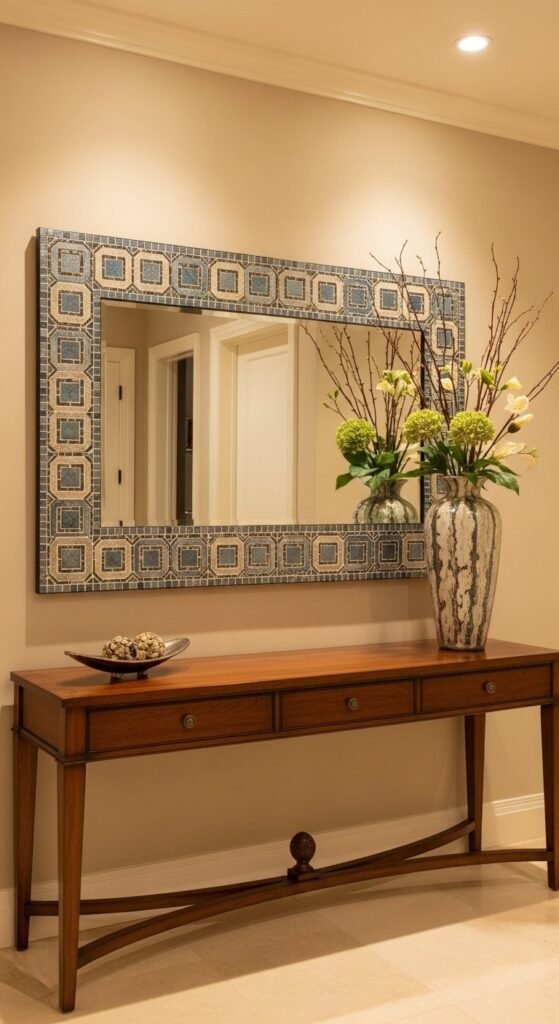
2. Blue-to-White Gradient Border
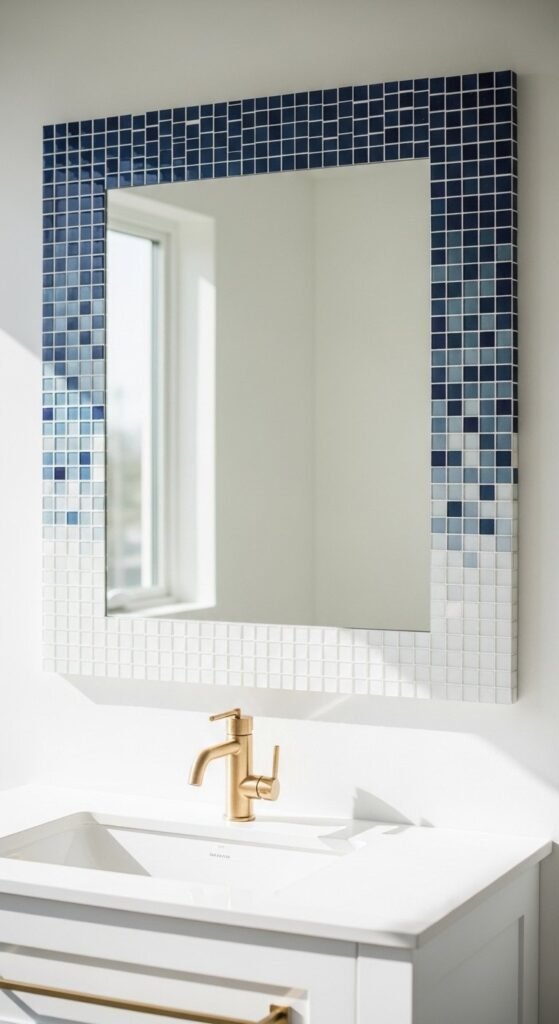
A gradient mosaic border adds depth and movement to a simple mirror. Begin by sorting tiles into color groups from darkest to lightest. Lay everything out dry before gluing so transitions feel smooth. Outer edges should hold the darkest blues. Mid-tones sit in the middle band. Whites and pale blues belong near the mirror glass. Thin-set mortar is ideal for bathroom conditions and provides long-lasting hold.
Work in small sections. Press each tile firmly. Slight spacing variations are acceptable and often unnoticeable once grouted. Allow adhesive to cure for at least 24 hours before grouting. White or very light gray grout keeps the gradient clean. Dark grout may overpower lighter shades. Use a rubber float to spread grout diagonally across joints. Remove haze with damp sponge passes.
Seal grout once fully cured. This helps prevent staining and mildew. For budget builds, peel-and-stick mosaic sheets can be cut into strips and layered in color order. This approach speeds up installation.
Gradient frames suit bathrooms, vanities, and powder rooms. They also work well in coastal or spa-style interiors. Keep surrounding decor simple so the color transition remains the focal point. Soft blues paired with brass or chrome hardware look especially polished.
3. Stained Glass Leaf Frame
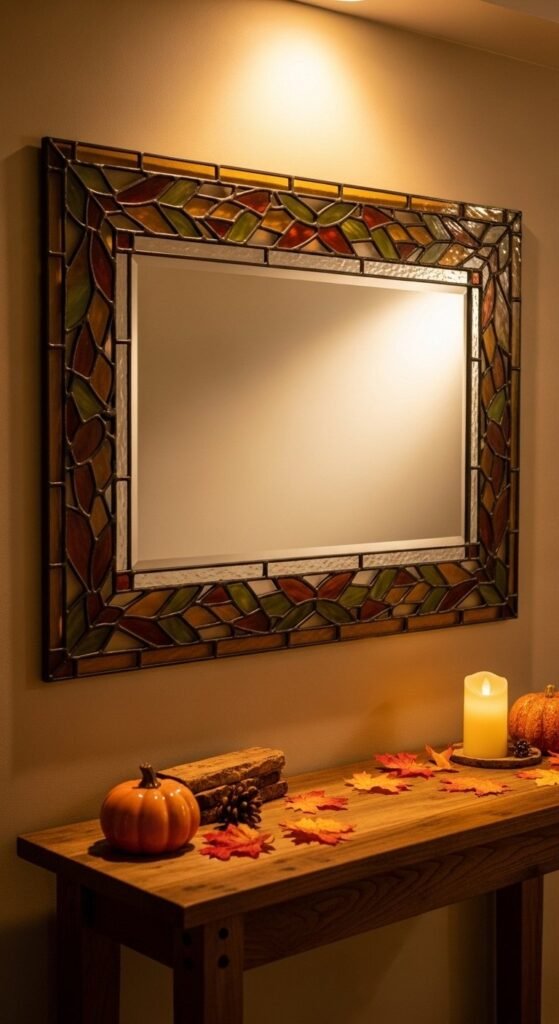
Leaf mosaics bring warmth and organic flow into any space. Start by printing leaf templates in several sizes. Trace onto stained glass scraps. Score with a glass cutter and snap using running pliers. Curves do not need perfection. Slight variation enhances realism.
Seal the frame surface before gluing. Arrange leaf clusters rather than evenly spaced singles. Overlapping shapes look natural. Place stems pointing in different directions. Fill small gaps with tiny accent pieces. Thin-set mortar or Weldbond both work well for this style. Allow tiles to cure overnight.
Dark brown or charcoal grout enhances color contrast. Push grout into joints thoroughly. Clean gently with a damp sponge to avoid pulling grout from deep crevices. Once cured, seal grout for longevity. Nature-themed layouts hide small spacing flaws better than geometric patterns.
This frame works beautifully in entryways, dining rooms, or above sideboards. Pair with warm wood furniture and neutral walls. Add dried florals or small plants nearby for cohesion. Seasonal variations are easy. Swap leaf colors for spring greens or summer brights. One frame can be reused year after year by adjusting surrounding accessories.
4. Black Grout Contrast Frame
Clear glass tiles paired with black grout create bold visual separation. Each tile stands out. Begin by sealing the frame base. Apply thin-set mortar evenly. Press tiles in place with consistent spacing. Tile spacers can help maintain uniform gaps.
After adhesive cures, mix grout with latex additive for strength. Spread diagonally using a rubber float. Work small sections to prevent premature drying. Wipe excess grout gently. Rinse the sponge frequently. Allow grout to set slightly before final haze removal.
Seal grout once fully cured. This frame style suits modern interiors, industrial spaces, and monochrome rooms. High-contrast frames emphasize shape and texture. Clear, mirrored, or lightly frosted glass all perform well.
For budget-friendly options, break old mirrors into small squares. Sand edges thoroughly. Use gloves. Lighting plays a major role. Install near windows or sconces to amplify reflections. Avoid busy wallpaper behind the mirror. Solid wall colors keep focus on tile detail.
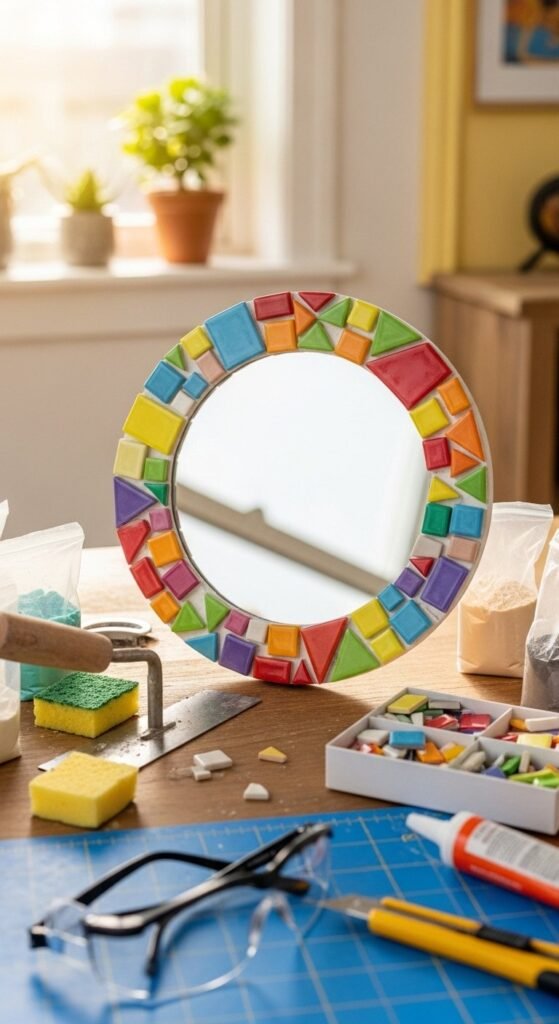
5. Ceramic Flower Petal Design
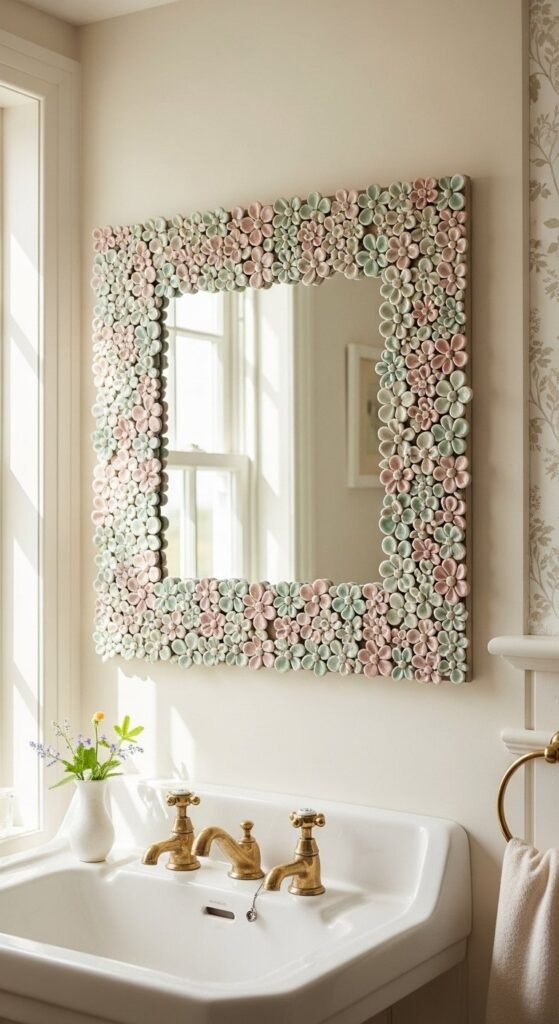
Pre-cut ceramic petals simplify mosaic work. No glass cutting required. Begin by sealing the frame surface. Arrange flower shapes dry before gluing. Decide on spacing and placement. Keep flower centers consistent using round dot tiles or small circles.
Use Weldbond or thin-set mortar to attach pieces. Press gently. Allow adhesive to cure fully. Choose white or pale gray grout for a soft finish. Push grout into joints. Wipe excess with a damp sponge. Seal grout once dry.
This design suits bathrooms, bedrooms, or nurseries. Pastel palettes feel gentle and decorative. Mix blush, mint, cream, and soft yellow for variety. MDF backing boards work well if sealed.
Kids can help place tiles under supervision. Larger petals are easier for small hands. For gifts, keep size modest and add hanging wire on the back. This style works well for spring decor and handmade presents.
6. Beveled Edge Wrap Mosaic
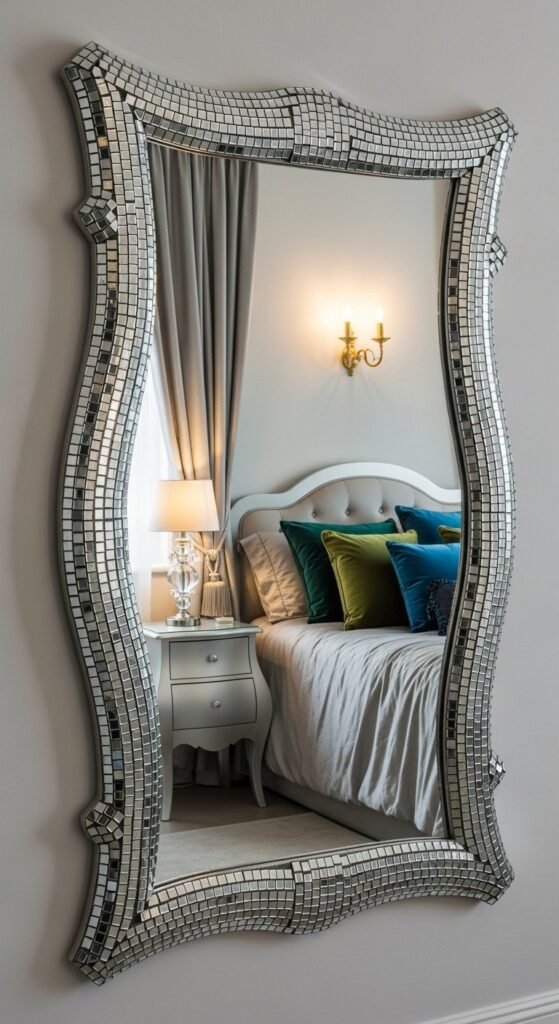
Beveled mirror frames add instant elegance, but mosaicking over curves requires a slightly different approach. Smaller tiles are key. Use wheeled nippers to trim thin strips that bend easily around edges. Seal the entire frame first, including grooves. This prevents moisture absorption and improves adhesive hold.
Apply thin-set mortar in short sections. Press tiles gently so they follow the contour without sliding. Allow each section to firm up before rotating the frame. This prevents sagging. For corners, cut tiles narrower rather than forcing larger pieces to bend.
Once cured, sand exposed edges lightly. Choose silver or light gray grout for a seamless look. Dark grout can interrupt the flowing surface. Push grout into joints thoroughly, especially where tiles roll over edges. Wipe carefully so grout remains in deeper seams. Seal after curing.
Curved surfaces reward patience. Working slowly produces smoother results. This style suits glam bedrooms, dressing rooms, and vanity areas. Pair with mirrored trays, metallic lamps, or soft velvet textiles. Reflections bounce light beautifully, making small rooms appear brighter.
7. Hexagon MDF Wall Mirror
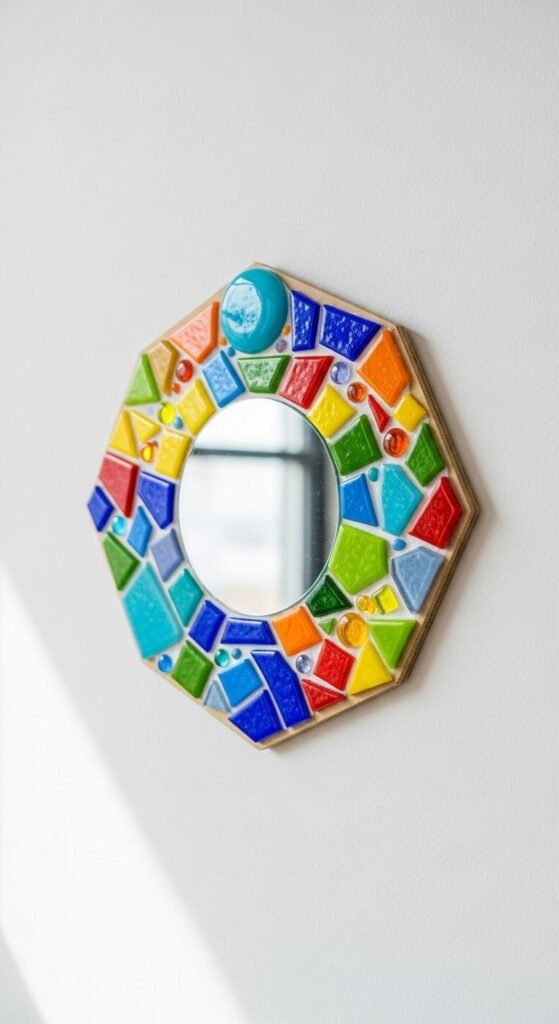
Hexagon mosaic mirrors offer a bold alternative to traditional frames. Start with MDF cut into a hexagon shape. Sand edges smooth. Seal front, back, and sides. This step prevents swelling. Attach the center mirror with strong adhesive and allow it to cure.
Plan tile placement from the mirror outward. This keeps spacing even. Bright mixed colors work well, but limiting the palette to three or four shades maintains cohesion. Thin-set mortar provides a strong hold. Press tiles firmly. Leave small, consistent gaps.
After 24 hours, grout using light gray or white. Clean in stages. Seal grout after curing. Add D-rings or sawtooth hangers on the back.
Non-frame bases allow creative freedom. Try triangles, arches, or circles once comfortable. These mirrors work well in hallways, home offices, or gallery walls. Keep surrounding decor simple to let the shape stand out.
8. Mandala Heart Mosaic
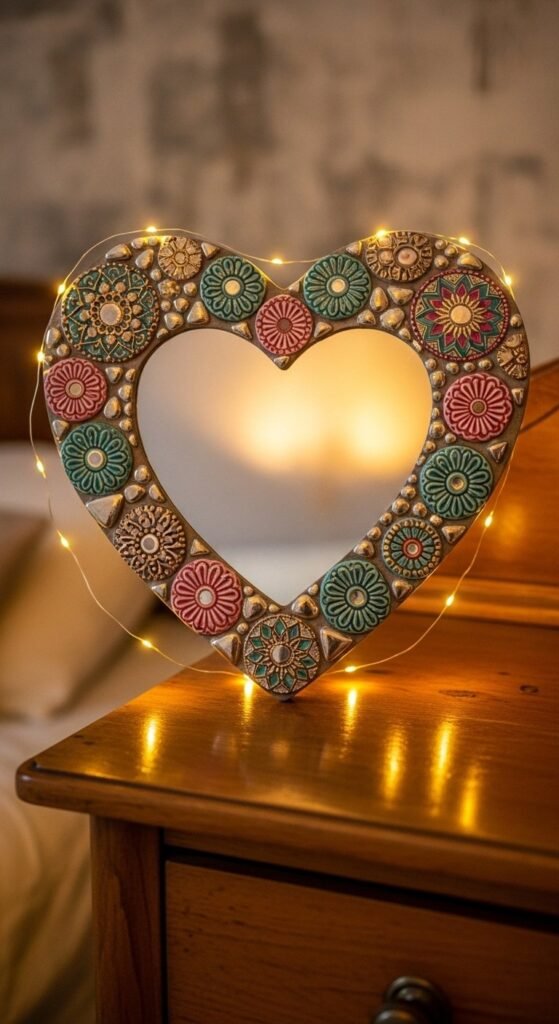
Mandala heart mosaics combine symmetry with softness. Begin by sealing the heart-shaped base. Attach the mirror at the center. Draw light pencil guidelines radiating outward. This helps keep patterns balanced.
Start with the innermost tile ring. Work outward in circles. Mix patterned tiles with solid fillers to avoid overcrowding. Keep spacing consistent. Weldbond or thin-set mortar both work well. Allow tiles to cure fully before grouting.
Choose white or pale cream grout for a gentle look. Gold or beige grout also pairs nicely. Push grout into joints and wipe lightly. Seal after curing.
Heart shapes work beautifully as gifts. Hang in bedrooms, nurseries, or craft rooms. Color palettes can be customized. Soft pastels feel romantic. Jewel tones feel bold. Keep edges neat with light sanding. Add hanging wire or small sawtooth hooks.
9. Yardstick Wood Tile Frame
Wood mosaics avoid glass cutting entirely. Cut yardsticks into small squares. Sand edges. Paint using several coordinating shades. Allow to dry. Seal painted pieces with clear sealer.
Seal the mirror frame base. Arrange tiles randomly or in simple patterns. Wood glue or construction adhesive works well. Press tiles firmly. Let it cure overnight.
Grouting is optional. Leaving tiny gaps creates shadow lines. If grouting, use sanded grout in light gray or cream. Seal afterward.
Safer alternative to glass mosaics. Lightweight and budget-friendly. Great for bathrooms, entryways, or kids’ rooms. Choose muted tones for farmhouse style or bold colors for playful spaces.
10. Broken Mirror Sunburst
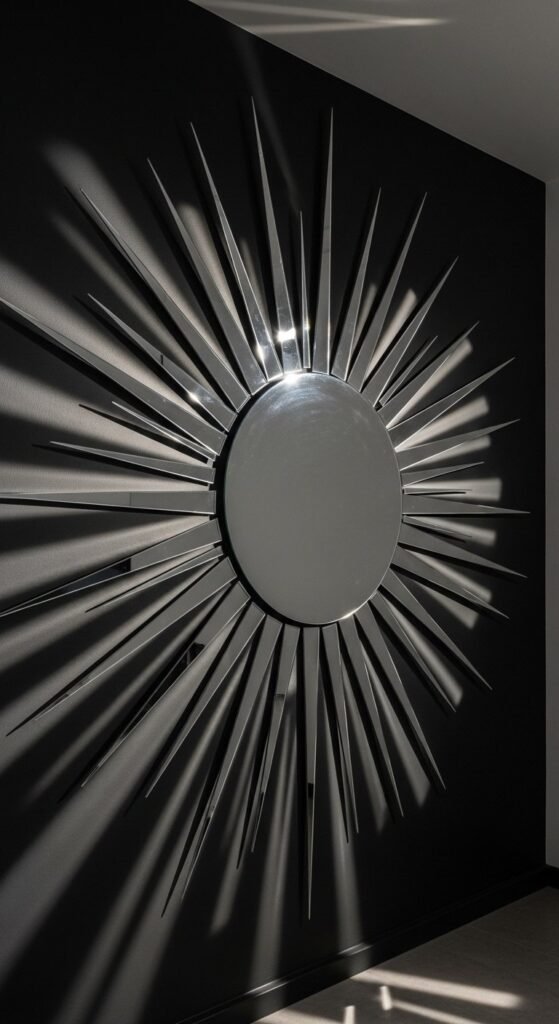
Sunburst mosaics create a strong visual impact. Wrap the mirror in a towel before breaking. Sort shards by size. Triangular pieces work best for rays. Seal base surface.
Start placing rays from the mirror edge outward. Keep angles consistent. Leave narrow spacing between rays. Use thin-set mortar for strong hold. Allow to cure fully. Sand sharp edges carefully.
Choose black or dark charcoal grout for drama. Push grout deep between rays. Clean gently. Seal once cured.
Bold focal point design. Works well in living rooms, dining rooms, or above fireplaces. Keep the surrounding decor simple. Let the mirror command attention.
11. Rainbow Arc Frame
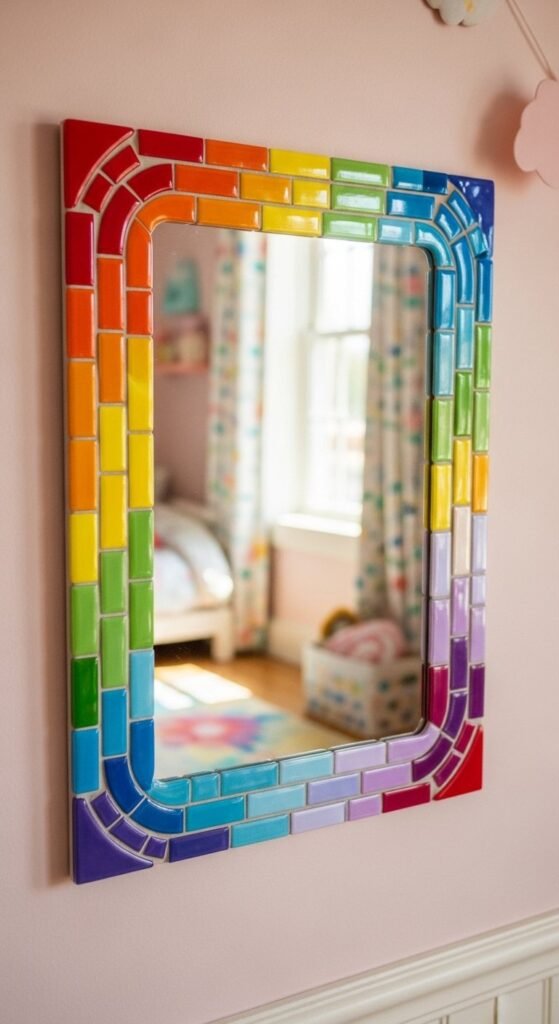
Rainbow arc mosaics bring movement and playfulness into a space. Begin by sorting tiles into color families: reds, oranges, yellows, greens, blues, and purples. Sketch light pencil arcs across the frame to guide placement. Start at one corner and follow the curve gradually. Thin-set mortar provides reliable adhesion. Press tiles firmly. Keep gaps fairly even.
Once adhesive cures, choose white grout to preserve brightness. Colored grout may mute hues. Push grout thoroughly into joints. Wipe excess gently with a damp sponge. Seal after curing.
Curved layouts hide small spacing flaws. This makes them approachable for beginners. Pre-cut glass tile sheets can be snipped into individual pieces for faster prep.
This style suits kids’ rooms, playrooms, and creative studios. Keep wall color neutral so the rainbow remains the focus. Add matching accessories like pillows or wall art for cohesion.
12. Coastal Sea Glass Border
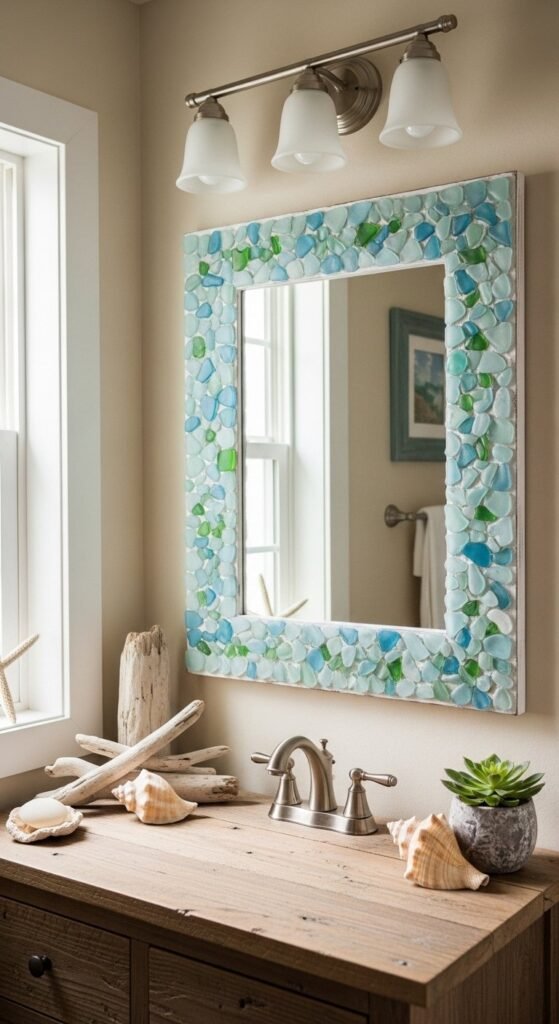
Sea glass mosaics create a relaxed shoreline feel. Use tumbled glass pieces with softened edges. Seal the frame before gluing. Arrange pieces loosely with irregular spacing. Avoid strict rows. Thin-set mortar or Weldbond both work well.
Light gray or sand-colored grout complements the palette. Push grout into gaps fully. Clean gently to avoid pulling grout from deep joints. Seal once cured.
Organic spacing enhances the coastal look. This frame pairs nicely with whitewashed furniture, rope accents, and light wood tones. Ideal for bathrooms, guest rooms, or beach homes.
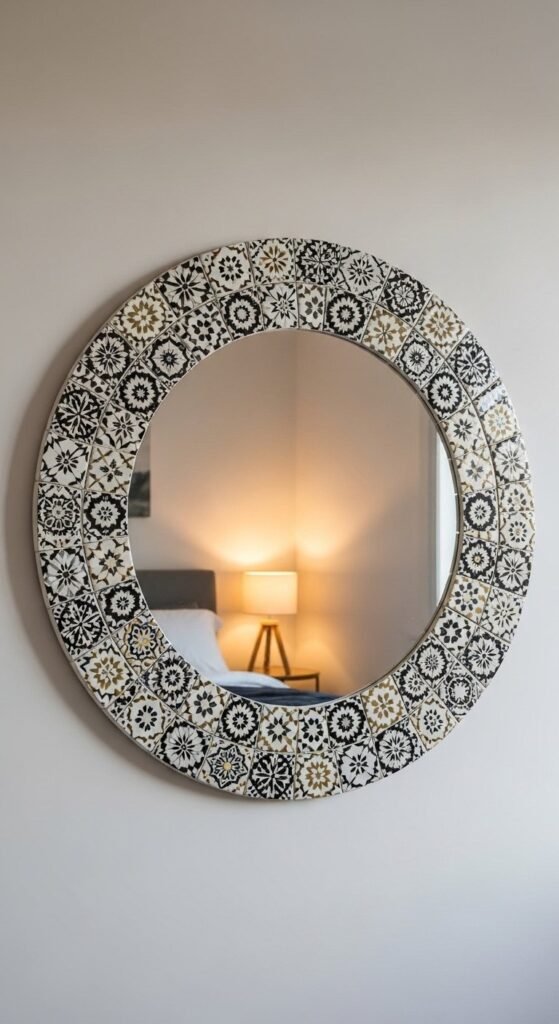
13. Moroccan Tile Pattern Frame
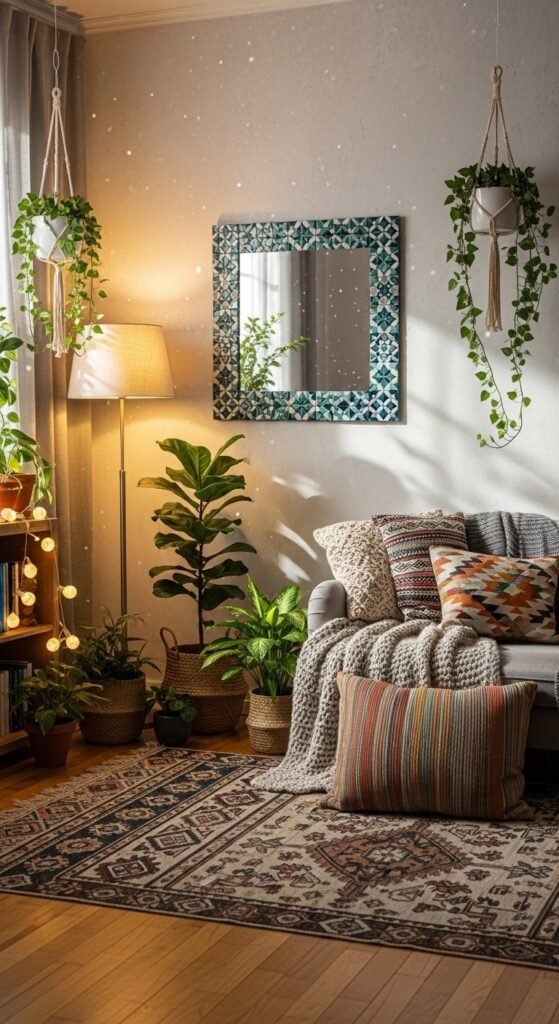
Geometric patterns bring global flair. Choose a repeating motif such as diamonds or stars. Dry-fit tiles first to confirm alignment. Work in rows using thin-set mortar. Tile spacers help maintain consistent gaps.
Allow adhesive to cure before grouting. Dark grout enhances pattern definition. Clean carefully. Seal grout after curing.
Patterned frames suit boho and eclectic spaces. Pair with plants, textured textiles, and warm woods. Keep the surrounding decor simple so the pattern remains readable.
14. All-Clear Crystal Frame
Clear glass and crystals reflect light beautifully. Mix flat glass tiles with faceted pieces. Seal frame first. Apply thin-set mortar. Place tiles evenly. Insert crystals occasionally for sparkle.
Silver or clear grout blends seams. Wipe carefully to avoid scratching crystal faces. Seal grout after curing.
Light-reflecting frames brighten dim rooms. Perfect for closets, dressing areas, or bedrooms. Pair with metallic accessories and soft lighting.
15. Botanical Vine Border
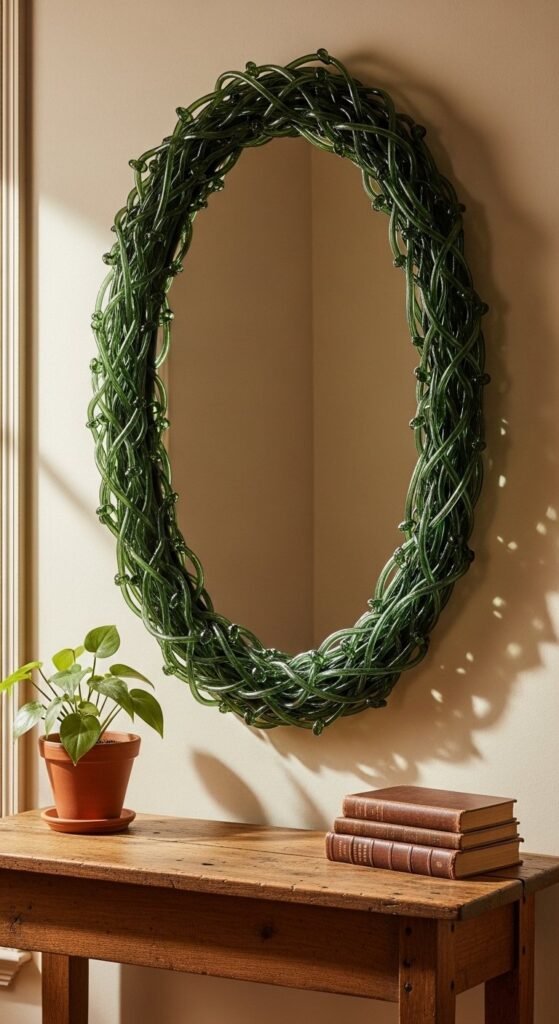
Vine designs feel fluid and relaxed. Use curved leaf or vine-shaped glass pieces. Lay vines first to establish flow. Fill remaining gaps with small green or neutral tiles. Thin-set mortar or Weldbond works well.
Choose dark green or brown grout for depth. Push grout into joints. Clean gently. Seal after curing.
Organic layouts disguise minor irregularities. Works well in entryways, living rooms, or bathrooms. Pair with plants and wood textures.
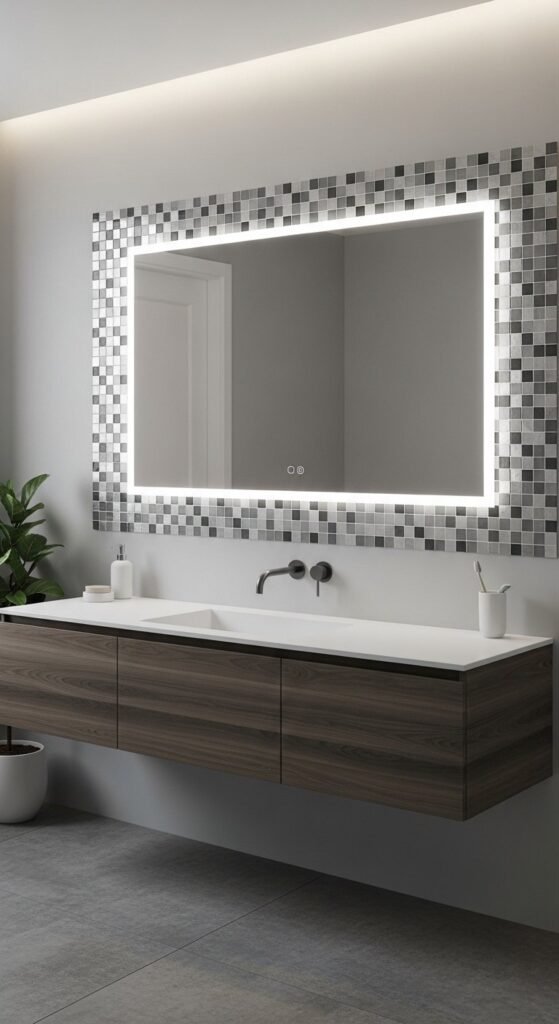
16. Black and White Checker Frame
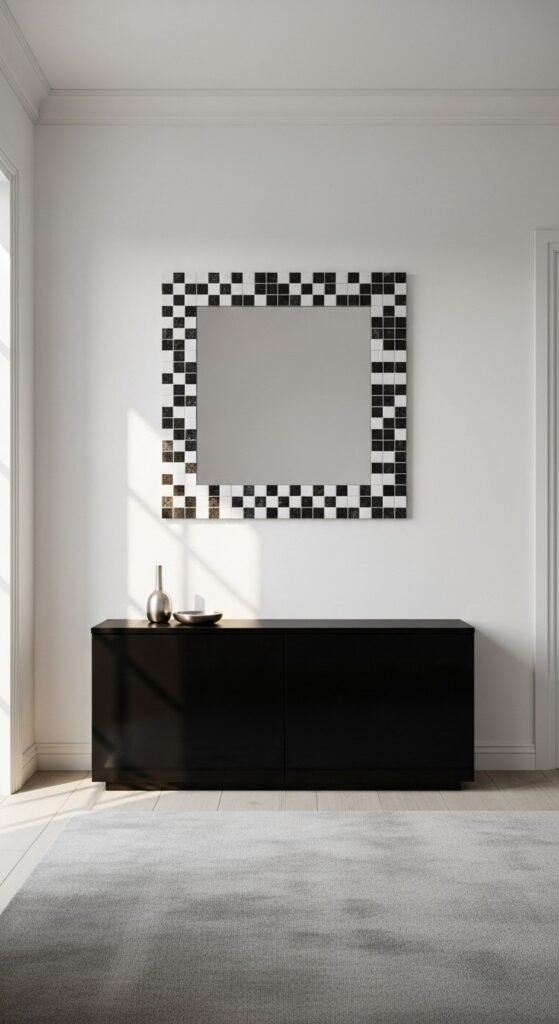
Checkerboard mosaics rely on clean repetition. Choose equal-sized square tiles. Dry-lay a row to confirm spacing. Seal the frame first. Apply thin-set mortar in small sections. Alternate colors carefully. Tile spacers help maintain alignment.
Allow adhesive to cure fully. Use medium-gray grout to soften contrast or white grout for sharper separation. Push grout into joints and wipe gently. Seal after curing.
Graphic patterns suit modern interiors. Pair with black hardware, simple lighting, and neutral walls. Keep nearby decor minimal so the pattern remains dominant.
17. Penny Tile Circle Frame
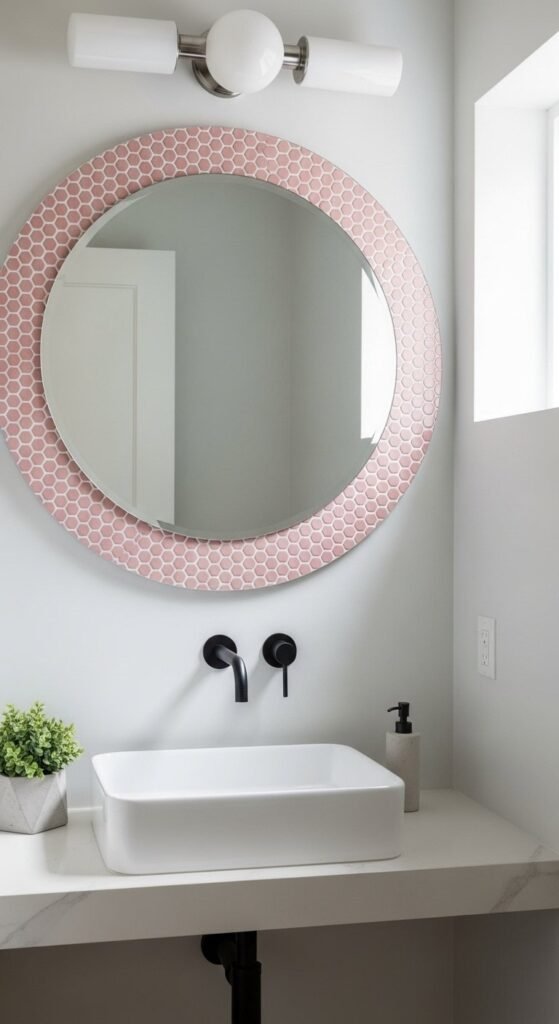
Penny tile sheets save time. Cut sheets into narrow strips. Seal the frame. Apply thin-set mortar and press strips around the perimeter. Use small tile spacers if needed.
White grout blends seams and keeps appearance smooth. Clean in gentle passes. Seal after curing.
Small-scale tiles produce polished results. This style works well in bathrooms and vanity areas. Choose blush, white, gray, or sage for subtle color.
18. Gold Accent Scatter
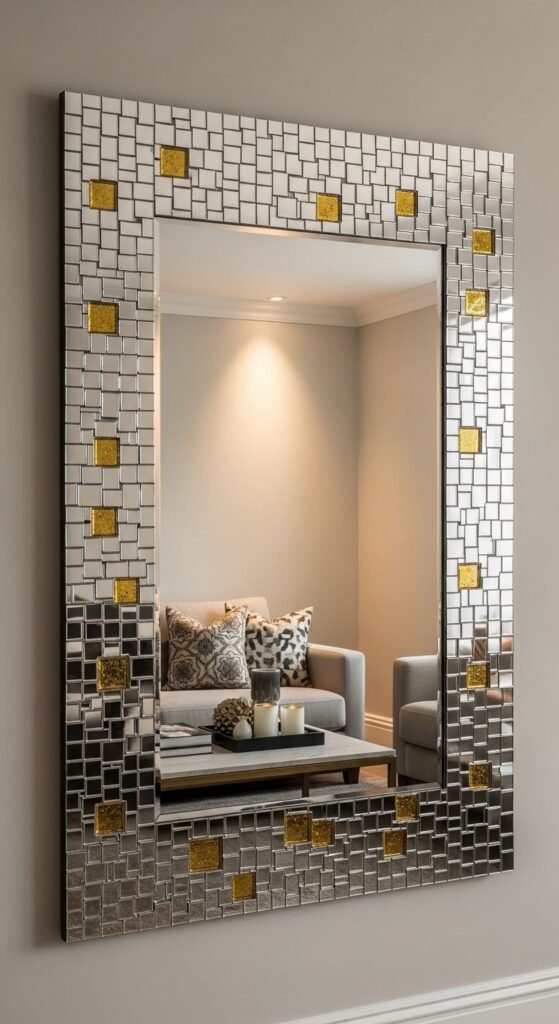
Mix silver mirror tiles with occasional gold pieces. Plan distribution so gold appears evenly scattered. Seal base. Apply thin-set mortar. Press tiles firmly.
Silver grout maintains cohesion. Clean carefully to avoid scratching mirrored surfaces. Seal after curing.
Subtle metallic accents add richness without overpowering. Pair with brass hardware or warm-toned lighting.
19. Kids Pre-Cut Tile Frame
Pre-cut ceramic tiles remove cutting steps. Use school-safe adhesive or Weldbond. Arrange freely. Wide spacing is fine. Allow to dry. Use white grout. Seal after curing.
Family-friendly craft project. Great for playrooms or gifts. Large tiles are easier for small hands.
20. Bathroom Peel-and-Stick Upgrade
Clean the surface thoroughly. Cut tile sheets into strips. Apply around the mirror edge. Press firmly. Seal edges if possible.
Fast budget upgrade. Ideal for renters. Choose neutral tones for versatility.
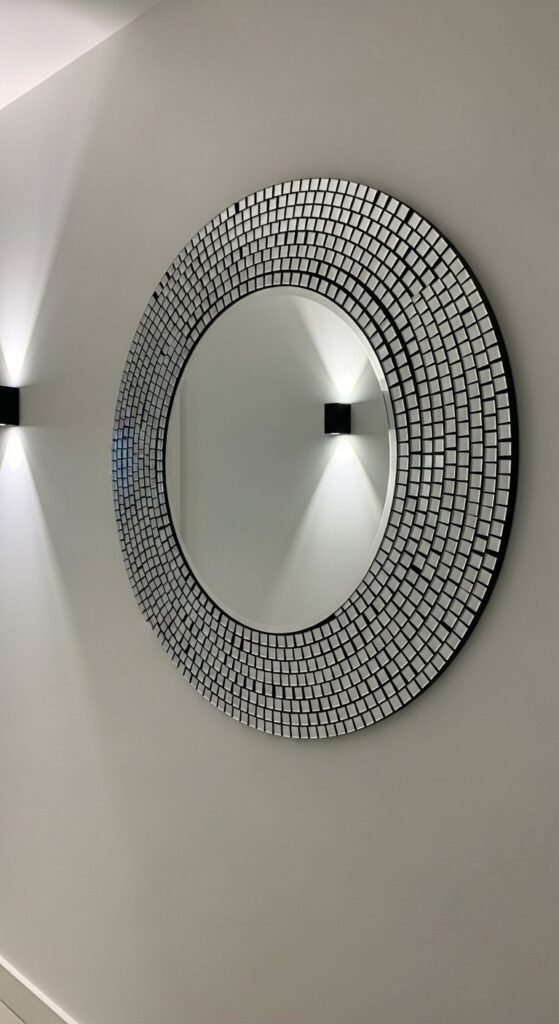
21. Concentric Circle Pattern Frame
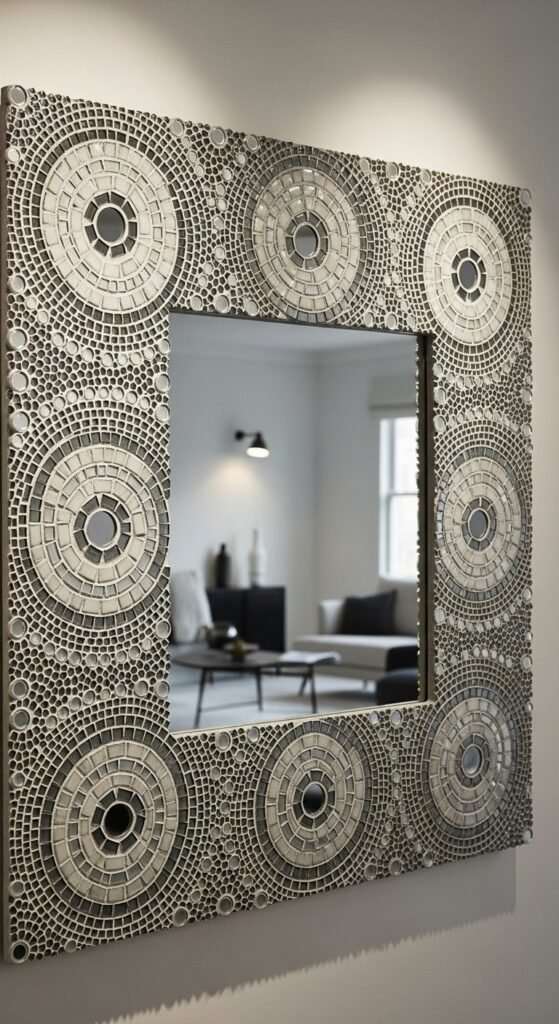
Concentric circle mosaics create a calm, rhythmic look that feels both artistic and structured. Begin by sealing the frame surface thoroughly. Lightly draw pencil circles starting near the mirror edge and expanding outward. These guides help maintain spacing and shape. Choose two to four coordinating colors to avoid visual clutter.
Apply thin-set mortar in small sections. Start along one circle at a time. Place tiles following the curve rather than forcing straight lines. Use smaller tile pieces for tighter curves. Allow adhesive to cure fully before grouting.
Light gray or warm beige grout keeps the pattern readable without overpowering it. Push grout into joints with a rubber float. Clean gently in multiple passes. Seal once cured.
Circular layouts disguise uneven spacing better than straight rows. This makes the style approachable for first-time mosaic projects.
This frame works well in living rooms, offices, or meditation spaces. Pair with simple furniture and soft textures. Keep wall color neutral so the pattern remains the focal point.
22. French-Inspired Repeating Set Frame
Repeating pattern mosaics create a refined, classic look. Choose three coordinating tile colors. Sketch a small repeat unit on paper first. Dry-lay several rows to confirm spacing and rhythm.
Seal the frame. Apply thin-set mortar. Place tiles following your repeat sequence. Tile spacers help maintain alignment. Work slowly to prevent drifting. Allow adhesive to cure overnight.
Use soft gray grout for balance. Push grout thoroughly into joints. Clean gently. Seal after curing.
Repeating layouts reward careful planning. The result feels polished and timeless.
This style suits entryways, dining rooms, and hallways. Pair with traditional or transitional decor. Add a small lamp or artwork nearby for symmetry.
23. Stained Glass Scrap Patchwork
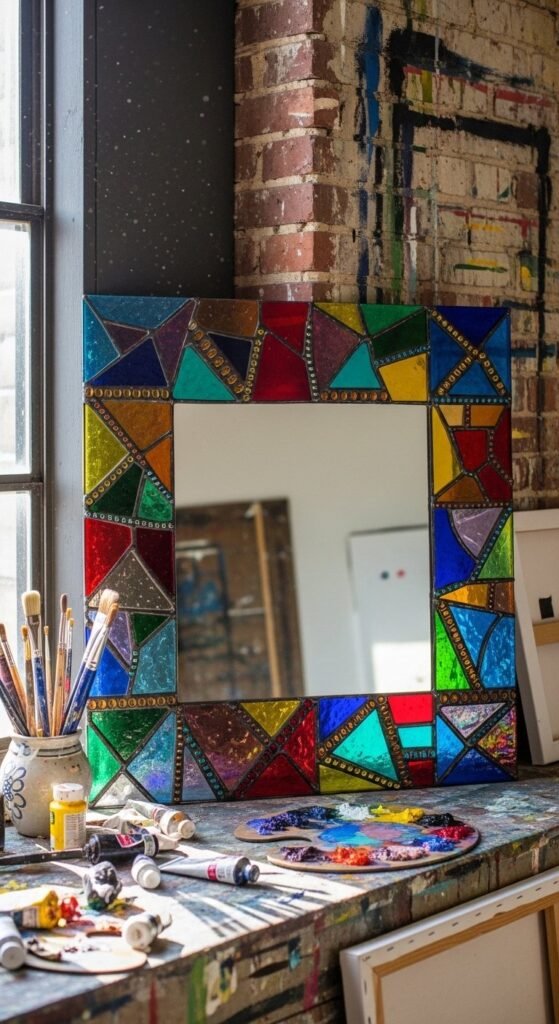
Patchwork mosaics embrace color variety. Gather stained glass scraps in assorted colors. Sort loosely by shade. Seal the frame base. Arrange larger pieces first. Fill gaps with smaller fragments.
Thin-set mortar works well. Press pieces firmly. Leave irregular spacing. Allow to cure.
Choose charcoal or dark brown grout to ground the colors. Push grout deep into joints. Clean gently. Seal after curing.
Scrap-based designs reduce material waste. Every frame becomes one-of-a-kind.
This style fits craft rooms, studios, or eclectic living spaces. Keep surrounding decor simple to let colors shine.
24. Modern Mandala Tile Ring
Modern mandala frames rely on balance and repetition. Seal base first. Attach the mirror securely. Draw radial guidelines. Begin placing tiles near the mirror edge. Work outward in rings.
Mix patterned tiles with solid fillers. Keep spacing consistent. Use Weldbond or thin-set mortar. Allow to cure fully.
White or pale beige grout preserves contrast. Push grout into joints. Wipe gently. Seal after curing.
Radial layouts create visual calm.
This frame works well above dressers or vanities. Pair with neutral textiles and metallic accents.
25. Unicorn Resin and Mirror Mosaic
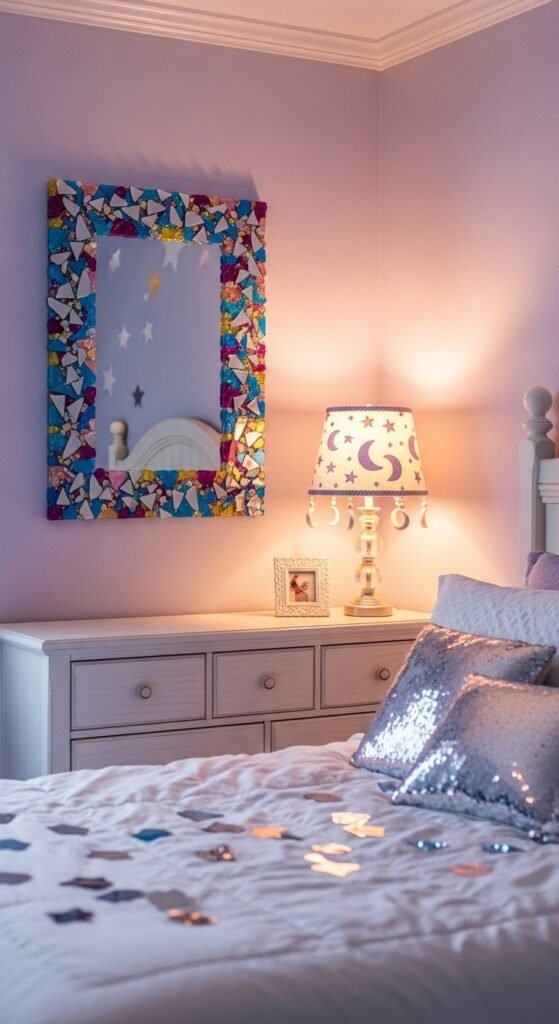
This style blends resin color with reflective glass. Break the mirror safely. Sand edges. Seal frame. Arrange shards face-up. Use strong adhesive.
Once cured, brush tinted resin or Unicorn-style stain lightly over shards. Allow to dry. Grout with light gray. Clean carefully. Seal grout.
Color-tinted reflections add playful energy.
Works well in creative bedrooms, studios, or teen spaces. Pair with soft lighting and pastel decor.
26. Minimal Thin Strip Border
Thin strip mosaics create subtle framing. Cut glass into narrow strips using wheeled nippers. Seal base. Apply thin-set mortar. Place strips evenly.
Allow adhesive to cure. Use silver or light gray grout. Clean gently. Seal after curing.
Slim borders suit minimalist interiors.
Perfect for bathrooms, powder rooms, or contemporary hallways. Keep other decor simple.

Leave a Reply