
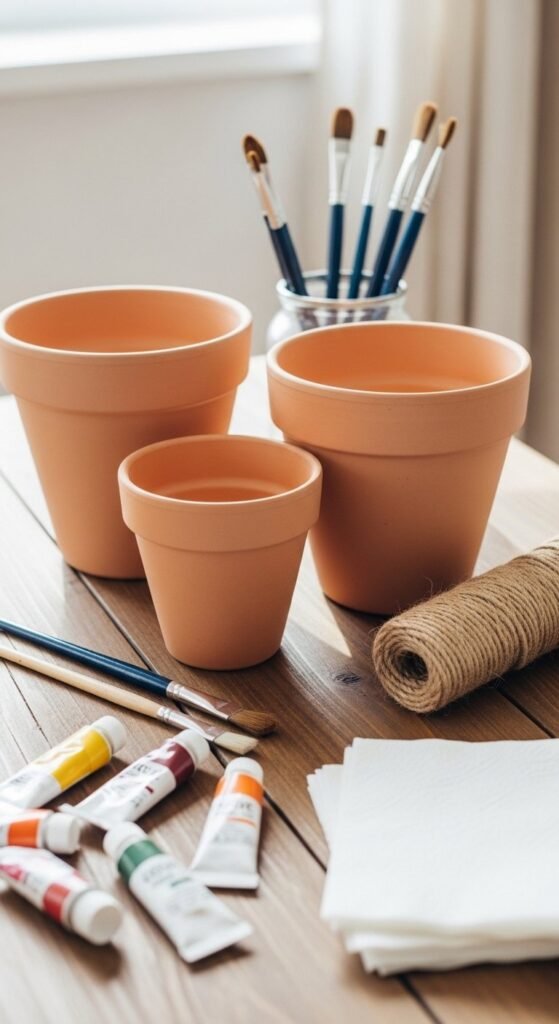
You don’t need artistic talent, fancy tools, or a big budget to turn plain clay pots into beautiful decor. Most clay pot decorating ideas are surprisingly forgiving and that’s exactly why they’re so popular for beginners, kids, and quick weekend projects. With a few everyday supplies, you can transform basic terracotta into something that looks store-bought (or better).
Below are the easiest, no-stress ways to decorate clay pots perfectly even if you’ve never crafted before.
Start With the Right Prep (This Step Matters)
Clay pots are porous, which means paint can soak in unevenly if you skip prep. Luckily, prep is simple and saves you frustration later.
Quick prep checklist:
- Wipe dust off the pot with a dry cloth
- Apply a white acrylic basecoat (inside and out if visible)
- Let dry completely before decorating
Why this helps:
- Colors look brighter
- Paint doesn’t bleed into the clay
- Designs last longer
This one step instantly makes beginner projects look more polished.
Wrap With Rope for an Instant Boho Look
If painting sounds intimidating, rope wrapping is the easiest option with no brushes required.
How to do it:
- Start at the bottom edge of the pot
- Add hot glue in small sections
- Wrap cotton rope tightly as you go upward
- Trim and secure the end with glue
Why beginners love it:
- Mistakes are invisible
- Takes about 10 minutes
- Looks rustic, modern, or farmhouse depending on rope color
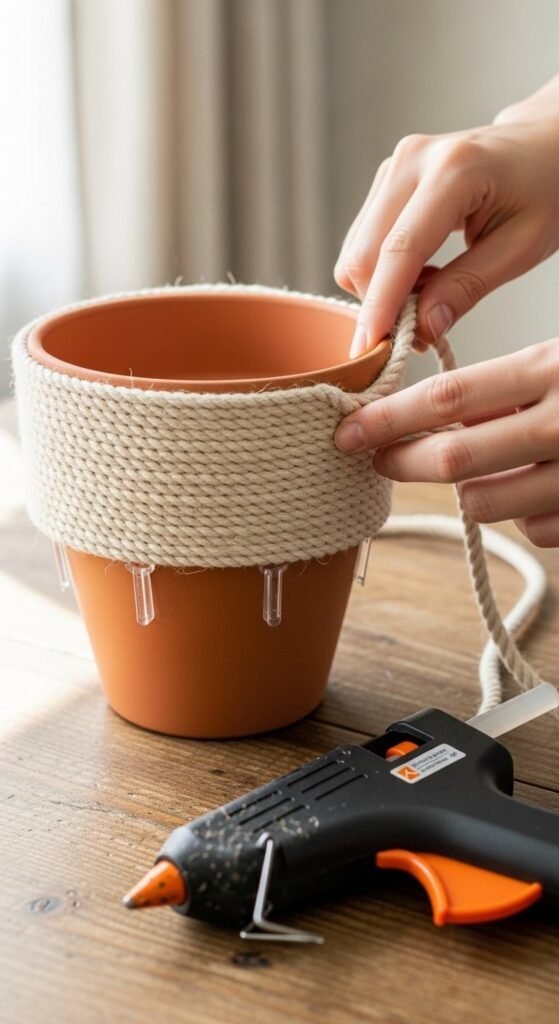
This style works beautifully for shelves, entry tables, or faux plants.
Paint Simple Patterns (No Art Skills Needed)
You don’t need detailed drawings. Simple shapes and repetition are enough.
Beginner-friendly ideas:
- Polka dots using Q-tips
- Horizontal stripes with painter’s tape
- Ombre fading with a sponge
- Random brush strokes for an abstract look
Tips for success:
- Use acrylic paint
- Let each layer dry before adding another
- Don’t overthink symmetry imperfection looks handmade
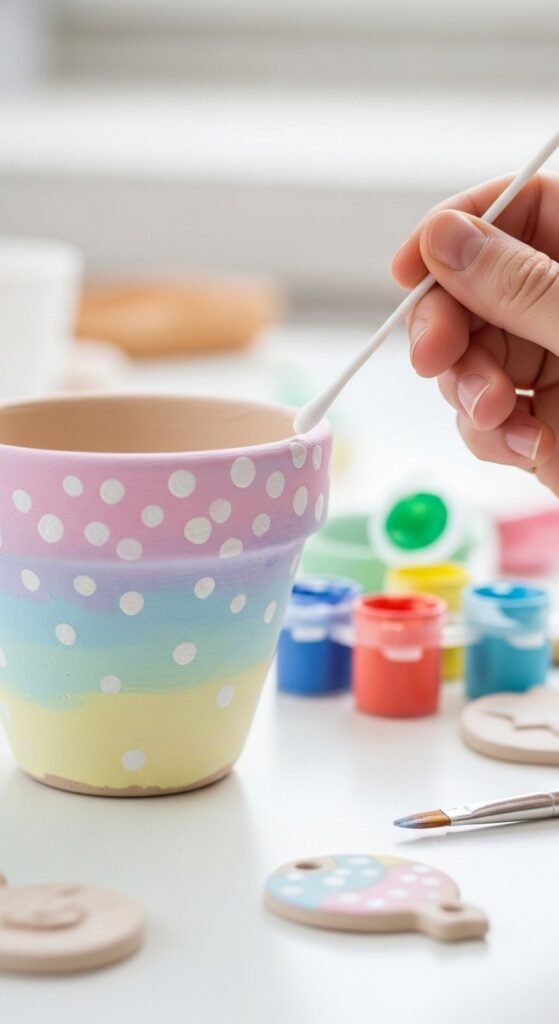
Even basic dots or stripes can look intentional and stylish.
Try Decoupage With Napkins or Fabric
Decoupage sounds fancy, but it’s one of the most forgiving techniques for beginners.
What you’ll need:
- Decorative napkins or fabric scraps
- Mod Podge (or similar glue-sealer)
- Soft brush
Steps:
- Separate napkin layers use only the printed top layer
- Tear (don’t cut) pieces for softer edges
- Brush glue onto the pot
- Press paper gently and seal over the top
Why tearing works better: it hides seams and wrinkles.
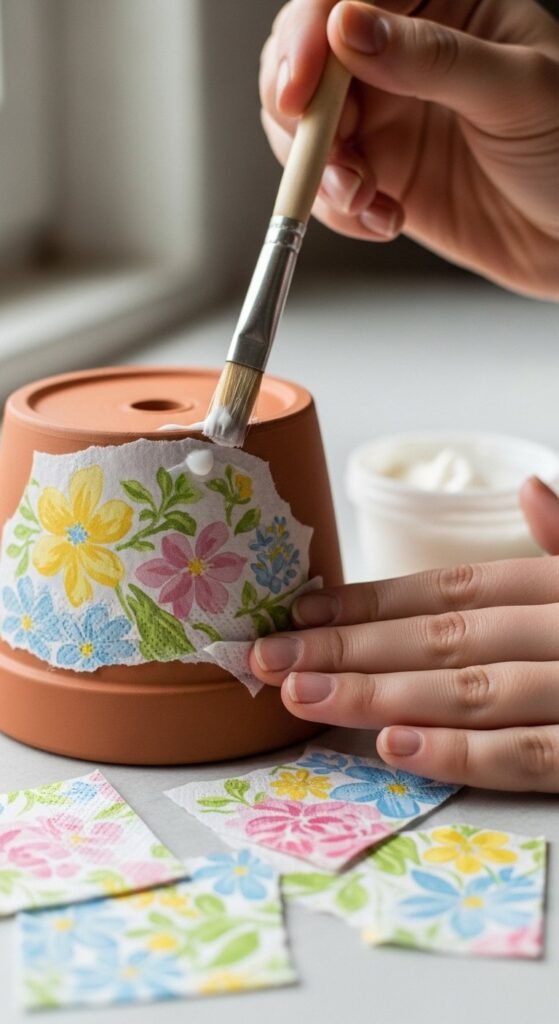
This is perfect for florals, vintage styles, or gift pots.
Use Paint Markers for Stress-Free Designs
Paint markers are a game changer if brushes make you nervous.
Great marker ideas:
- Simple mandalas
- Leaves or vines
- Faces or cute characters
- Words or short messages
Benefits:
- No paint mixing
- More control than brushes
- Easy to fix mistakes once dry
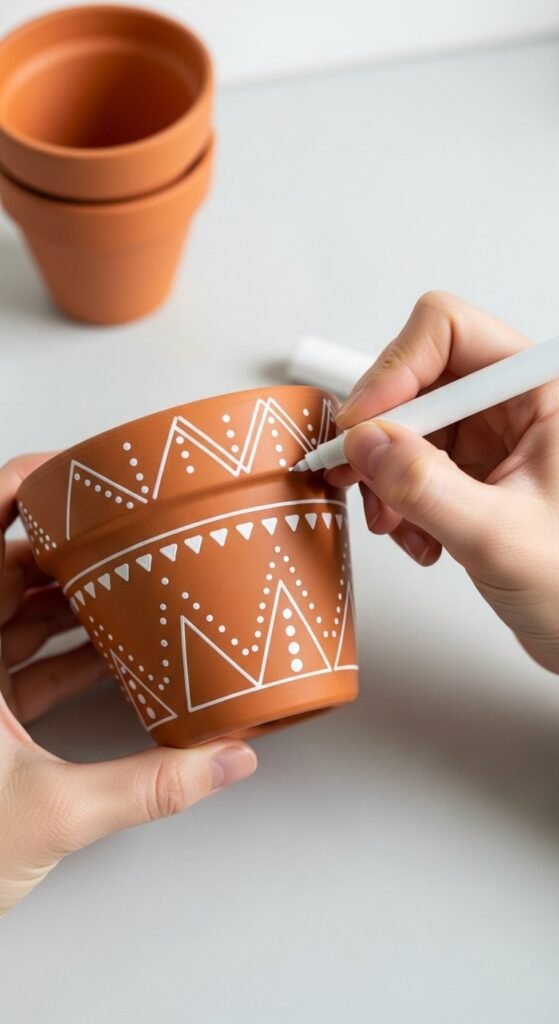
Markers are especially great for personalized gifts.
Seal Your Pot So It Lasts
This step is often skipped but it’s what keeps your work from chipping or fading.
Seal your pot if:
- It will be outdoors
- You used decoupage
- You want a professional finish
Options:
- Matte sealer for a natural look
- Gloss sealer for bold colors
- Spray or brush-on both work
Let everything cure fully before adding plants.
Style and Use Your Finished Pots
Decorated clay pots aren’t just for plants.
Try using them for:
- Faux flowers on shelves
- Desk organizers
- Kitchen herb decor
- Party or holiday centerpieces
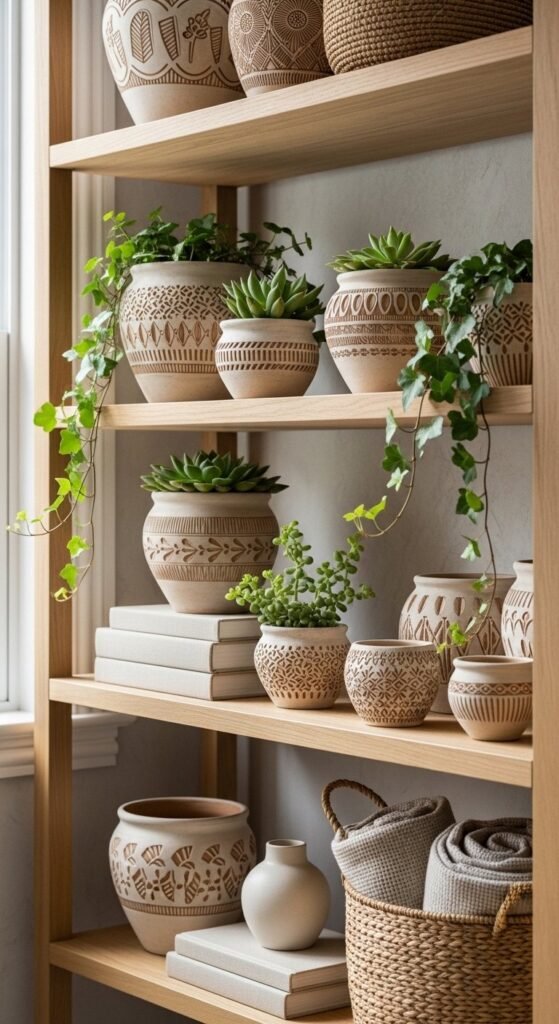
They also make thoughtful, low-cost handmade gifts.
Final Takeaway
Decorating clay pots isn’t about being crafty, it’s about choosing techniques that work with you, not against you. Rope wrapping, simple paint patterns, decoupage, and markers all deliver big results with minimal effort.
Start small. Try one pot. You’ll probably want to make more.
Save this guide for later and turn your next plain clay pot into something beautiful.

Leave a Reply