
If you want your home to stand out during the holidays, wrapping outdoor poles is one of the fastest and most eye-catching ways to upgrade your curb appeal. Whether you have porch columns, entryway posts, railing poles, or even mailbox stands, a beautifully wrapped pole instantly turns your home into a glowing Christmas scene. And the best part? You only need a few inexpensive materials to make it look magical.

Let’s break down the easiest, most stylish ways to wrap outdoor poles like a pro—and make your home holiday-ready in minutes.
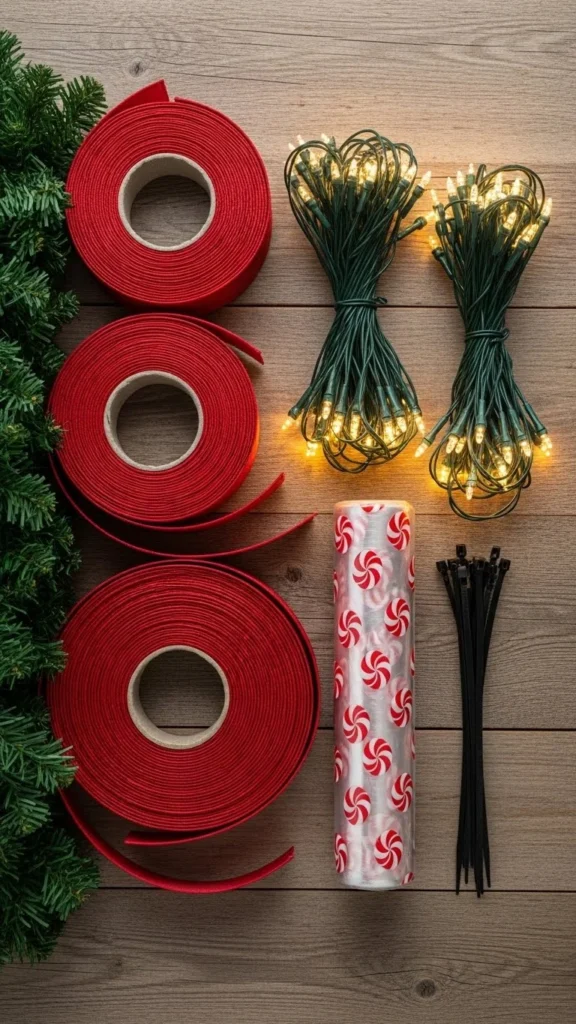
Start With the Right Materials
Before you start wrapping, gather your supplies. The right materials make the process smoother and help the final design stay secure through rain, wind, and winter temperatures.
Popular materials to use:
- Wide wired ribbon (red, white, gold, or plaid)
- Weatherproof garland
- Outdoor-safe string lights
- Mesh deco ribbon
- Plastic candy-cane wrap
- Zip ties or twist ties
- Outdoor tape or adhesive hooks
If your pole is textured (brick, stone, or rough wood), ribbons grip more easily. For smooth metal or PVC poles, have extra zip ties ready.
Choose a Wrapping Style
Think of pole wrapping like decorating a Christmas tree—your style sets the entire mood. Here are the most popular looks you can recreate easily.
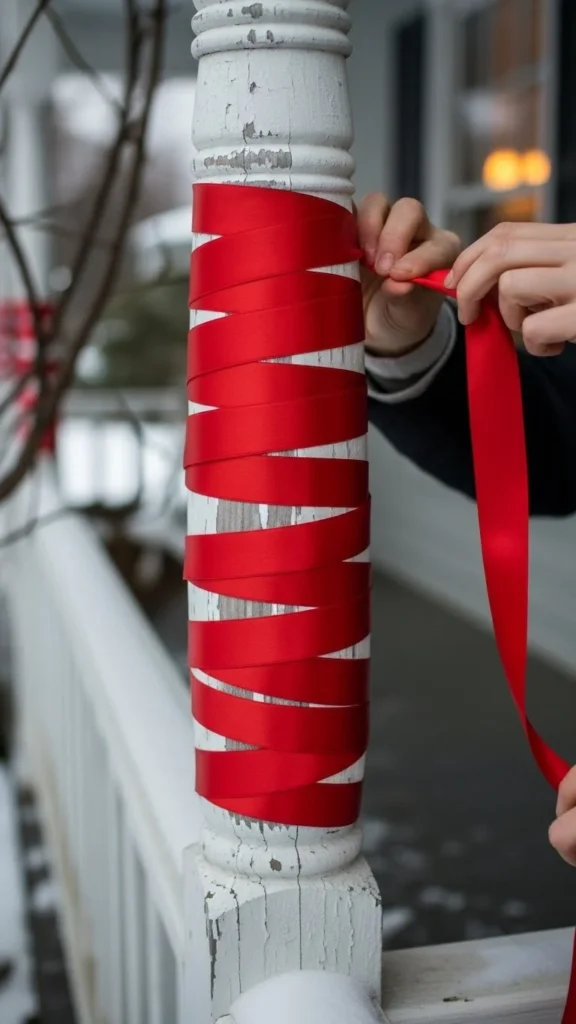
1. Classic Candy Cane Spiral
This look is clean, bold, and perfect if you want a traditional holiday vibe.
Use red-and-white ribbon or candy-cane plastic wrap and spiral it from bottom to top. Keep the spacing even for a professional look.
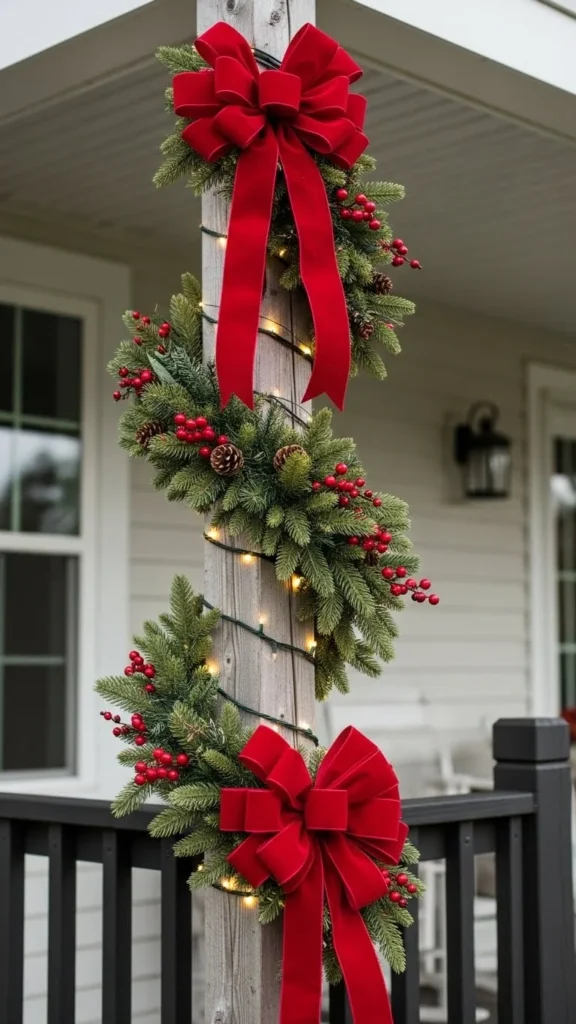
2. Garland + Lights Combo
This style gives instant Christmas charm and looks beautiful from the street.
Wrap garland first, then follow the same spiral path with lights. The greenery softens the look while the lights add nighttime glow.
3. Big Ribbon Statement Wrap
Use extra-wide ribbon (2.5–4 inches) and wrap it loosely for a luxurious “gifting” feel.
Choose velvet, plaid, metallic gold, or burlap depending on your home’s style.
4. Mesh Deco Wrap for Volume
Mesh ribbon makes poles look fuller, fluffier, and extremely festive.
You can create small poufs every 12–18 inches for added texture.
Each style works beautifully on its own, or you can mix and match for a layered, custom look.
How to Wrap the Pole Step-by-Step
Once you’ve chosen your design, it’s time to wrap. Here’s a simple, foolproof method that works for any pole size.
Step 1: Start at the Base
Secure your first piece of ribbon, garland, or lights at the bottom of the pole.
Use:
- A zip tie for garland
- Tape or adhesive hooks for ribbon
- A twist tie for lights
Make sure the base is tight—it supports the entire wrap.
Step 2: Spiral Your Way Up
Slowly wrap the material in a spiral motion, keeping the spacing consistent.
For a candy-cane wrap, spacing matters the most. For garland, allow it to look slightly fuller and more natural.
Tip: Step back every few turns to check how it looks from a distance.
Step 3: Secure the Top
Once you reach the top, tuck the end behind a hook or secure it with a zip tie.
If placing a bow or ornament topper, attach it now.
Step 4: Add Layers (Optional)
You can layer on:
- Fairy lights
- A second contrasting ribbon
- Small ornaments
- Mini bows or bells
Layers add personality and make the pole more visually striking both day and night.
Add Festive Accents for Extra Impact
The pole wrap is the foundation, but accents bring the whole look together.
Here are some ideas to enhance the design:
- Add a large bow at the top or bottom
- Tie small bows along the pole
- Hang mini ornaments from the garland
- Place lanterns or planters at the base
- Add faux snow spray for a frosty finish
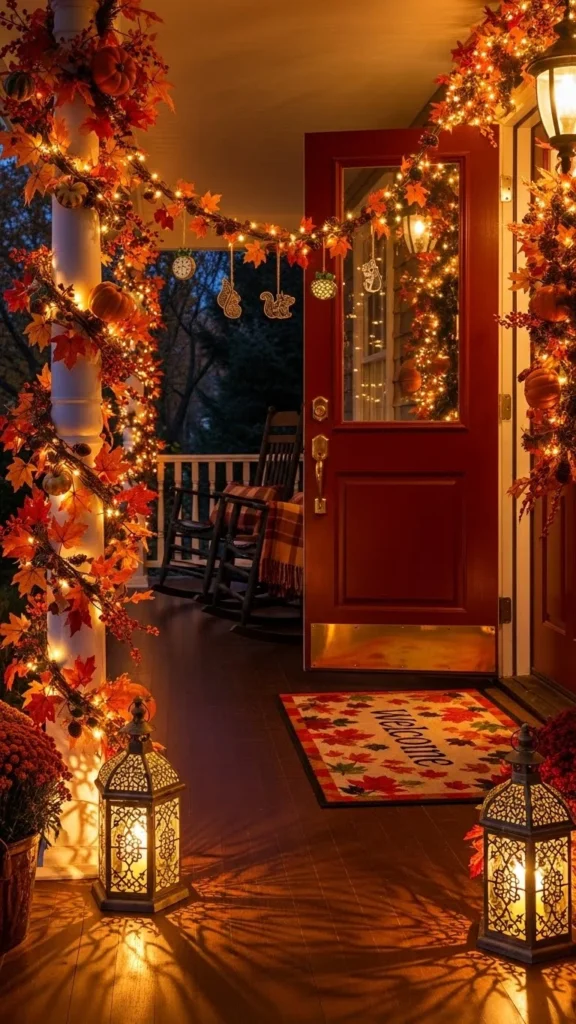
You can even coordinate your pole décor with:
- A matching wreath
- Stair garlands
- Front door bows
- Window swags
- Pathway lights
Matching elements make your whole house cohesive and Pinterest-pretty.
Ensure Everything Is Weather-Safe
Since your decorations will be outdoors, weatherproofing is essential.
Here’s how to make sure your poles survive winter weather:
- Use only outdoor-rated lights
- Opt for waterproof ribbons and mesh
- Avoid hot-glue outdoors—it won’t hold
- Stick with zip ties instead of tape in windy areas
- Use UV-safe materials to prevent fading
- Secure everything tightly to prevent slippage
If you want extra durability, lightly mist fabric ribbon with waterproof spray.
Creative Variations to Try
Want your décor to stand out even more? Try these fun twists:
1. North Pole Theme
Use red ribbon, white lights, and a “North Pole” topper.
2. Snowy Winter Theme
Wrap poles in white mesh, silver garland, and cool-tone LED lights.
3. Rustic Farmhouse Theme
Use burlap ribbon, pinecone garland, and warm amber lights.
4. Bold Glam Theme
Choose gold mesh, metallic ornaments, and bright warm-white LEDs.
5. Minimal Scandinavian Theme
Keep it clean with natural rope, subtle greenery, and soft fairy lights.
Each variation creates a different holiday personality for your home.
Final Thoughts: Make Your Curb Appeal Shine
Wrapping your outdoor Christmas poles is one of the simplest ways to instantly transform your home’s exterior into a warm, welcoming holiday scene. With just a few materials and a little creativity, you can make your porch, walkway, or entryway glow with festive charm.

Leave a Reply